Is the filament stuck in the extruder again? Check out our simple guide to stop filament jams from ruining your day and your 3D printer.
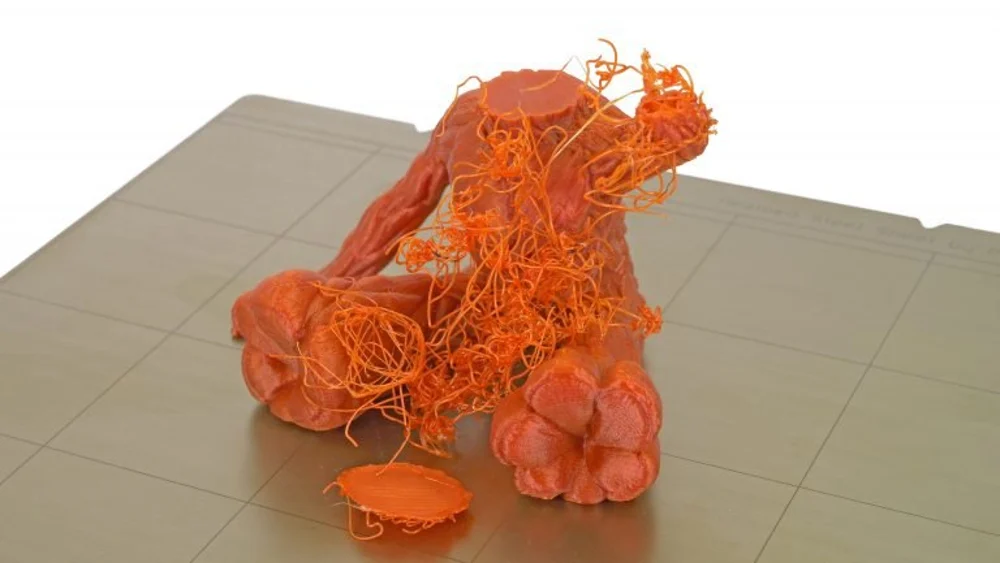
We’ve all had the unpleasant experience of waiting for a print to finish only to return to missing layers, a bundle of spaghetti, blobs, or uneven filament deposition. These issues can arise from several sources, but here, we’ll focus on filament jams.
Filament jams happen when the extruder can’t push filament through the hot end. The extruder either grinds the filament until it’s so thin that the gear that advances the filament is no longer in contact with it, or the motor that drives the extruder stalls because it’s overloaded.
No matter what kind of extrusion system you use – direct drive or Bowden – you’ll eventually encounter this problem.
Three Problems and Their Solutions
In this article, we’ll look at three common problems that lead to filament jams. The first occurs when stuff that isn’t filament gets into the hot end and clogs the nozzle. The second happens when the hot end is pushed against the bed and filament can’t be pushed out of the nozzle. The third is a loss of temperature control in the hot end, resulting in filament that’s too cold to pass through the nozzle.
For each problem, we’ll offer some short- and long-term solutions.
What Not to Do
The methods described for solving extrusion problems are simple and are intended to be useful for a majority of situations. We do not recommend any action not approved by the makers of your printer or hot end. Looking online, it’s easy to find drastic methods for cleaning out hot ends. These are last-ditch efforts that can end badly. If in doubt, contact the manufacturer.
Ready to print jam-free? Let’s go!
Problem #1: Clogged Nozzle
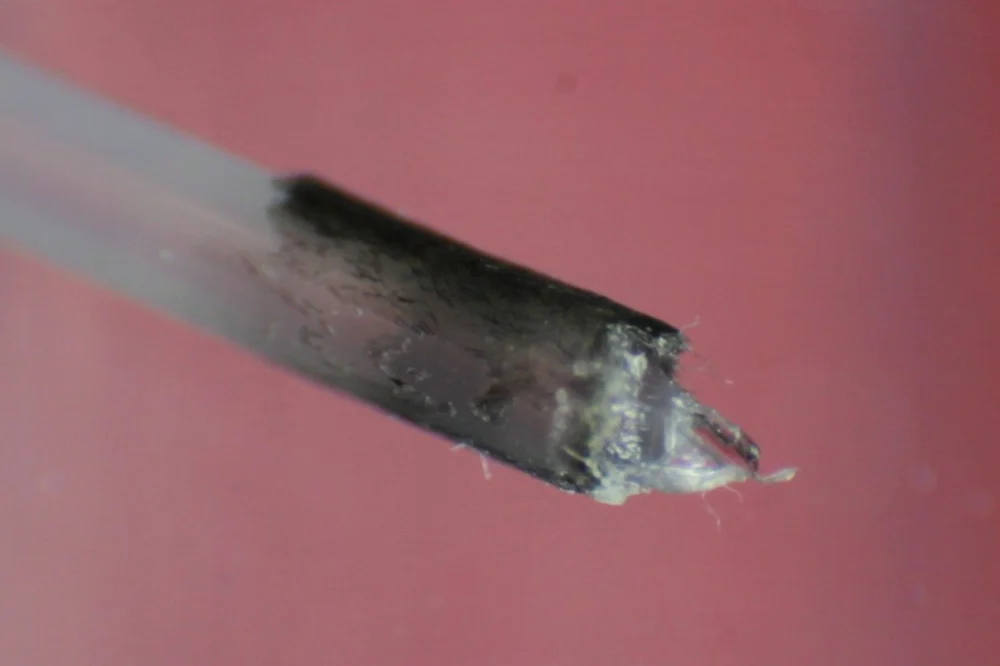
Cause: This can happen at any time if dirt or grit gets into the hot end and plugs the hole in the nozzle. The offending substance can come from two sources, the filament itself or from dust or dirt that adheres to the filament.
Reason: Some cheap filament is made under circumstances that allow dirt to fall into the vats where the plastic is made. This dirt winds up in the feedstock from which the filament is made. Dirt can also get into the filament during the extrusion process that melts the feedstock and pushes it through a nozzle to make the 1.75-mm or 2.85-mm filament. If the plastic was recycled, bits of contamination could have entered the feedstock.
Even if the filament is squeaky clean, as soon as you open the packaging, you expose the plastic to the dust and dirt from the environment around your printer.
SHORT-TERM SOLUTIONS
The first thing you have to do is get that pesky material out of your hot end. One way is to use a piece of wire that’s smaller than the diameter of your hot end nozzle. Disengage your extruder so that you can push the plastic into the hot end by hand. This is quite simple for Bowden systems – just remove the Bowden tube from the hot end. (You may have to heat up the hot end first.) Next, make sure that the hot end is at the extrusion temperature of your plastic and then push down on the plastic while pushing the wire into the nozzle. This will often dislodge the blockage.
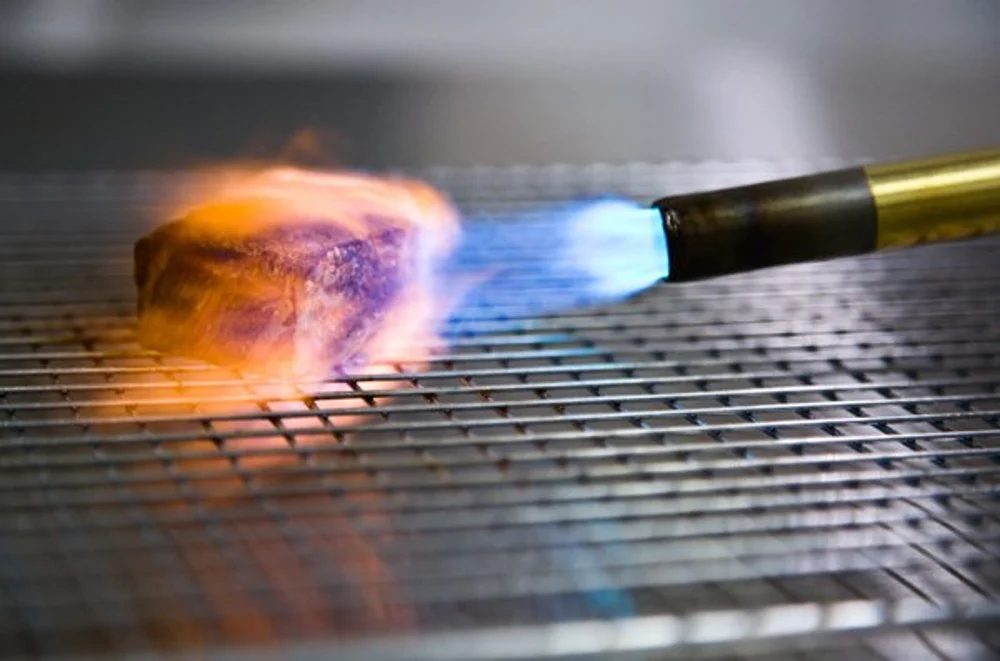
If the blockage is small, it’ll then pass through the nozzle. If this doesn’t work, heat up the hot end, let it sit at temperature for a minute – this is around 90 °C for PLA – and then turn it off. As the hot end cools, the plastic will begin to harden. At some temperature, it will be difficult to pull the filament out of the hot end, but it will come out completely. If done correctly, the plastic will come out in the shape of the inside of the hot end and you can often find the foreign substance embedded in the plastic.
LONG-TERM SOLUTIONS
Change your filament supplier to someone that has better quality control. Most name-brand suppliers are excellent sources of high quality, clean plastic. To solve the local dust problem, wrap a clean, lint-free cloth around the filament just before it enters your extruder. This will remove any dust that sticks to the filament (but make sure the cloth is lint-free or else you will just add to the problem). There are several filament cleaners available for free from local print repositories.
Problem #2: Plastic Isn’t Flowing
Cause: Either liquid plastic has hardened in the cold side of the hot end or the nozzle is too close to the bed.
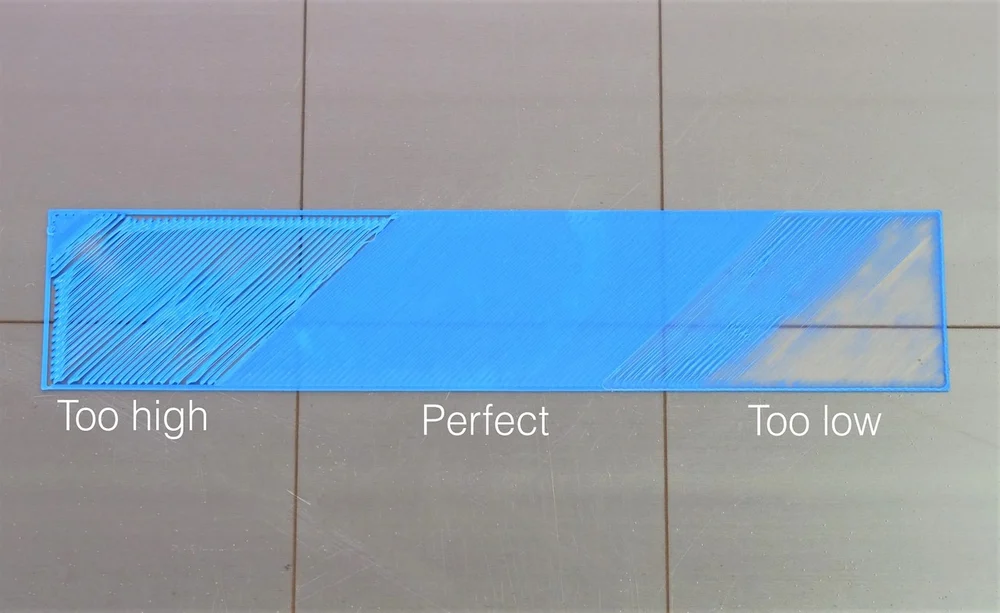
Reason: If the hot end has been sitting at a high temperature for a long period of time, the plastic can become very fluid. When a new print is started, the material will be pushed into the cold side of the hot end, solidify, and cause a clog. If the hot end is too close to the bed, so that the tip of the nozzle rubs against the surface of the bed, this will also prevent extrusion of plastic. In both cases, the filament next to the idler wheel will be ground down by the gear that pushes the filament into the hot end. Thus, the filament will no longer be pushed into the hot end.
SHORT-TERM SOLUTIONS
The same trick for removing debris from the nozzle will also work to clear a hot end that’s plugged with solidified plastic. Again, use the wire if you need to help get plastic flowing. If your nozzle is too close to the bed, you may need to relevel it or adjust the nozzle’s Z offset.
LONG-TERM SOLUTIONS
At the end of each print, while the hot end is still hot, push 20-30 mm of filament into the hot end to clear out the fluid plastic and then retract the filament until it’s completely out of the hot end. This will prevent the filament from melting any further and causing a clog. The initial push is important; if you forget it, you’re leaving fluid plastic behind, which will make the problem reappear. Careful leveling of the bed using a multi-point leveling procedure will usually help with problems of the hot end hitting the bed.
Problem #3: Missing or Rough Layers
Cause: Poor temperature control of the hot end.
Reason: There are two major reasons why the temperature of the hot end can vary: physical (airflow) and electrical (thermistor failure, weak or broken thermistor wiring, or broken or burned wiring). These can be annoying problems because they can be intermittent.
SHORT-TERM SOLUTIONS
Sometimes you can use an extra thermistor stuffed into a crevice of the heater block of your hot end. Unplug the old thermistor, plug in the new one, and see if the situation improves by monitoring the temperature of the hot end with your printing software. If this fixes the problem, replace the old thermistor. If not, you’ve narrowed the problem down to hot end wiring.
LONG-TERM SOLUTIONS
If you’re lucky, the thermistor or wiring will fail either open (the thermocouple is not connected) or closed (a short circuit). A voltmeter set on a low resistance scale (1,000 ohms or so) will show either infinite resistance (open) or zero resistance (short). In either case, replace the thermistor and its associated wiring.
If the problem is intermittent, you can sometimes get an idea of what’s happening by watching the power LED on the circuit that supplies the power to the hot end. When the hot end is working correctly, this LED will turn on and off at a predictable rate. If it goes on or off intermittently for a long period, you should look carefully at the wiring. If you jiggle it and the hot end suddenly goes on or off, you have a wiring problem and should replace the affected wires.