Metal additive manufacturing is exciting for the new things it makes possible. It’s already helped create lighter parts for more fuel-efficient aircrafts and improved the lives of patients with custom medical implants. The market is growing too, with analysts predicting that metal additive will produce $228 billion worth of components in the next decade.
The promise of metal additive is clear but not necessarily easy to realize, in part because designing for metal additive has a steep learning curve. The manufacturing industry hasn’t accumulated decades of functional knowledge like we have for subtractive legacy processes. Plus, designing for metal additive has a different set of rules than designing for polymer-based additive.
Getting familiar with metal additive design takes time and effort. Our team of application engineers at FacFox has extensive first-hand knowledge on the subject. We compiled our top four design rules for metal additive to help get you started.
1. Understand the material set
Metal additive processes fall into two categories based on the densification process they use: melting / solidifying with fusion or solid-state densification. Fusion-based processes resemble traditional welding in the way they bond materials, while solid-state processes resemble traditional sintering. The materials used for each additive process are similar to those used in their traditional analogs, and they’re generally good for the same types of applications. There’s a lot of overlap; both methods use the same family of stainless steels, for example. It’s important to note, however, that materials will behave differently depending on the technology you use.

When choosing the right method for your project, you need to evaluate not only the types of materials available, but also how the printing process with affect the properties of your final part. The good news is that in some cases you might be able to leverage additive design—perhaps by consolidating elements or creating complex geometries—to make your part with a material that wouldn’t meet your requirements in traditional processes.
2. Plan and design for post-processing
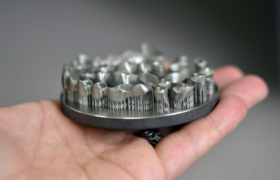
Metal additive can be tricky. Even if it looks like your part will print perfectly, it could end up failing if you neglect to design for post processing, so you need to take special precautions. Many metal additive processes involve powder, so you need to design for powder removal or risk failure when powder agglomerates during heat treatment. In some cases, especially when creating hollow parts, you might have to facilitate powder drainage by adding holes to your design.
With powder bed metal additive technology, your part forms a strong bond to the build plate and must be removed, which can pose design challenges. For example, wire EDM can be a good option for separating part from plate, but you might need to design a fixture to keep the part from get damaged when it’s detached. Parts made with metal additive usually require adjustment to meet final requirements after they come off the printer, so make sure your design takes post processing into account.
3. Try to make your design self-supporting
Generally speaking, you should always aim to minimize overhangs and reliance on support structures when designing for additive. This recommendation is even more crucial for metal. Because of the way metal additive processes fuse layers on top of one another, overhangs may come out misshapen or poorly finished if the angle to the build plate is too small. Support structures aren’t always an ideal solution to overhang issues because they waste material and their removal can compromise the stability and finish of your part.
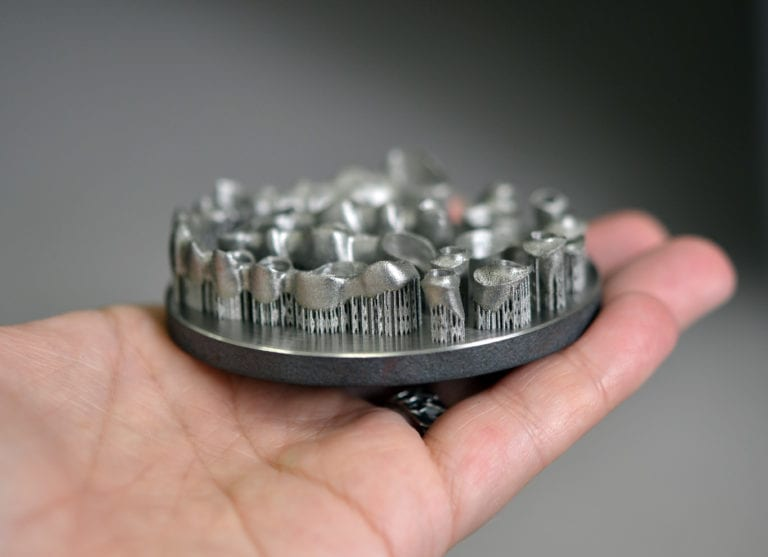
There isn’t a general rule of thumb to determine when an overhang requires support. Each metal additive technology is different and can support overhangs at different angles. The overhangs supported by each method should be a key determining factor in choosing a process for your design.
4. Prepare your skillset for metal additive
Metal additive is still in the relatively early stages of adoption, but the market is maturing rapidly. Building expertise now will future-proof your business and give you a competitive advantage as the technology becomes more accessible.
But expertise doesn’t come easy. As we’ve outlined here, designing for metal additive takes a different skill set than designing for traditional manufacturing or even polymer-based additive. An experienced manufacturing partner like FacFox can help you choose the right technology for your application, get your metal additive designs ready for production, and manufacture parts accurately. Once you’ve been through the process, you’ll start to see how metal additive can improve existing products and create totally new ones.