The Anycubic Photon is our summer 2019 pick for the “Best Budget Resin 3D Printer”. Check out our review to find out why it’s a great choice if you want to spend $500 or less.
As far as low-cost desktop DLP 3D printers go, the Anycubic Photon DLP 3D Printer has emerged as one of the most appealing options on the market. Anycubic has a reputation for building reliable and affordable printers like the Anycubic i3 Mega FDM 3D printer. When it comes to the price, the Anycubic Photon is no exception – it’s one of the cheapest DLP 3D printers out there.
The Anycubic Photon DLP is generating some serious buzz across the community, and for good reason. Priced about $500, this machine is a potential game-changer for the SLA/DLP desktop 3D printing sector. But talk is cheap; we wanted to see this 3D printer in action.
So let’s take a dive into this resin-based 3D printer (not literally, that would be a health hazard) and find out how whether the Anycubic Photon DLP 3D printer is worth the hype or not.
Don’t miss: The Best Resin 3D Printers of 2022
Pros
- Extremely affordable compared to other SLA/DLP 3D printers
- Easy to use and setup
- Produces high quality prints at impressive resolution of 25-100 microns
- Compact and efficient size
- Adequate instructions for assembly, cleaning, etc.
- Custom slicer with good support structure generation
Cons
- Small build volume
- Resin 3D printing can get a bit messy
- Post-processing requires patience and space
- Properly cleaning printer is time-consuming
- Safety gear is necessary (but also provided)
- User must be cautious with hazardous material
The Verdict
All in all, we were pleasantly surprised with how the Anycubic Photon worked, both in terms of print quality and ease of use. In a market where most options are priced well above $1,000, we found that this machine makes for an ideal introduction to SLA/DLP 3D printing for both beginners and well-seasoned makers.
It’s no shocking revelation that resin 3D printing provides better print quality and resolution than FDM, but the Anycubic Photon proves that it can be done on a printer in the same low price range. Although there’s a slight learning curve for those who have never used a SLA/DLP 3D printer, this obstacle is overcome quickly thanks to the clear documentation, an active online community, and other online resources.
Most of the Anycubic Photon’s downsides are universal in the world of resin printing, factors such as post-processing, material handling, safety, etc. The printer does have a particularly small build volume, but it provides enough space for you to accomplish most projects. However, it’s important not to overlook the sticky resin and post-processing chemicals that you’ll have to bring into the workshop.
Aside from that, at under $500, it’s hard to find reasons to discount the quality of the Anycubic Photon. Not only is this 3D printer incredibly affordable, it also produces surprisingly high-resolution prints.
For professionals, such as dentists or jewelry designers, it’s probably worth investing in a more complete ecosystem that something like the Formlabs Form 2 provides. However, for beginners or makers that want to get better acquainted with resin 3D printing while maintaining good quality and ease of use, you won’t find a better budget option than the Anycubic Photon.
Features
First and foremost, the Anycubic Photon is a desktop DLP 3D printer. This technology significantly differs from the more commonly used FDM 3D printing. Instead of melting plastic filament within a heated nozzle, DLP and SLA printers use liquid resins that are cured by either UV light or high-powered laser, respectively.
Whereas an SLA 3D printer, such as the popular Formlabs Form 2, uses a laser to harden the liquid resin, DLP printers use a technology called Digital Light Processing. This process projects the whole image of a layer (like a beamer would), effectively curing the resin layer by layer. Once one layer of resin is solidified, the build plate moves up and the projector then displays the next slice of the 3D model.
One of the primary benefits of DLP 3D printing is that it can produce highly detailed objects. The screen resolution is one of the most important aspects of any DLP 3D printer. The Anycubic Photon offers a 2K resolution, which is relatively good for the low price point.
The build volume for the Anycubic Photon DLP 3D printer is 115 x 65 x 155 mm, which is quite small compared to other machines. If you need to print bigger objects, you might be better off with an FDM 3D printer or a larger SLA 3D printer. However, if you want to experiment with DLP technology without burning a whole in your pocket, you’ll definitely be intrigued by what the AnyCubic Photon has to offer.
Please be advised that resin-based 3D printing may not be ideal for beginners. Post-processing involves washing the pieces with ethanol, curing them, cleaning the build plate – it’s a messy process. Also, the smell of the resin is not pleasant. Even though the Anycubic Photon has a carbon filter with a fan inside, the odor of the resin can still be overwhelming.
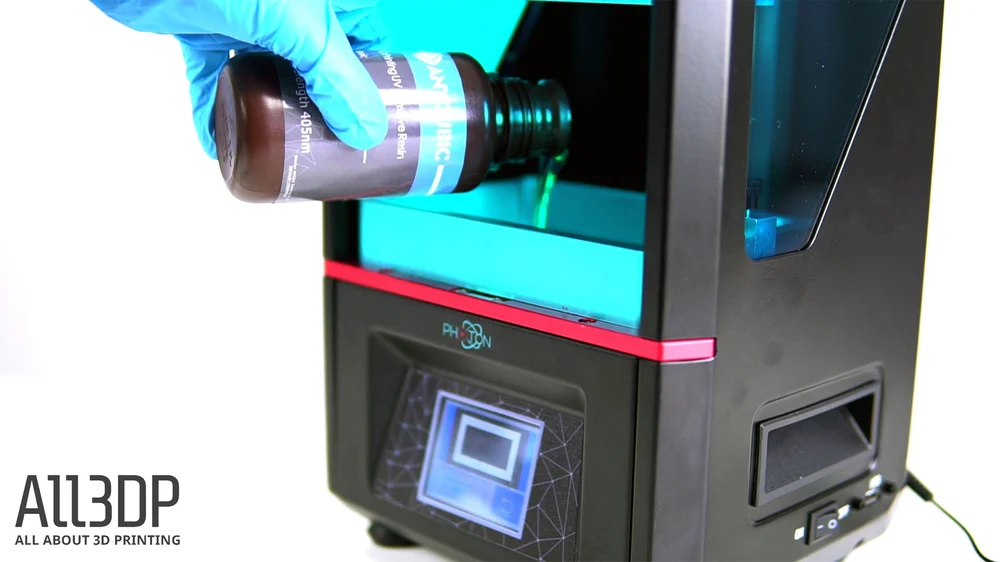
The 3D printer manufacturer strongly advises that the user wears the gloves and the protective mask provided with the 3D printer when pouring the resin (and so do we, as the smell is potent and potentially hazardous). You should also be sure to keep and use the Anycubic Photon in a relatively large room with open windows.
Review the Specs
Aside from the small build volume, the specs of the Anycubic Photon DLP 3D printer look very similar to most DLP 3D printers.
- Technology: DLP (Digital Light Processing)
- Build Volume: 115 x 65 x 155mm
- Layer Resolution: 25-100 microns
- Connectivity: USB, SD Card
- Touchscreen: 2.8-inch color screen
- Input rating: 110V/220V AC
- Working Voltage: 12V DC
- Printer Dimensions: 220 x 220 x 400 mm
So let’s break down the special features of the printer.
Unboxing
The Anycubic Photon DLP 3D printer comes preassembled. When you crack open the box you’ll find:
- The Anycubic Photon 3D printer
- Power brick and cable
- Manual (also available in English, German, French and Japanese)
- Resin tank
- Various tools
- Gloves and safety mask
- A bottle of resin
- Filters for the resin. These have a net-like structure for parts unintentionally left in the resin tank.
- USB-Stick (8GB)
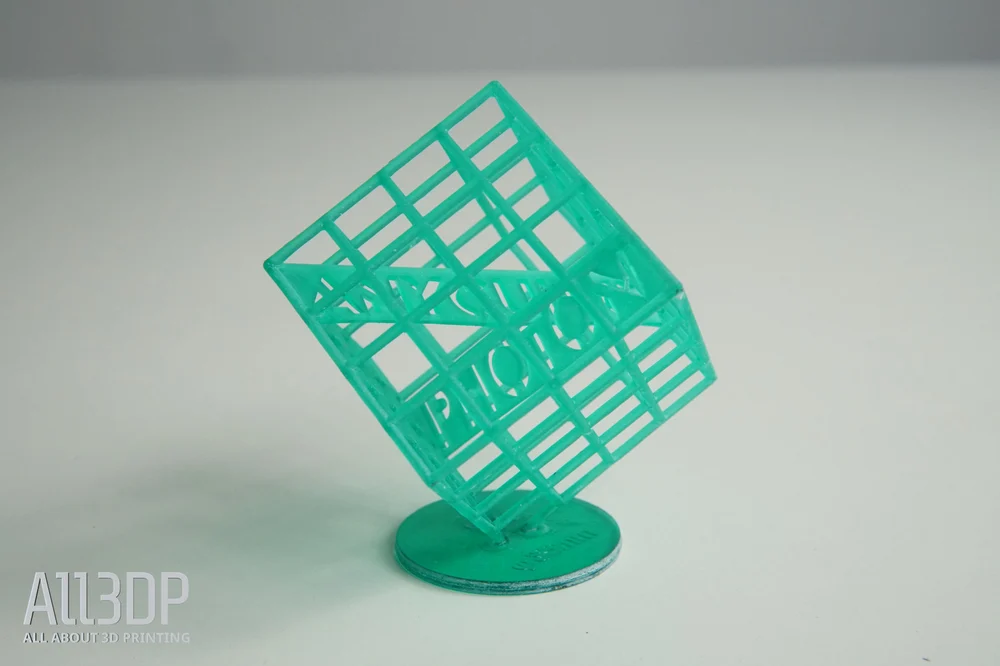
The 8GB USB stick comes with some pre-sliced models. The Lattice cube in a 50-micron resolution should take around 4 hours to 3D print.
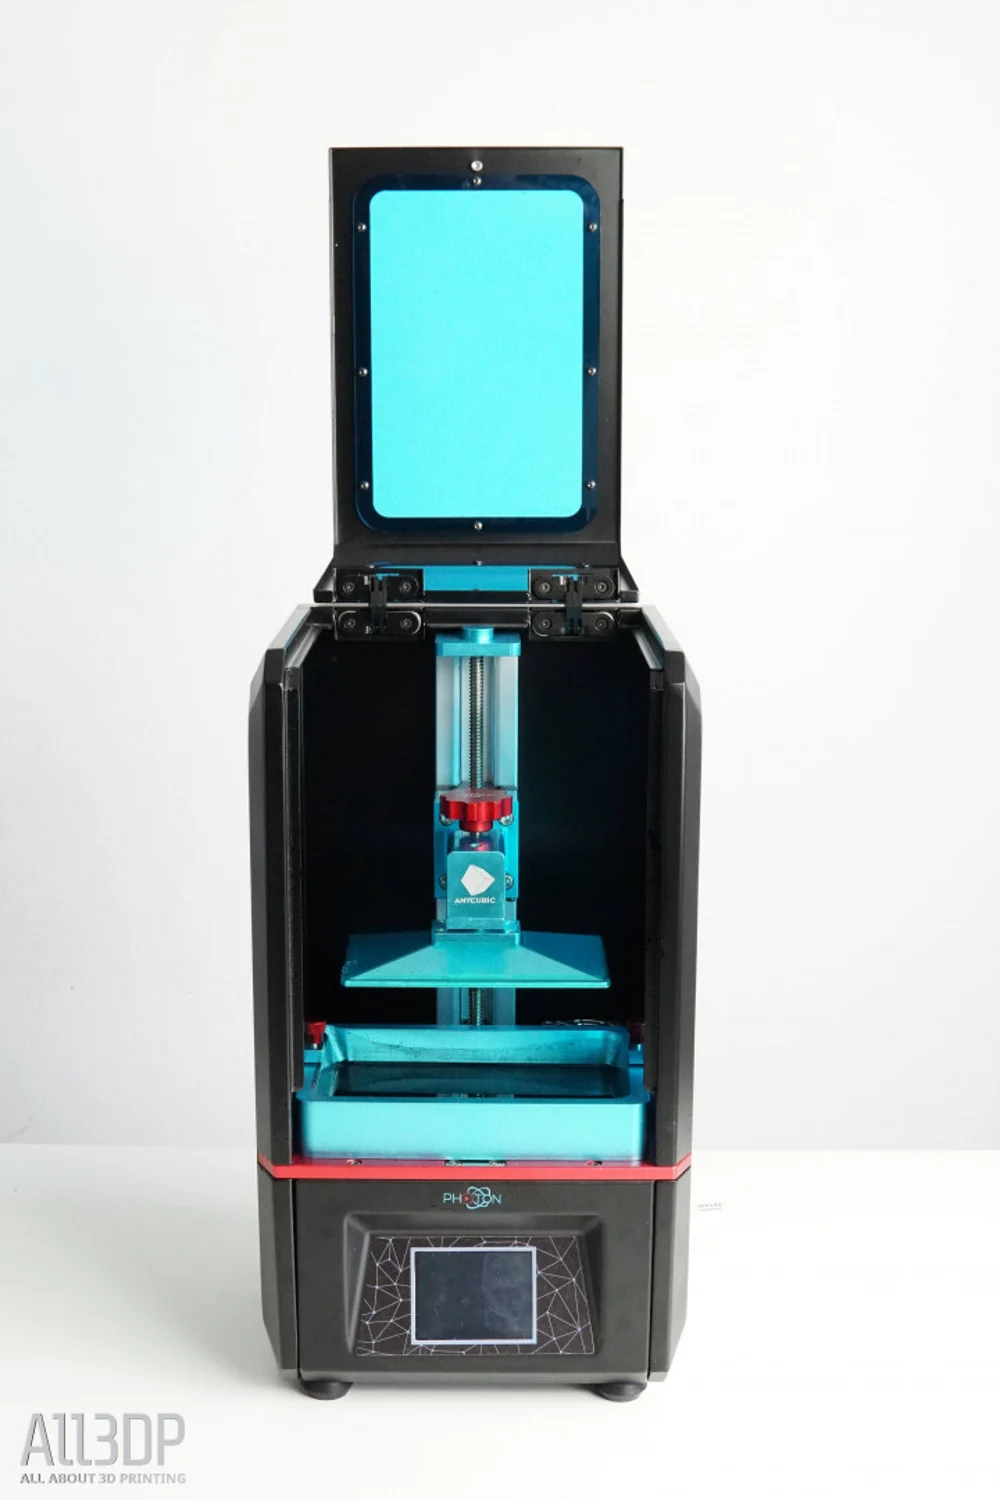
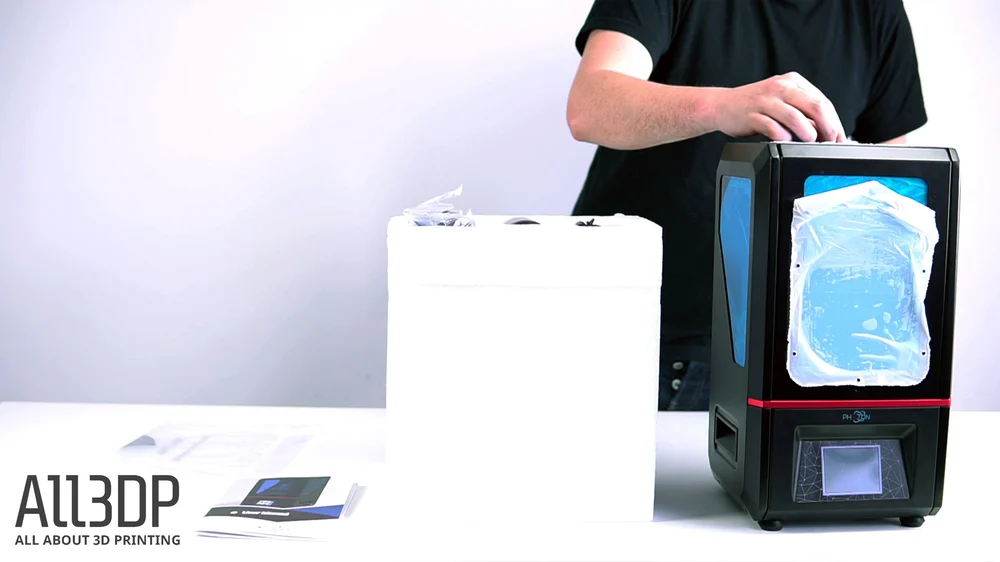
Upon unboxing the Anycubic Photon, we were pleasantly surprised to find that the entire machine was essentially assembled already. The windows of the 3D printer are protected by plastic sheeting, while styrofoam is inserted inside of the print chamber keeps all of the parts from wriggling around. Once you remove all of the protective packaging, you’re left with tiny 3D printer with an impressive design.
Although the Anycubic Photon comes mostly pre-assembled, there are still a handful of steps that need to be completed before you can start 3D printing.
Assembly & Leveling
Assembling and setting up the Anycubic Photon DLP 3D printer is an extremely simple process. It can be accomplished in 20-30 minutes, even less if you’re fast (but take your time, getting these steps right will be essential to your 3D printing success).
The first step is a move taken right out of the IKEA playbook: attach the small knob to the front door of the 3D printer. This knob looks like it belongs on a kitchen cabinet, but at the same time, it fits the Anycubic Photon’s petite and compact style. Simply mount the door handle unit in using the M4*8 screw that comes with it.
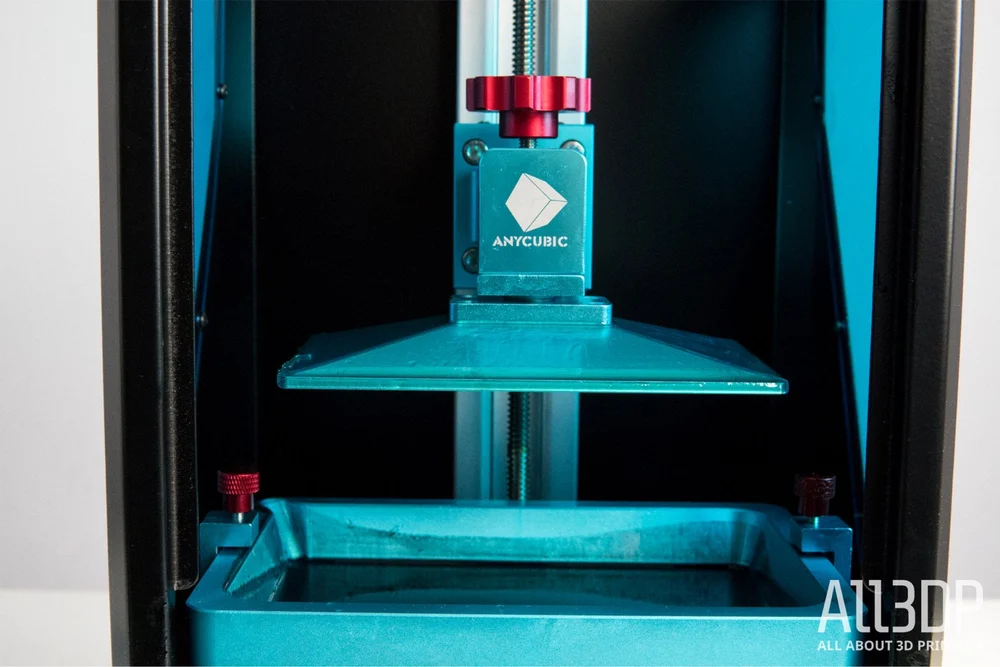
Now that the knob is attached, we can open and close the lid of the Anycubic Proton with ease. This is important, because the next step is to open the top cover to check whether the 2K LCD screen and platform is free of dust (best remove any specks of dust with a small towel dabbed in Isopropanol).
Once the inside of the print chamber was as spotless as possible, we plugged in the power cord and brought the Anycubic Photon to life. Next came the crucial step of leveling the Z-axis of the 3D printer.
However, before we could start leveling the print platform, we had to remove the resin tank from the print chamber, as this will get in the way of your leveling process. This can be done easily by unscrewing the two adjustable nuts on each side of the vat.
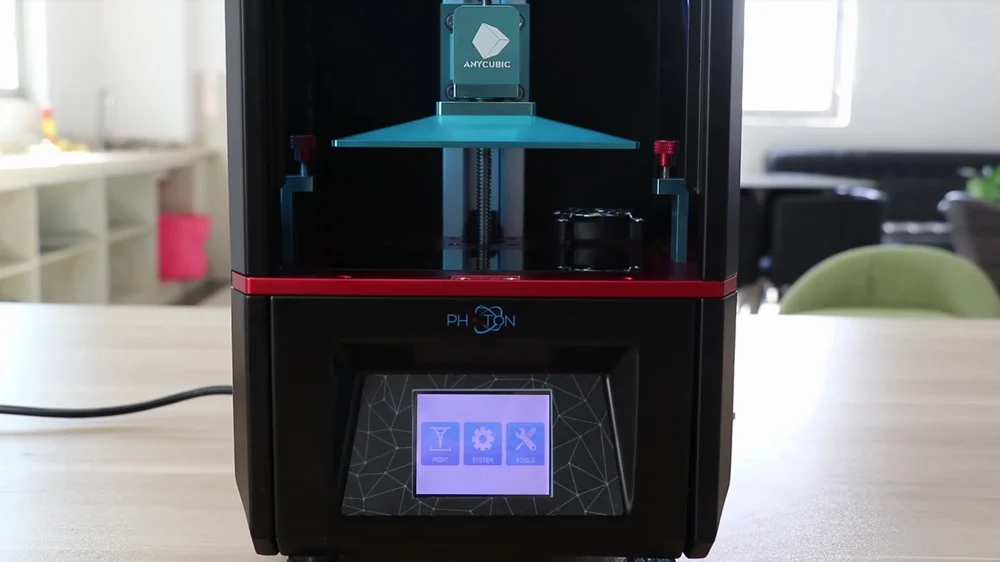
Using the touchscreen LCD display, we accessed the “MOVE Z” function through the “TOOLS” setting. After clicking the “HOME” button, the Z axis started to descend. There is a screw at the top of the print platform that needs to be loosened with an Allen wrench. This will allow the user to tweak the platform until they get it as level as possible.
Once we accomplished that, we had to retighten the screw and grab a sheet of A4 paper and place it on the 2K LCD screen on the surface of the print chamber. At this point, we also tightened the large red knob on top of the print platform. Then, using the distance controls on the UI, we had to lower the platform (either by 0.1 mm, 1 mm, or 10 mm), until we felt the drag resistance when pulling the paper back and forth.
This leveling process of the Anycubic Photon is actually similar to the way FDM 3D printers are manually calibrated. We recommend slowly lowering the platform by small increments, avoiding any potential issues. Once we felt a bit of resistance when moving the sheet of paper, we tightened the platform screw once more to make sure it was as level as possible. The Anycubic Photon’s platform should not have any tilt, otherwise, there will be a risk of failed or poor quality prints.
To set the current Z height, we went through “TOOLS” to “Z=0” on the display screen. We reset the Z-zero position, effectively locking our calibration settings into place.
Before breaking out the resin, we had to run a function test of the UV-LCD. To do this, raise the print platform about 120 mm and go through “TOOLS” > “DETECTION” > “NEXT”. This will start a brief test with the UV light, which will appear in the form of a bright rectangle inside of the 2K LCD screen.
Finally, we placed the resin vat back into the Anycubic Photon and tighten the adjustable nuts.
Once the Anycubic Photon DLP 3D printer is fully assembled, the user must pour the resin into the vat, filling it up about one-third of the way.
First Prints and Post-Processing
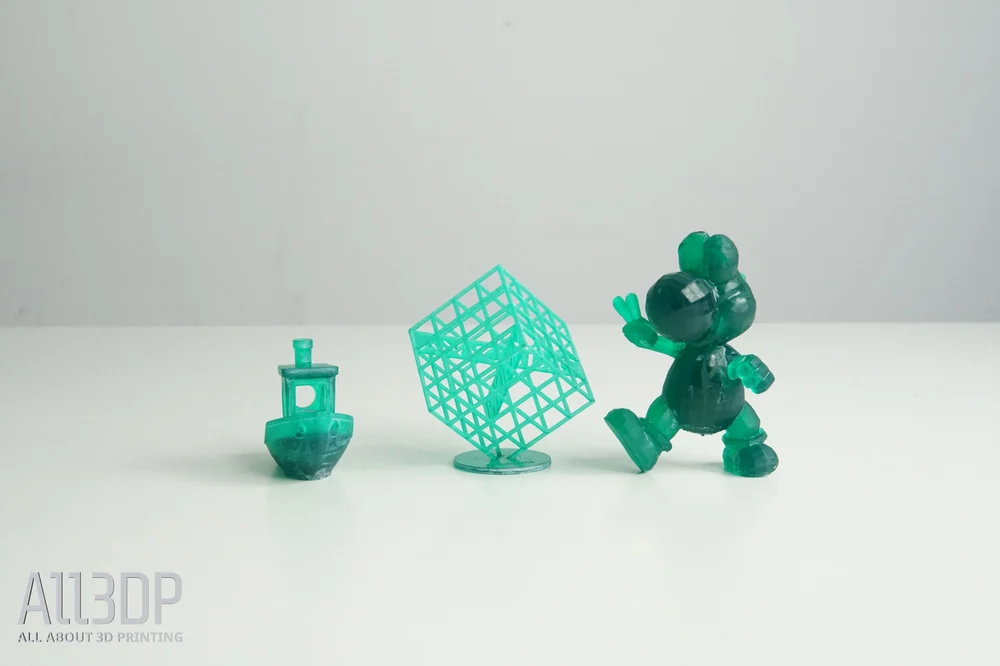
After assembly and bed leveling were complete, it was finally time to start printing with our Anycubic Photon. The first model we decided to try was the test print provided on the USB stick.
This complex lattice cube structure is the perfect way to show off the advantages of SLA/DLP 3D printing. On the inside of the model are two planks that stretch from one corner to another, one of which has “ANYCUBIC” inscribed in it, the other with “PHOTON”. Since the model was already sliced and uploaded onto the USB stick, we didn’t have to dive into the Anycubic Photon slicing software just yet.
With the resin vat one-third of the way filled with green resin, it was time to get printing. Unfortunately, our first two attempts at 3D printing the Anycubic Photon test model was a failure. Although the 3D printer was able to solidify the first layer of the print, it didn’t stick to the print bed and prevented the rest of the model from coming to fruition.
So, we went back to the drawing board, re-leveling the print bed and cleaning the LCD screen with isopropanol and a cloth. After tweaking things a bit, we finally got our first successful print on the Anycubic Photon.
The quality of the test model was extremely impressive, with a nearly flawless surface and high quality details. Once the print was complete, we removed it from the bed and submerged it in an alcohol bath, going back and forth into a tub of water to clean off all the excess resin.
After repeating this cleaning process a few times, we had to cure the print with UV light. Since we don’t have a UV chamber to do this for us, we had to use the power of the sun. The best way to naturally cure a DLP print is to place it into water and leave it out in the sun. After a few hours, we had a clean and solid 3D print.
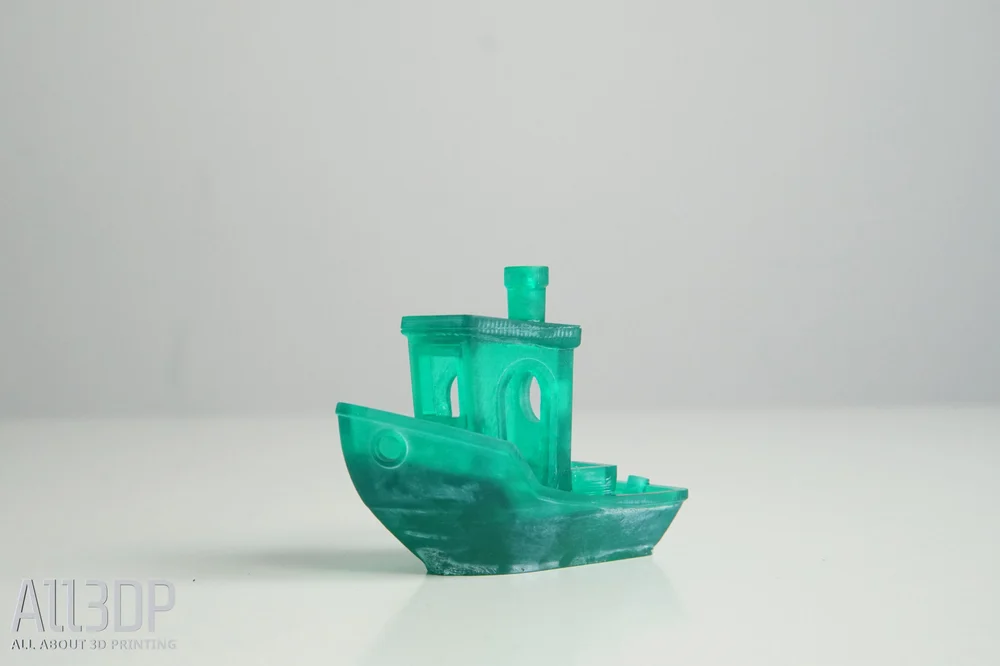
For the second model, we took the expected route and settled on the #3DBenchy, the go-to benchmark model for FDM printing. We wanted to draw direct comparisons between the surface quality of the two 3D printing technologies.
The Anycubic Photon handled with 3DBenchy model with impeccable ability, checking off each benchmark without any flaws. The tiny boat essentially looks layerless, and when placed next to a Benchy created with a FDM 3D printer, the differences are night and day.
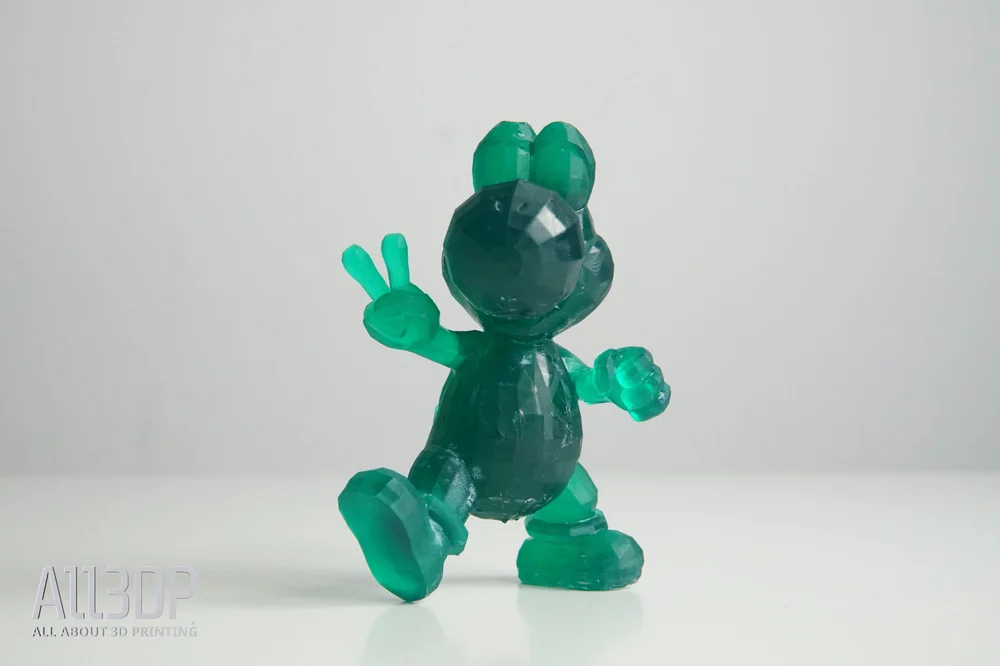
After the two test models, it was time to have a little fun with our Anycubic Photon 3D printer. Since the printer came with green resin, we decided to print a model that would be complimented by this color. And so, we settled on a great model of Yoshi, the adorable dinosaur species that is a staple figure in the Super Mario video game franchise.
This model was a bit more complex, and required support structures. Using the Anycubic Photon slicer, we were easily able to auto-generate supports on the model. The slicer also enables users to manually add and edit support structures, and is both simple to use and efficient.
The Yoshi model came out quite nicely, and after snipping the support structures, cleaning off the excess resin, and curing the model in the sunlight, we had a green little dinosaur throwing up a peace sign. There were a few areas where the surface of the model was rough from the removed support structures, but the overall quality of the Yoshi was still impressive, especially for the low price point of the Anycubic Photon.
Cleaning
Unlike your average FDM 3D printer, the Anycubic Photon requires a fair amount of cleaning both before and after you’re ready to print. When you finish a print, you should pull the resin vat out and remove any cured parts floating around. Placing the filters that are provided with 3D printer above the mouth of the UV resin bottle, pour the material through the filter to strain out solid parts.
Be careful when cleaning the vat, particularly with the FEP film that is at the base. If you scrape out resin without tactfulness, you can possibly scratch this film and will need to purchase a replacement. That’s why the plastic spatula is best used to remove any cured resin chunks that may be leftover from the print.
The Chinese manufacturer released a video showing how to properly clean the resin vat of the Anycubic Photon, which you can watch below.
Once the resin is removed, you can clean both the vat and the LCD projector. It’s critical that no dust, resin, or any other obstructions stand in the way between the light projector and resin vat. The best way to clean these parts is with isopropyl alcohol, just dab a bit on some cloth and wipe away.
You can also do the same procedure with the Anycubic Photon’s build plate, which will eventually become coated in resin from repeatedly dipping inside the resin vat.
Be sure to wear your safety gear while cleaning the Anycubic Photon, especially the gloves. The cleaning process can, ironically, create quite the mess if you’re not cautious with removing the resin vat and pouring it through the filter back into the UV resin bottle.
Safety Tips
Since the Anycubic Photon system uses toxic UV resins, it’s important to wear gloves and safety glasses, as you don’t want uncured resin to touch your skin, and you definitely don’t want it getting into your eyes. Once the print is cured, you can handle the print with your bare hands, but you can ensure safety by keeping your gloves on throughout printing and post-processing.
The Anycubic Photon comes with a few pairs of gloves, but you’ll soon find that you can never have too many in stock. Therefore, it’s best to order a box or two to prepare for the inevitable depletion of the gloves provided with the 3D printer.
The uncured resin also disperses toxic fumes, which is why the Anycubic Photon comes with a surgical mask to keep you from breathing in the overwhelming smell. One whiff of the resin and you’ll realize right away that it’s not something you should be inhaling.
If you want to avoid any uncured resin from spilling out into your surrounding environment, placing the Anycubic Photon inside a tray will help contain any mess. If you decide to swap out the supplied plastic spatula with a metal one (which we recommend), be sure to only use it for resin 3D printing.
Just as with handling uncured resin, it’s also critical that the isopropyl alcohol used in post-processing is also handled with care. When curing a 3D print in this solvent bath, the uncured resin will mix with the isopropyl alcohol, creating a hazardous liquid that should be handled and disposed of with care.
Software
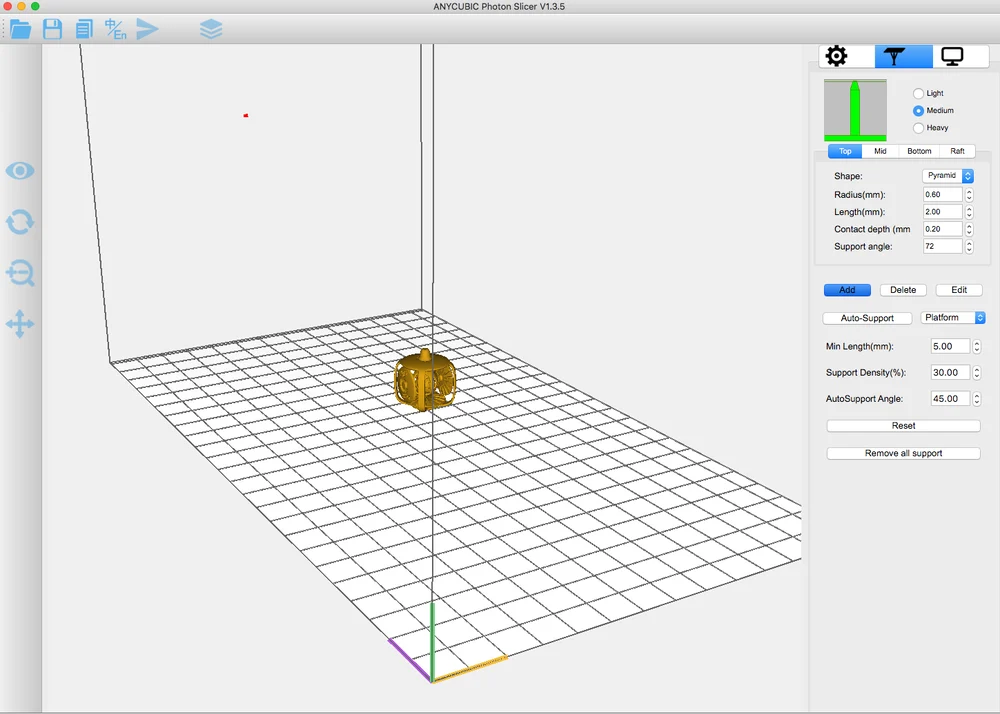
The Anycubic Photon comes with its own slicing software. Upon opening the program, you’ll immediately notice how simple this slicer is.
You can only change a handful of print settings, including layer thickness, normal exposure time, off time, bottom exposure time, and bottom layers. However, if you’re not exactly sure what modifying these factors will do, your best bet is to just leave the preset setting intact. The same goes with the resolution settings, which are pre-defined as well.
The one area you truly have control over is the support generation. You can decide to autogenerate supports or manually insert them, but we found the automated support structures to be quite sound. The Anycubic Photon slicer provides the user with control over the shape, placement, radius, length, and density of the support structures, just to name a few.
Other than that, the Anycubic Photon slicer offers convenient ways to view, scale, and rotate the model. The slicing process is pretty fast compared to some other commonly used software, and leaves you with a .Photon file that is exclusively prepped for this DLP printer.
All in all, the slicer that comes alongside the Anycubic Photon is adequate enough. Though it lacks in design, and also doesn’t have explanations on what each setting does, this slicing software is simple and easy to use.
Where to Buy it?
As we’ve stated throughout this review, the Anycubic Photon’s price is very low for a DLP 3D printer. The cost of desktop DLP printers generally range from around $500 for a Wanhao Duplicator 7 to $4000 for a SprintRay Moonray D/S. With a price of roughly $400, the Anycubic Photon is currently one of the cheapest DLP printers on the market.
You can find additional information on the Anycubic Photon 3D DLP 3D printer on the company’s website and the official Facebook group.
Source: https://all3dp.com/1/anycubic-photon-3d-printer-review/