One of the great things about laser engraving and cutting systems is how fast they can etch a pattern or cut out even the most intricate design. Still, laser operators are always looking for ways to increase productivity. Are you running your laser as efficiently as possible? Here are a few tips and tricks you can use to ensure that you are operating your laser at its highest potential.
1. Engrave multiple items in one batch
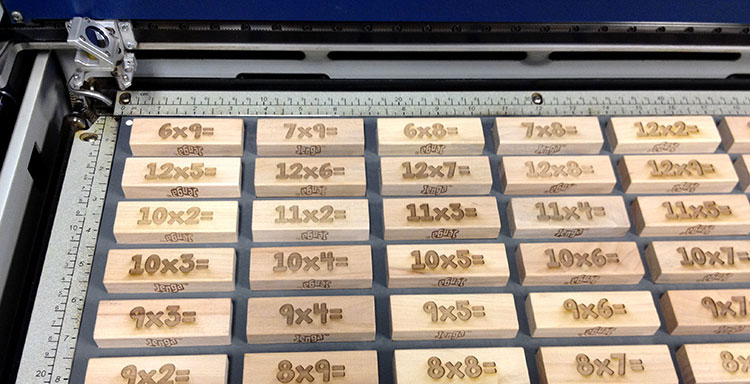
One thing that will reduce production time is printing multiples. If you have a project that requires engraving more than one item of the same or similar design – like plaques or coasters – print multiple pieces at once, instead of one at a time. We’ve found that by engraving in batches, users experience up to a 37% increase in time savings. How many you can engrave at once will depend on your table size, so to do this, you need to expand the page size in your graphic design program to match the full table size of your laser. You can then fill up an entire table with a particular piece and engrave them all in one run. Using a jig to properly space out the items can be helpful as well.
2. Adjust the resolution
Resolution is another factor to consider when you want to increase throughput. A clear image is important in any engraving job, but the higher the DPI is, the long an item will take to engrave. DPI refers to dots per inch, and the higher the DPI the closer together the engraved dots are going to be. This results in a highly detailed engraved image, but may take longer than you’d like. By lowering your engraving resolution a bit, you can increase your time savings by up to 33% or more. To offset a lower resolution, consider using different dithering patterns found within the Epilog print driver. Dithering takes the visual dot patterns that can be seen with lower DPI and randomizes them, which hides the lower resolution. By finding the right combination of resolution and dithering pattern, you can achieve a result that both looks good and takes less time to produce.
3. Use color mapping
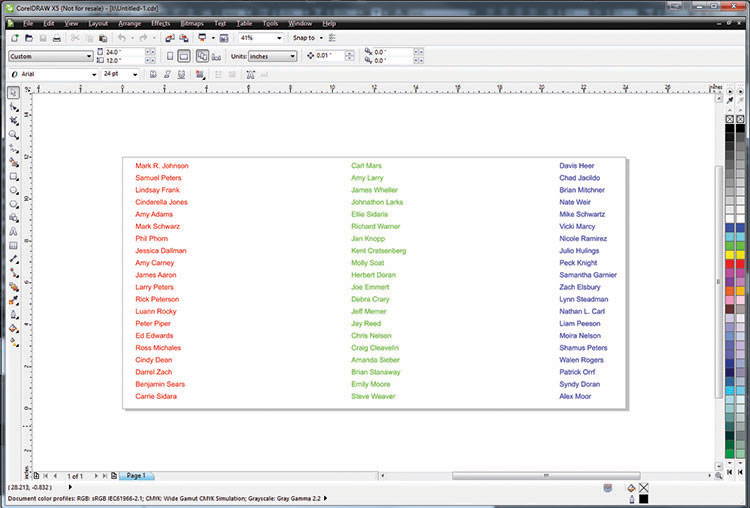
You can also use color mapping to save engraving time. Let’s say you have a design with three columns, each with about 20 names. By default, the laser sees this as one image and the laser head will travel over the white space between columns in order to engrave the entire graphic you’ve sent to print. Using color mapping enables you to skip all that white space by assigning each column a different color and an associated engraving order. With this method, the laser will engrave one column at a time, only traveling over the white space between columns when it’s time to move on to the next set of names. This approach can save you upwards of 43% depending on the items you’re engraving.
4. Pre-engrave items
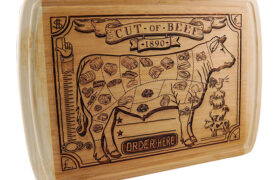
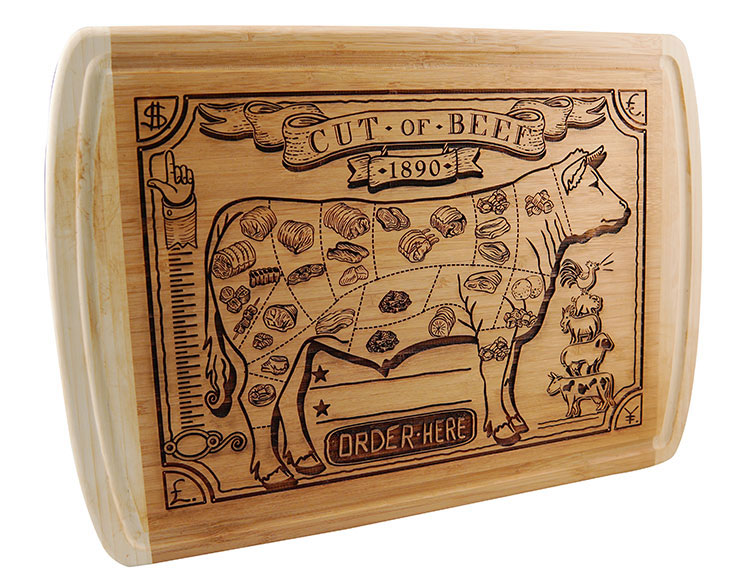
Customization is extremely popular, and thus a great business opportunity, but one-off jobs can be very inefficient. Loading up the same design over and over again to engrave the same item multiple times can consume a lot of your production time. We suggest pre-engraving an inventory of popular items before individual orders come in. Take this cutting board as an example. You can easily pre-engrave the main graphics of this design onto a batch of cutting boards. Once an order comes in, put one of the pre-engraved boards back in the machine and add a family name or other custom phrase in place of the “order here” section. This small addition will take little time compared to printing the entire design again. By front-loading your effort, you can avoid bottleneks in your day-to-day workflow.
5. Use center engraving
Another tip is to use center engraving to quickly set up custom jobs on an item like a phone, an award, or anything else that requires centered text or graphics. Center engraving makes it easy to work with differently sized items without having to create a custom template for each one. This feature allows the user to move the laser by hand to the center of the object being engraved. Set the center point as the new home position and the laser will use that point to properly place the graphic. Compared to setting up custom files and jigs, this method will save you a lot of time!

6. Use the Job Manager
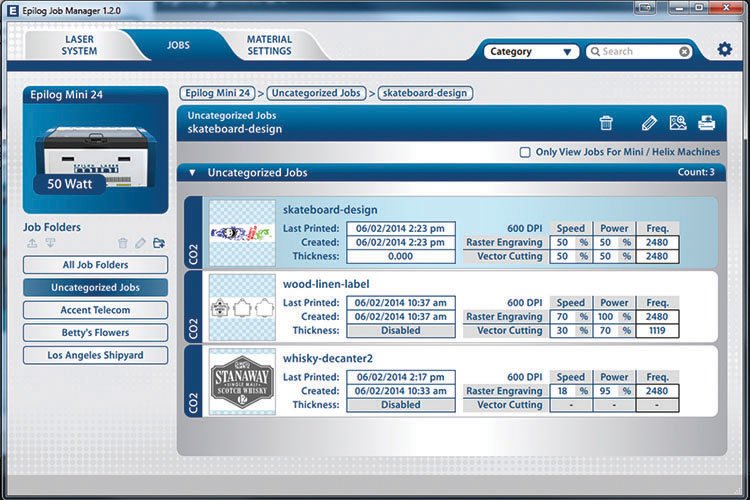
The final thing we suggest taking advantage of is the Epilog Job Manager. The Job Manager is an easy way to streamline your laser processing workflow. This is an incredible time-saver that gives you access to job time recorders, a materials database and much more. You can tailor the software so you can easily locate and replicate jobs at the touch of a button.
We have many resources for beginner engravers as well as more experienced laser operators. You can visit our Sample Club to view a large library of projects, featuring free graphics files you can use to practice on your laser or to serve as inspiration for new creations! You can also catch up on our Customer Spotlights, which showcase how people like you are creating successful businesses with their Epilog Laser machines.
Hopefully these tips and tricks will help you make your engraving/cutting adventures less time-consuming and more productive. Happy lasering!