Hello, I’m Geordie and I currently work at ADX Portland running the Laser Cutter and Engraver. My job is to take in customer’s projects, set them up and run them on the laser. As a result, I’ve learned a few tricks for how to set up jobs to get the best results, and in this Instructable I’m going to pass them on to you.
The laser I work with is an Epilog Helix and the program we use to run it is Corel Draw. I’m going to try to write in general terms so you can use whatever laser and program you want to.
Note: For several of these tips it is important to understand the difference between Vector files and Bitmap files. Vector files are mathematical formulas defining lines, circles etc. These are created by programs like Adobe Illustrator, Inkscape, AutoCAD and Corel. Bitmap files are collections of individual pixels. This included digital photos, Adobe Photoshop files, JPGs etc. With the Epilog laser (and I’m assuming other ones) you can only cut with a vector file. You can engrave with either vector or bitmap files. For several of my tricks, you need your file to be a vector file for the trick to work.
Tip #1: Preparing for Cutting or Engraving
Before we get to tips for cutting and engraving, let’s start with some good ideas for preparing to cut or engrave.
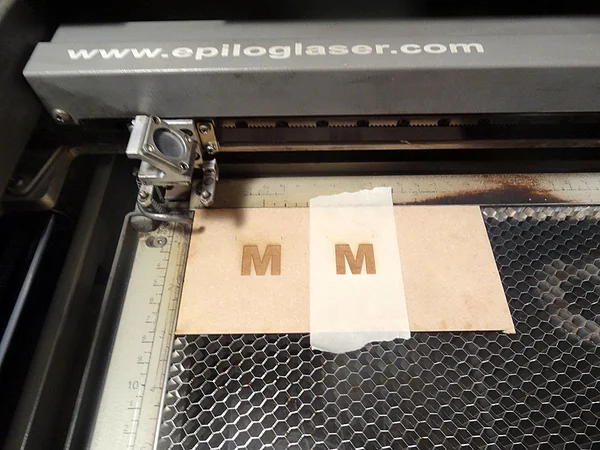
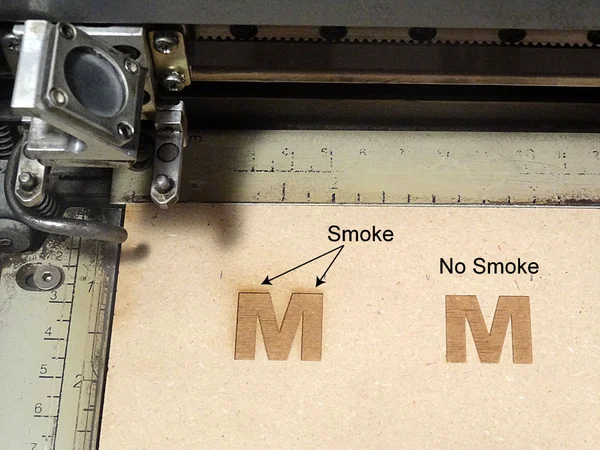
Masking: If your going to engrave on something be aware that the smoke for the engraving can stain the edges of the engraved surface. If you don’t want that cover the surface with masking tape to protect it. The masking tape won’t decrease the power of the laser much (bump up the power a bit if you feel it needs it) and the masking tape will protect the material around the engraving from the smoke. After running the engraving just peal the masking tape off. I use this a lot if I’m engraving on leather.
Presets: Your laser should have some suggested settings for cutting or engraving different materials and different thicknesses. You should also be able to load these settings into your computer or laser and save them as presets. Be sure to name them something that makes sense so you can easily find them That way the next time you need to engrave on leather or cut 1/8″ thick acrylic, you can just find the preset for that material.
Test cuts: Even when I have a preset for cutting a material I usually try to run a test cut in it before I run the full job. Nothing is worse than taking the material out of the laser and finding that it didn’t cut all the way through. I create a small circle or square (about 1/4″ or 1/2″ wide) and cut out in corner or on some scrap material. Then I can see if I need to increase or decrease the power before I run the final cut.
Tip # 2: the Power of Layers
Several of the tricks I’m going to talk about require being able to print only part of a file or design at a time. The easiest way to do this it to put different parts of you design on different layers in a file. Most graphics programs allow you to create different layers and then to turn them off and on. While you can put everything on one layer here are some advantages to using layers.
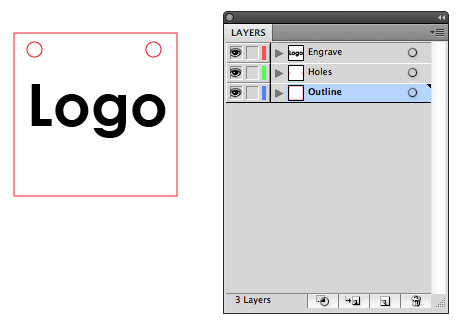
1. Controlling the order of cuts. Your laser should have some options to determine the order in which lines are cut but one way for you to control that is to put different cuts on separate layers on to turn the print of each layer on and off in the order you want.
2. Have multiple parts and designs in one file. Rather than having a separate files for each design, just put them all in one file and put them individual layers. Then just print the layers one at a time. Helps keep things organized.
3. Creating guides. You might need to create some guides for laying out out your design or maybe you’ll need a target to place an object in. If you don’t want these to print put them on their own layer and turn off the printing of that layer.
Tip #3: Wood Grains and Engraving
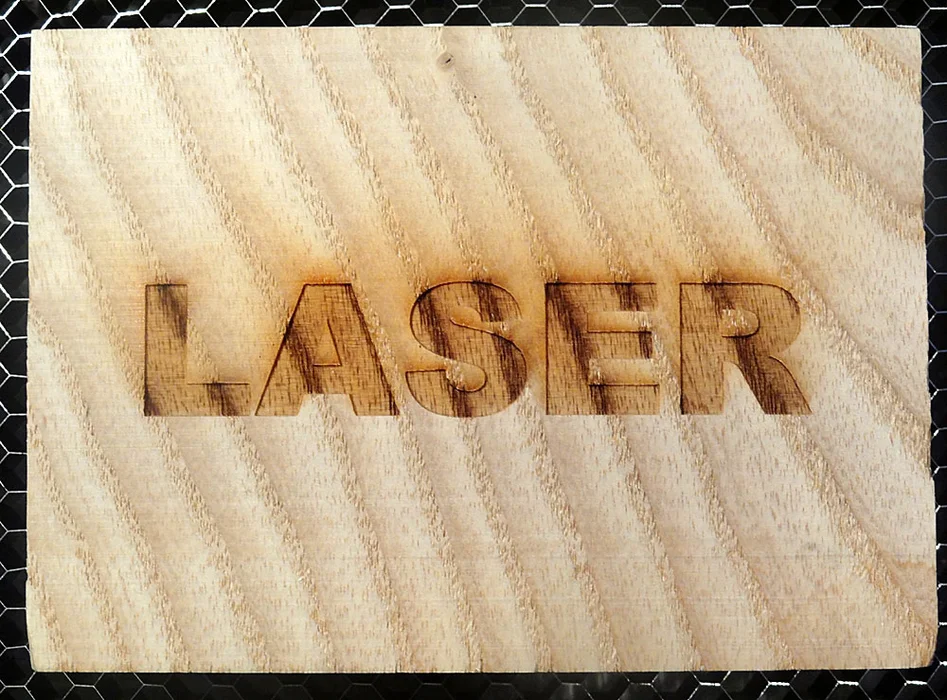
So you’ve designed a logo or a image and you want to burn it onto a piece of wood. Wood is a great material for engraving but you need to be aware of the difference between engraving on a solid piece of wood versus a composite material like plywood or MDF. Unlike a manufactured material, natural wood is not uniform. The grains in the wood represent different types of growth in the wood (winter and summer) and they will each burn differently. Usually the darker grains are harder and the lighter parts between them is softer. As you can see from the example photo you end up with a zebra pattern in the engraving. If having a uniform look to the engraving is important to you, you’ll probably get better results from a good plywood where the top layer is more uniform.
One more thing to be aware of is materials with a thin veneer of nice wood on top. The engraving will often burn through the thin veneer exposing what under neath. Make sure what’s beneath the veneer looks good and that you burn all the way through the veneer so you don’t have a mix of veneer and under-surface.
Tip #4: Overlapping Lines.
Often when cutting out multiple parts at once, the temptation is but them up against each other so similar lines overlap. This is a good idea, but there is a good way to do this and a bad way.

Let’s say for example you have a bunch of squares to cut out. If you draw 2 squares (4 sides each) and then but them up against each other it will look like there is only one line between them. The trouble with this is that although it looks like there in only one line on the overlapping side, the computer still sees 2. The end result is that lines will get cut one on top of the other. This can lead to that edge getting burnt, rather than a clean cut. It also waste time on a unnecessary cut.
The way to fix this is to eliminate one of the doubled up lines. Draw one of the squares with 3 sides and but it up against the one with 4 sides.
Tip #5: Lines – Raster Versus Vector
The main difference between a raster engraving and a vector cut, is that for the engraving the laser head travels left to right across the print area and then moves down a hair and repeats until it has engraved the image. With the vector cut the laser just traces the lines of the cut. As a result raster engraving take a lot longer than vector cuts.
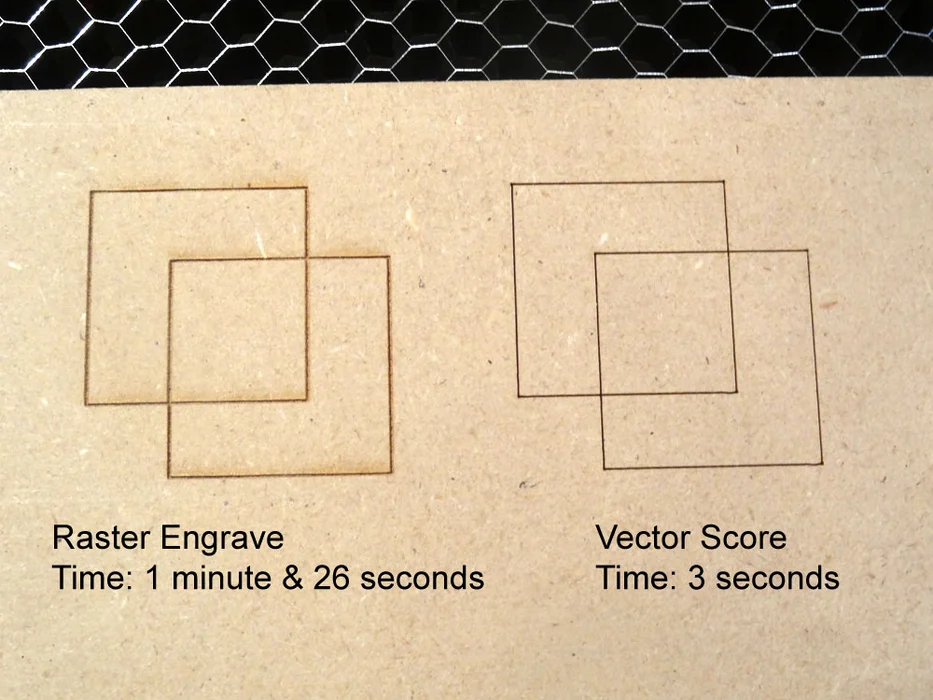
So what if you have art work, like a Celtic knot, or a design, like a map, that is mostly lines. You can run it as a raster engraving. The advantage of this is that you can set you line thickness to what ever you want and have different lines be different thickness. The disadvantage is it is going to take a lot longer to engrave.
If your design or art work is a vector file (this doesn’t work with bitmap images) there is a faster way to create your lines. Set your file up as a vector cut but turn the power down and increase the speed. For example to cut through 1/8″ plywood I would have the laser power at 100% and the speed at 20%, but to just score the wood I would set the power to 30% and the speed to 95%. So rather than cutting through the material the laser just burns a thin line into it. The advantage is it is going to be much faster than engraving. The disadvantage is that the line is going to be very thin and you can’t vary the thickness of it.
See my next tip for a way to get thicker vector lines.
Tip #6: Defocus the Laser for Thicker Vector Lines.
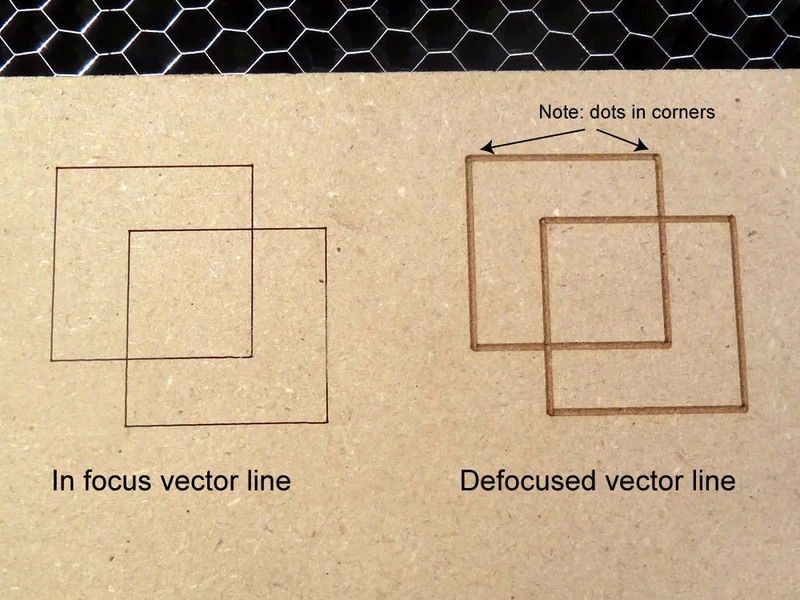
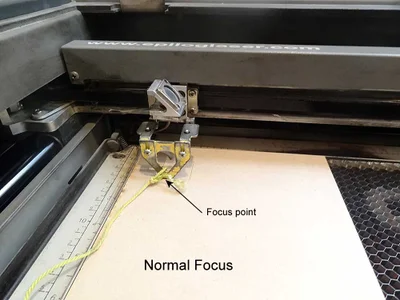

In my last tip I covered how to use the vector setting to just score lines into material to produce line art work or designs. But the disadvantage of this trick is that the line is very thin. But there is a way to tick the laser and get thicker lines. The laser has a very tight focus so if lower your material a bit the laser will lose focus and spread out. The way I do this is to put a small piece of wood that is about 3/8″ thick on top of the material I an using and have the laser focus on the wood. Then I run the laser on a vector setting (with a lower power setting and a higher speed). The result is a much thicker line than if the laser was correctly focused.
There are 2 disadvantages to be aware of with this technique. One is the line is a little soft and not as crisp as a raster engraving. Second, in the corners of the lines the laser pauses just a little as it changes direction so the corners get burned a little deeper. The corners look like they have little dots in them.
I discovered this trick when a client wanted a large order of wooden coasters with a Celtic knot designed burned into them, but they had a limited budget. To do the art work as an engraving would have taken to long and cost too much (about 5 to 7 minutes each). But by doing the art work as a defocused vector score, I cut the time to about a minute each and meet the budget.
Tip #7: Adding a Vector Score to the Edge of Type or Engravings
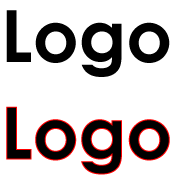
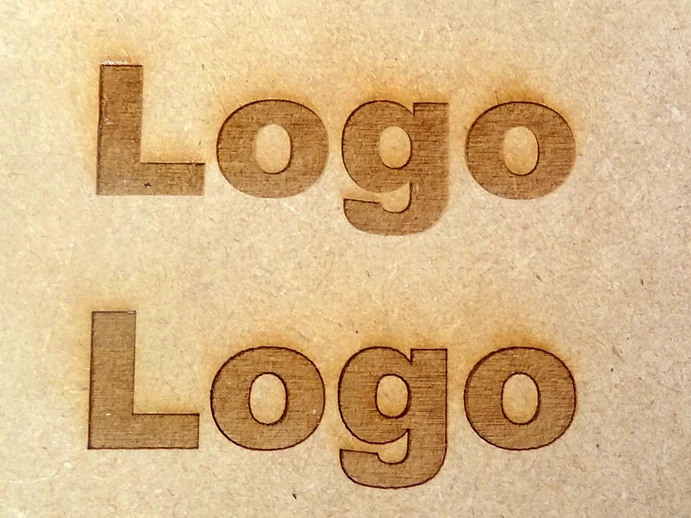
Normally you should get nice edges to any engraving your laser makes (if not check your lens and focus). But if you want to give the edges of your engraving a little extra sharpness here’s a good trick. Add a light vector score to the edge of the engraving.
Once again you will need to have your image as a vector file. Select your image and add a thin stroke to the edge. When you set up the laser set the stroke for a vector cut but turn the power down and increase the speed so it burns but doesn’t cut through the edge. After the laser does the engraving it will come back and burn a thin line around the very edge.
This is a great effect for type.
Tip #8: Hitting the Target
Sometimes you need to hit a target area that is not a the lasers origin. For example, a piece of scrap plastic that you’ve already cut several shapes out of, but there is enough room between some of the old cuts to do a new cut out. How can you accurately get your new cut out into the leftover space?
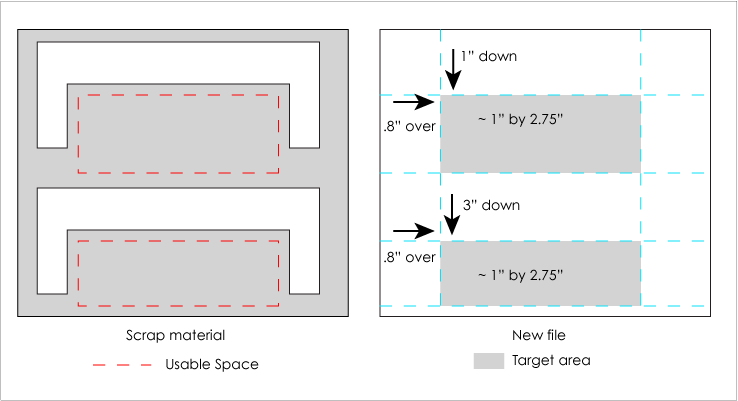
First measure the target area and get its rough dimensions. Make sure there is enough room for what you want to cut out. Then place the scarp material in the laser and measure down and across from the laser’s origin to the target area. For example a 1″ by 2″ rectangle located 2.5″ down from the top and 1.75″ over from the left edge. Then in you file use guides to mark out the target area and position in the distance from the origin as the area on the scrap material. Place your design or cut out in the target area. Make sure your guides won’t print out and run the file. If you’ve measured everything correctly your cut out should be in the target area.
Tip #9: Engraving Multiple Objects
Lets say you have a bunch of wooded coasters that you want to engrave your logo on. You could put them one at a time at the origin of the laser and engrave them one by one. But wouldn’t it be nicer to layout several at once and have the laser engrave them all?
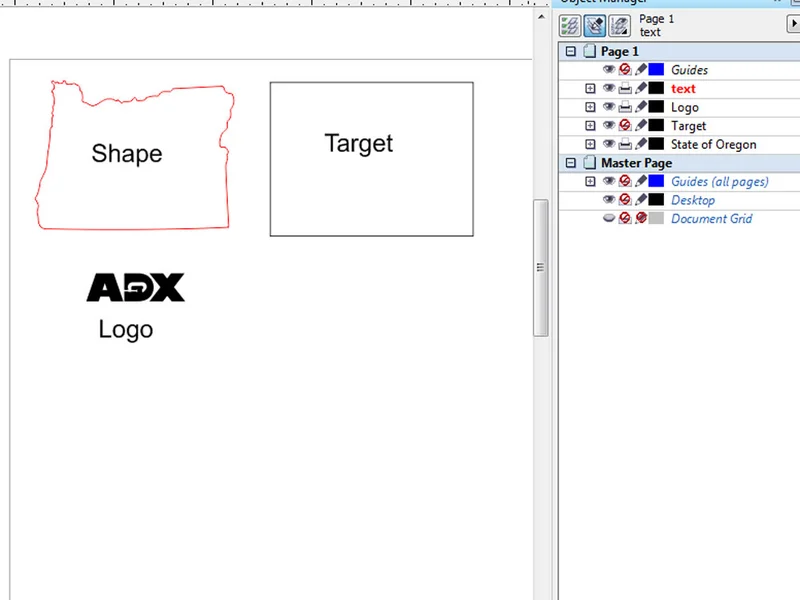
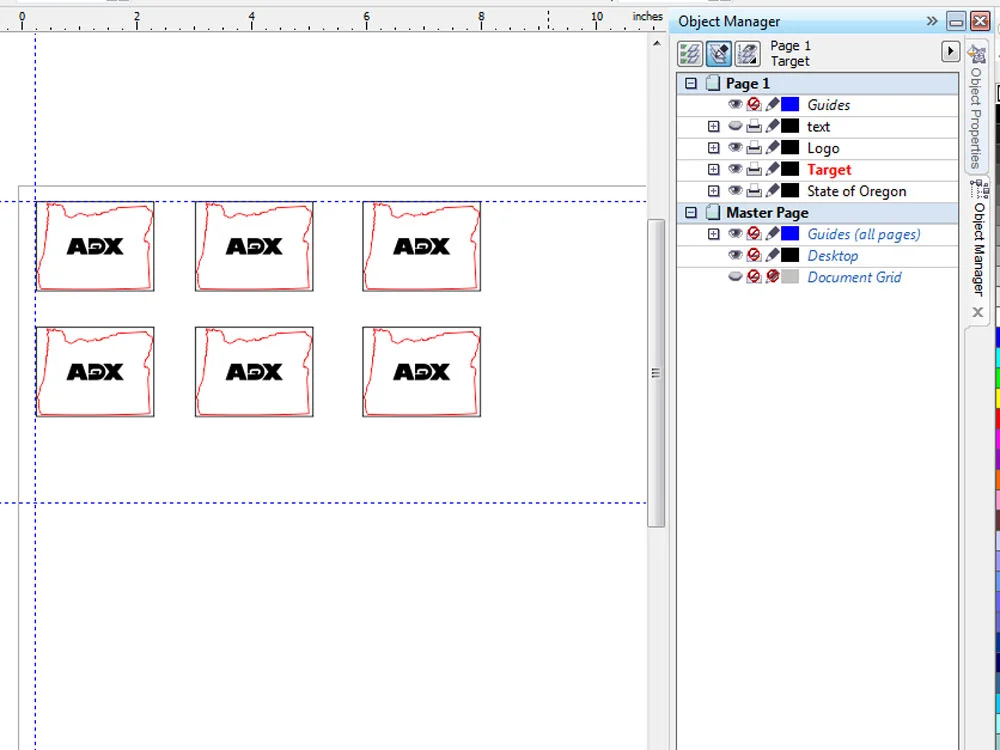
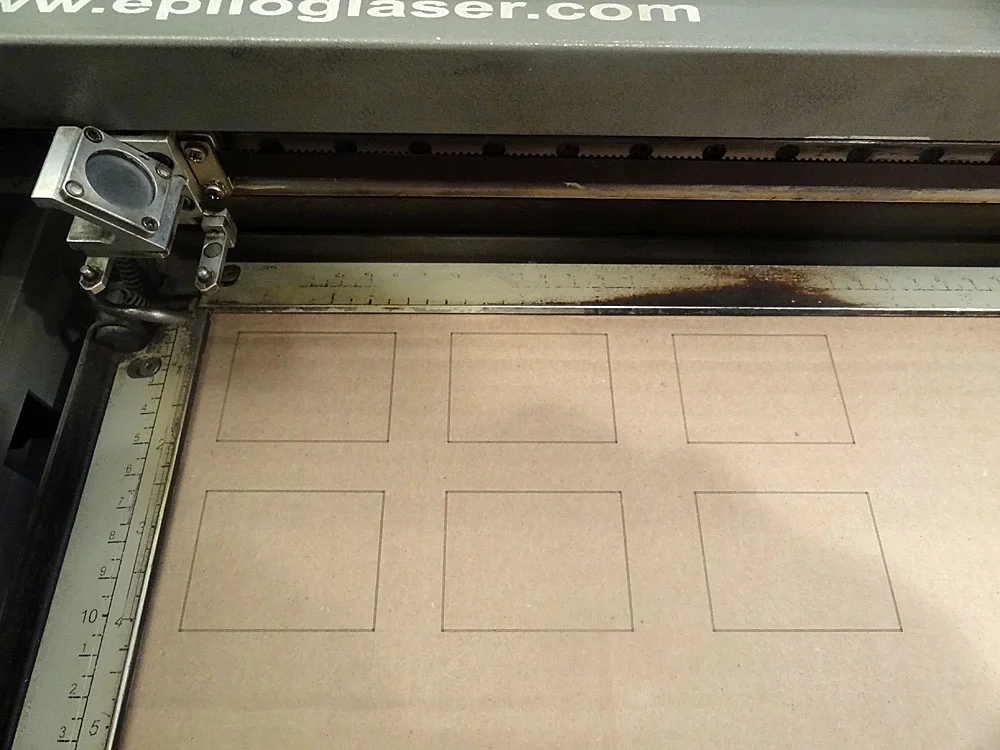
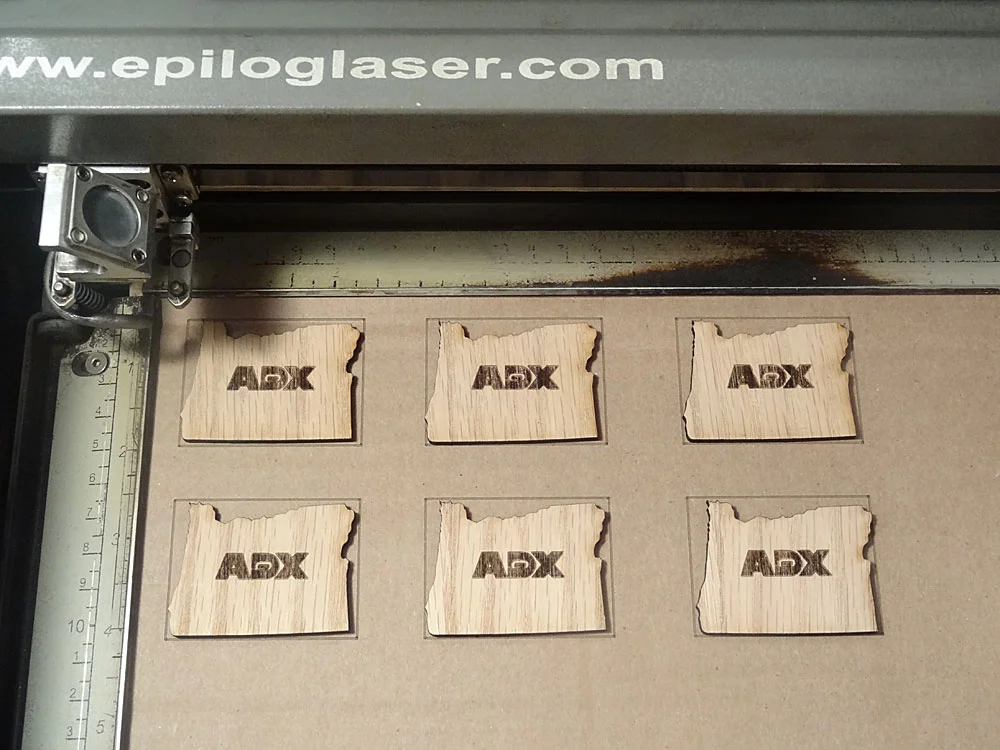
The trick is to create a grid that you can lay the pieces out on and accurately have the laser engrave on them. Create a new vector file the size of your laser bed. Then measure one of your shapes/items. If you can get its exact shape great, but if not just figure out a nice geometrical shape, like a circle or square, that it will fit snugly into. This will be your target shape. Create the target and position your design (engraving or cut) in the target. Now copy both the target and your design and paste as many copies as you can fit in the space of your laser bed.
Tip : Leave a little space between the targets so you can set them down without bumping the ones around them.
Before you print the file, move the targets to one layer and your design to another layer. Then turn off the printing for the layer with your design on it.
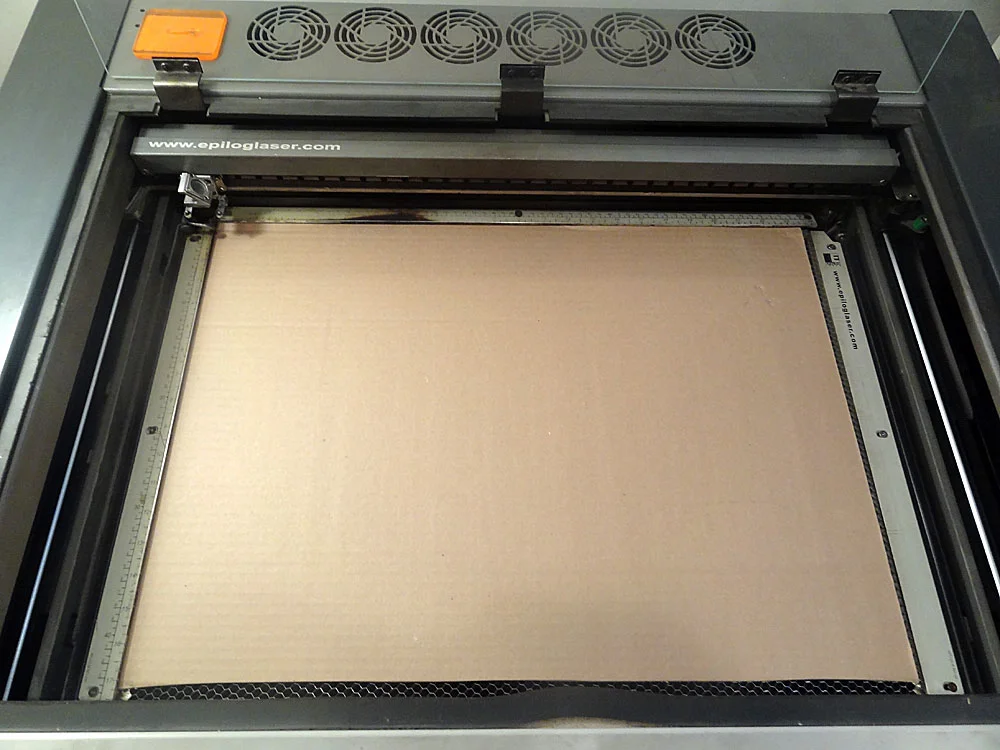
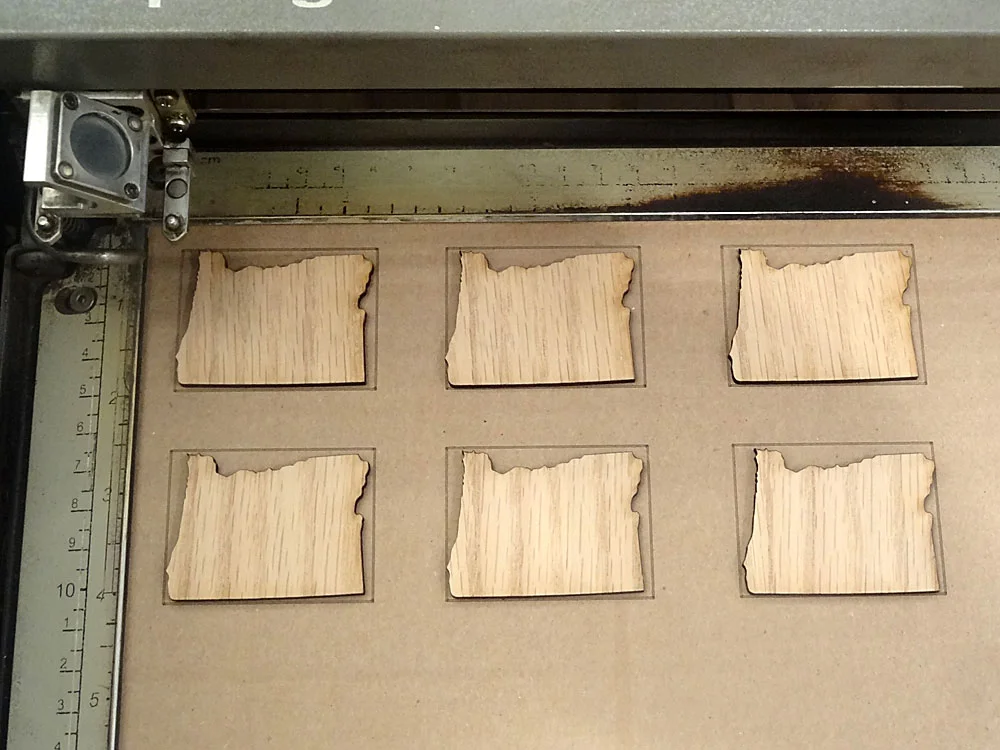
Cut a piece of cardboard to the size of your laser bed and put it in the laser. Now make sure just the layer with targets is set to print. Engrave, score or cut the target shapes into the card board. This creates a grid on the cardboard that matches the one in the file. Now place the items you are going to engrave on the targets marked on the cardboard. Don’t forget to refocus the laser on the tops of what you are engraving on. Now you can turn off the printing of the target layer and turn on the printing of the design layer.
As long as you don’t move the cardboard you can just keep laying out new parts, hitting engrave and repeating until you have all your parts done.
Tip #10: Using the Red Dot to Figure Out Where to Cut or Engrave
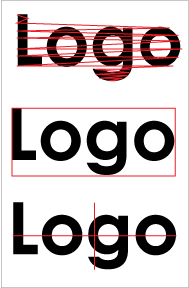

The laser I use has the option to turn on a laser pointer that projects a red dot where the cutting/engraving laser will fire. This is helpful for figuring out where the laser will cut before you run your job on your material. Simply turn off the power to the laser and turn on the red dot. Then run the file and watch where the red dot goes.
One thing to be aware of is this works well with vector lines, where the laser/red dot traces the lines, but not so well with engravings where the laser pass back and for over the whole area of the engraving. If I need to use the red dot to figure out where an engraving will end up, what I often do is to draw a vector square or circle around the engraving and then just having the red dot trace the square. Or draw horizontal and vertical center lines.
https://img.facfox.com/imgs/2021/06/72ca98c4d581eaed.png