Clogged nozzles can seem tedious to fix, but before you take your toolhead apart, try the cold pull method. This method makes use of a strand of filament and strategic temperature changes to unclog or clean a nozzle without dismantling the whole thing.
Also called the “atomic pull” by Ultimaker, this procedure involves using a strand of filament with a molten tip to pick up a glob of material, as well as other small debris, that’s clogging the nozzle, and then pulling the strand out, hopefully taking the clog and debris with it.
Repeating this cold pull a few times can fix many nozzle issues without having to dismantle the nozzle and risk injury or incorrect reassembly. So, it’s usually the first thing to try when you’re facing a clogged nozzle. In this article, we’ll take you through how to perform a cold pull as your first line of defense.
What You’ll Need

Generally speaking, the best filament for performing a cold pull is nylon. It’s typically recommended because it’s naturally slippery and thus less likely to snap when pulled out of the nozzle. That said, if you don’t have any nylon lying around, go with your next slipperiest and least brittle material.
Aside from some filament, you’ll need some cutters to cut a piece of filament to use, and keep some pliers handy to use to remove the filament slowly and steadily. And that’s it!
Steps

Here’s how to perform a cold pull:
- If there is one, begin by removing your Bowden tube from the extruder head.
- Heat up the hot end to the printing temperature of your chosen cold pull filament while removing the old filament.
- Feed the cold pull filament through the nozzle until it starts oozing out a little.
- Cool the hot end while applying constant pressure on the filament strand. This ensures the tip of the strand molds to the shape of the nozzle’s interior while cooling.
- When the hot end is about 60 °C, you can release the pressure. By this time, the clog or dirt is hopefully stuck to the cold pull filament strand.
- Heat the nozzle up once again to the printing temperature of your filament and start pulling it out. Do this step more carefully if you’re using PLA, as there’s a high risk of snapping it instead of pulling it out in one piece.
Tips
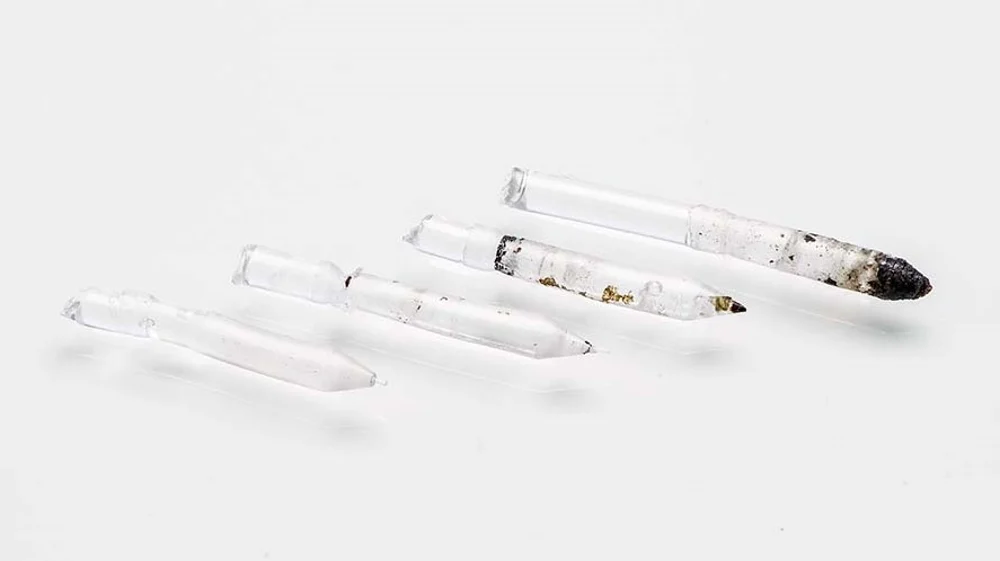
If you performed these steps correctly, then you’ve now made a negative mold out of the nozzle. Repeat this process until the nozzle is completely free of any old filament or other contaminants.
If you’re doing this with a filament in the same color as the one that got stuck, then it can be very difficult to see your progress. It’s always best to use a different color, with lighter colors being the best to show dirt removal, and nylon filament being the absolute best option.
If the cold pull process doesn’t resolve your clogged nozzle, make sure that everything is clean by trying the other methods in our article on nozzle cleaning. If you’re still having issues, you might want to try using a cleaning filament.
Source: https://all3dp.com/2/3d-printer-clogged-nozzle-how-to-perform-a-cold-atomic-pull/