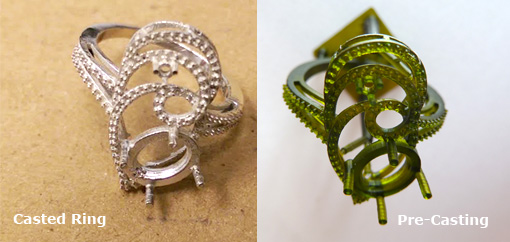
This technical guide should serve as a reference for casting materials via the lost wax casting method. The castable materials in this guide are: DLP Castable Resin, Castable Wax, Castable Wax Ultra HD.

Getting Started
This technical guide is designed to assist with successfully casting castable materials. Lost wax casting includes many variables that must be handled precisely in order to achieve consistent results. Modifications to the burnout procedures in this guide may be necessary due to a variety of factors, such as the size of the flask, humidity level, and type of kiln used. These modifications are recommended throughout the guide.
Drying
For parts printed in a castable material, a drying process is needed to eliminate all IPA residue before post-curing.
Dry in a convection oven at 100° F / 37° C for a minimum of 30 min and a maximum of 60 min, depending on the volume of parts.
A commercial-grade low temp convection oven is recommended for this drying procedure. Cabela’s 80-Liter Commercial Food Dehydrator is recommended.
Casting Trees
When constructing casting trees, increase the connection between sprues by 10-30% of the sprue diameter. We recommend the sprues be tapered to help with metal flow during casting. Round, smooth, and thick transitions will reduce turbulence and increase the speed of the molten metal throughout the sprue system and into the pattern of the investment.
When considering sprue placement on the models, treat your models printed in castable materials just as you would your hand-carved wax models. Some models may require more sprues to help vent the material during casting. It is recommended that you add more sprues to large or thick pieces to accommodate this.
Adhere wax sprues to the models in the following manner:
1. Sand the model roughly at the connection point.
2. Use beeswax or super glue to adhere the wax sprue to the model. Beeswax must be very hot to create the best possible connection.
For best results, make sure your vent point is large enough to allow the flow of material out of the flask. It is suggested to use a thicker base when working with polymers verses wax for burn-out.
Investment
Follow the manufacturers’ instructions for investing procedures.
Give the flask a maximum of four hours to bench set.
Firing
Gas kilns are recommended for all castable materials. Casting results may vary based on the specific kiln and/or ambient factors.
This technical guide is for casting with a 3.5-inch flask diameter, 800 feet above sea level. If casting with a flask larger than 3.5 inches, add one hour of hold time to the burnout for each inch.
Ventilation is a key factor when processing investments in a kiln. The airflow fuels the machine and can optimize burn-out. Propping flasks from the bottom with pieces of fire brick or a steel bolt will introduce more airflow around the flasks and give the burn-out an even heat treatment.
Troubleshooting
The lost wax casting process has many variables that contribute to a successful casting. If you experience issues with breakout or porosity during casting, reference this section to ensure you are following all recommended procedures.
1. When working with lettering or relief work, these surface details can sometimes fill in during the casting process. To remedy this, the printed models can be coated in Procad Barrier Liquid for Resin Casting after post-curing and before spruing. This product is only recommended when casting silver or gold with DLP Castable Resin. See the product manufacturer for more detailed instructions for use.
2. Fillet all edges slightly in your CAD software before printing the models. This is especially important for stone holes.
3. When working with engraving, make sure the engraving is not deeper than it is wide.
4. Do not expose castable materials to 99% isopropyl alcohol for longer than 2 minutes during post-processing. Excess exposure to alcohol begins to degrade the models.
5. 99% isopropyl alcohol must be removed from parts using compressed air. Do not let models air dry with alcohol still on the surface.
6. Do not use less than 99% isopropyl alcohol when post-processing castable materials. Anything less than 99% will leave residue on the models.
7. Do not use an ultrasonic cleaner to post-process castable models.
8. Do not expose models to water at any point during post-processing.
9. Do not use a debubblizer surfactant that contains alcohol with castable materials. This product degrades the material.
10. Follow post-curing instructions for your specific post-curing unit.