Digital impressions are required for any case that will use 3D printed models, such as clear aligners, splints, Hawley retainers, or occlusal guards.
Before you start 3D printing there’s a simple but crucial step: You need to clean up the scanned impression and design a digital model that can be 3D printed.
This guide will cover step by step how to use the free software Meshmixer to prepare a dental 3D intraoral scan for 3D printing.
Intraoral Scans vs. Physical Impressions
Digital dental models can be created either by scanning the patient directly with an intraoral scanner or using a desktop optical scanner to scan a traditional impression or model.
An intraoral scanner is a handheld device that projects a light source on the scanned area, and its sensors then capture hundreds or thousands of images to create a three-dimensional digital model.
To digitize a traditional physical impression, dental professionals send alginate or polyvinyl siloxane (PVS) impressions to a dental lab that can scan it with a desktop optical scanner.
Intraoral scanners are faster than traditional physical impressions, which can result in cost savings for a dental practice thanks to the reduced chair time. Intraoral scanning is also substantially more comfortable than regular impressions for the patient.
There’s no need to ship the impression to a lab either, so practice can save time and costs by sending files digitally to a lab. A digital scan is also a prerequisite for in-house 3D printing for practices that want to save money by printing models in-house.
The Digital Workflow for Creating Dental Models
Traditionally, dental practices and labs have used stone modeling to create a physical model of a patient’s dentition from the impression.
3D printing is a faster, cheaper, cleaner, and simpler process. It is also practically the only way to create models from digital impressions and IOS scans. Dental practices and labs can store models as digital files instead of physical items. If needed, they can simply recreate the model using the digital file at any time.
The 3D printing workflow follows four simple steps: scan, design, print, and prepare.
1. Scan: First, collect the desired images digitally using an intraoral scanner or by scanning a physical model or impression on a desktop scanner.
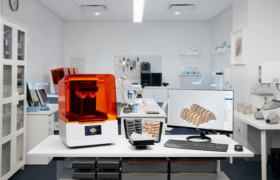
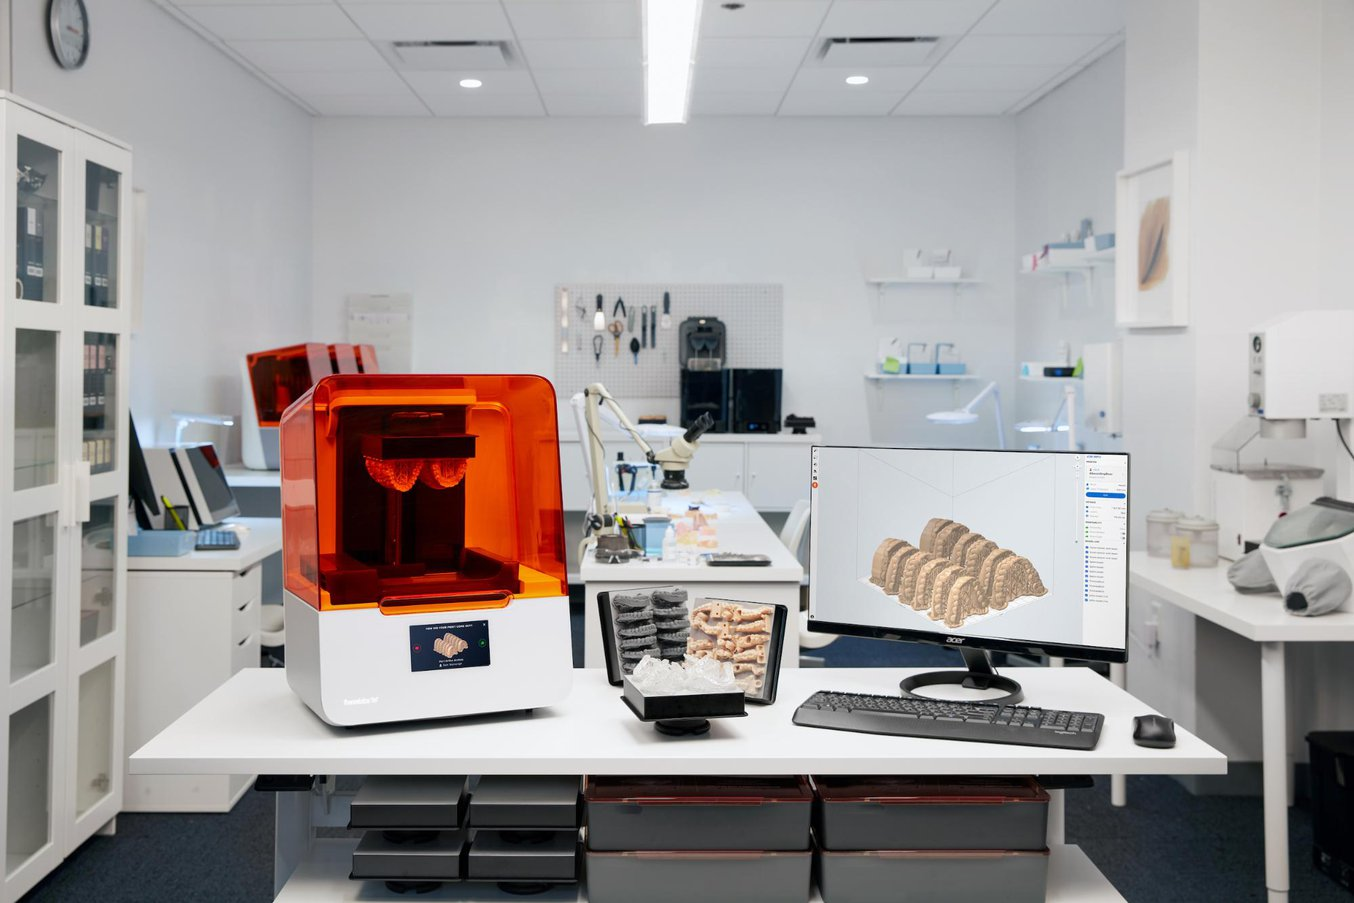
2. Design: Next, import the scan data into CAD software, such as Meshmixer. Use the software to design, build, and clean the model as needed. This guide goes through the step-by-step process below.
3. Print: After building the design, import the built model files into the appropriate print preparation software. Arrange the model files in the software and send them to the 3D printer.
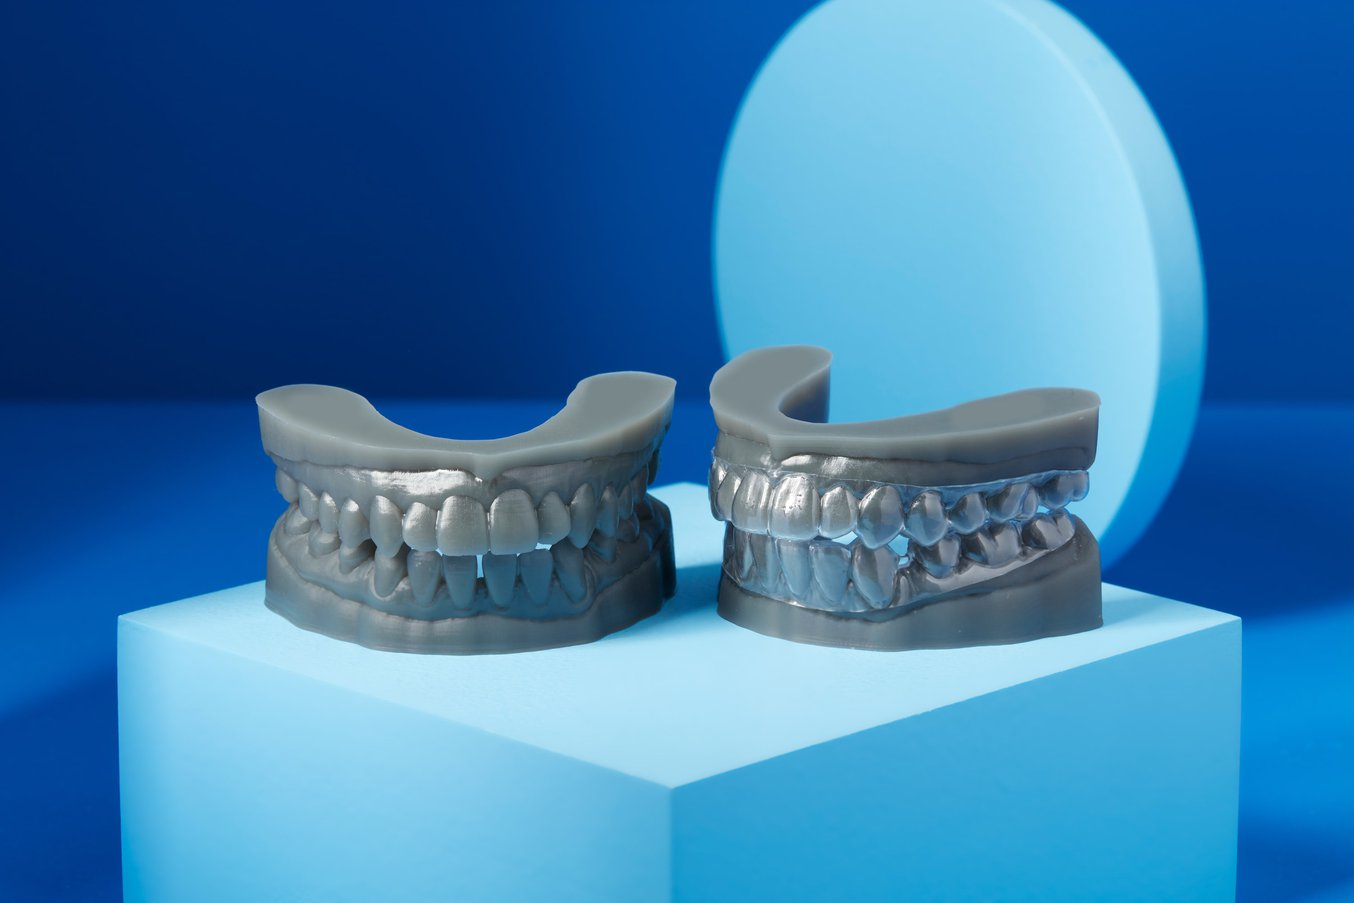
4. Prepare: Once the print finishes, wash, dry, and post-cure the printed parts. Once the models are ready, they can be used to create various appliances.
This simplified 3D printing workflow is more efficient than creating stone models, which involves many more labor-intensive steps. It takes a shorter amount of time to complete an intraoral scan, clean the mesh on CAD software, and send it to a 3D printer than it does to cast a physical impression, prepare a stone mixture, and pour, clean, and trim a stone model.
Step By Step: Making Models from 3D Intraoral Scans with Meshmixer
Meshmixer is a powerful free software that can be used to clean 3D scans and prepare them for printing. Dental professionals can not only use Meshmixer to optimize the mesh but also resculpt entire sections, stylize the model, and add useful features.
The Basics
Before we begin working on Meshmixer, it’s important to understand the basics.
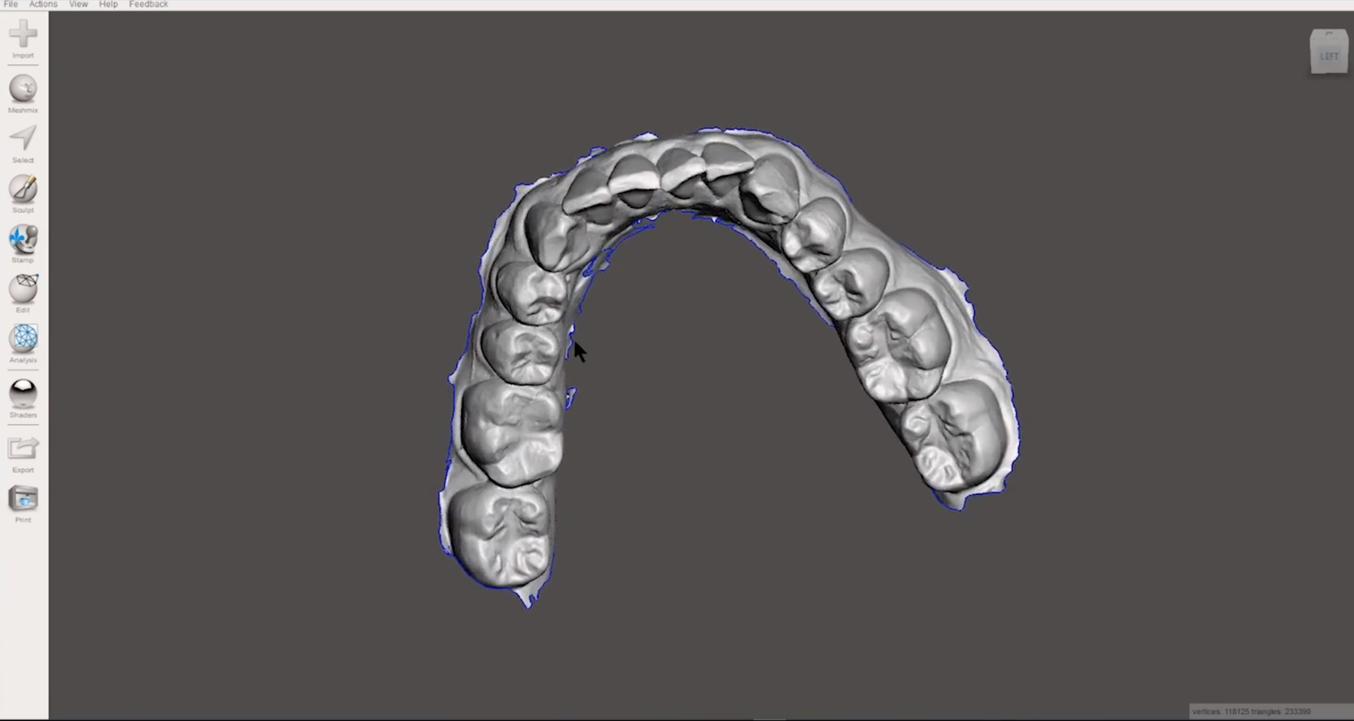
The software has two menus: one on the left sidebar, and one along the top of the program. The left sidebar menu contains the tools to clean your mesh, while the top menu performs administrative tasks such as export and save.
In many CAD programs, a 3D model is called a mesh. This is because the file data is stored as a network of interconnected points that form each surface. When this tutorial or Meshmixer refers to a mesh, that’s your model.
Here are a few tips and tricks for using Meshmixer:
- Use a three-button mouse. Performing certain tasks, such as moving the mesh and selecting areas to refine, is much easier with a mouse than a laptop’s built-in trackpad.
- Under View on the top menu, ensure that Orthographic view is turned on before you begin to ensure accuracy.
- To rotate the view of your mesh, right-click, and hold the model.
- If you make a mistake, undo your last action with Control + Z on PC or Command + Z on Mac.
- When exporting your model, make sure the file format is in STL Binary.
- To avoid confusion, keep each model in separate files.
- Always review your model before exporting it and look for irregularities and unrefined sections.
Quick Mesh Cleaning
If you want to produce a model as fast as possible, you can take the following steps to quickly clean your mesh:
- Click on the Select tool in the left sidebar.
- Hit Control + A on a PC or Command + A on a Mac to select the entire mesh.
- Go to Select → Modify → Smooth Boundary to quickly smooth out the unrefined edge. When done, click Accept.
- With the model still selected, go to Select → Edit → Extrude. Here, you will see two end types: Flat and Offset. Change the end type to Flat, it makes a smooth bottom that is easier to work with.
- This will apply an extrusion, or an external boundary, to the mesh. You want to ensure that the extrusion extends past the entire edge of the mesh. To fix this, drag the Offset sphere or type in a negative Offset range to achieve the desired thickness.
- Hit Accept. Now, you can send the file for printing by clicking Export.

Detailed Mesh Cleaning
If you want to create a smoother and more refined model, you can use two methods: Plane Cut or Select and Cut. Plane Cut is effective for removing large unrefined sections in a few simple steps, while Select and Cut is best for smaller sections.
How to Use Plane Cut
- Rotate your model so that the anterior is at the top, the posterior is at the bottom, and the unrefined edge of the scan is on the left. Ensure your molars are aligned.
- Click Edit → Plane Cut.
- Click and drag to draw a vertical line along the unrefined edge.
- Ensure the side of the mesh you want to remove is transparent and the areas you want to keep are opaque. Click the blue arrow in the middle of the mesh to switch sides if needed.
- Hit Accept. The plane cut will remove the selected edge.
- If you want to refine the model further, you can use the Select and Cut method.
- If you are happy with the model, smooth the boundary through Select → Modify → Smooth Boundary, then add an extrusion via the Select → Edit → Extrude process. You can export the model after this step.
How to Use Select and Cut
- Identify the area you want to refine.
- Go to Select. You will see the option for Brush Mode. Use the menu to select the size of your brush.
- Just off the side of the mesh near the area you want to select, hold and drag your mouse to activate the brush. Drag your brush along the area you want to cut off.
- Let go of the mouse near the area where your brush started. The area will be selected in orange.
- Hit Delete on your keyboard to remove the area. Repeat with each area you want to refine.
- Once you are happy with the model, smooth the boundary through Select → Modify → Smooth Boundary, then add an extrusion via the Select → Edit → Extrude process. You can now export the mesh.
Fixing Holes
You may encounter holes in the mesh while cleaning your image. You will need to fill these holes before you send the model for 3D printing.
Here’s how to do it:
- Click on Analysis → Inspector to view the holes. The tool will automatically identify the holes.
- You will see spheres pointing to holes in the model. One of these holes will be the large opening over the perimeter of the impression surface; do not fill this hole.
- Click the sphere pointing to the smaller holes to fill them in automatically.
3D Printing the Model
Once you finish cleaning the mesh, you can upload the refined model to the print preparation software of your 3D printer.
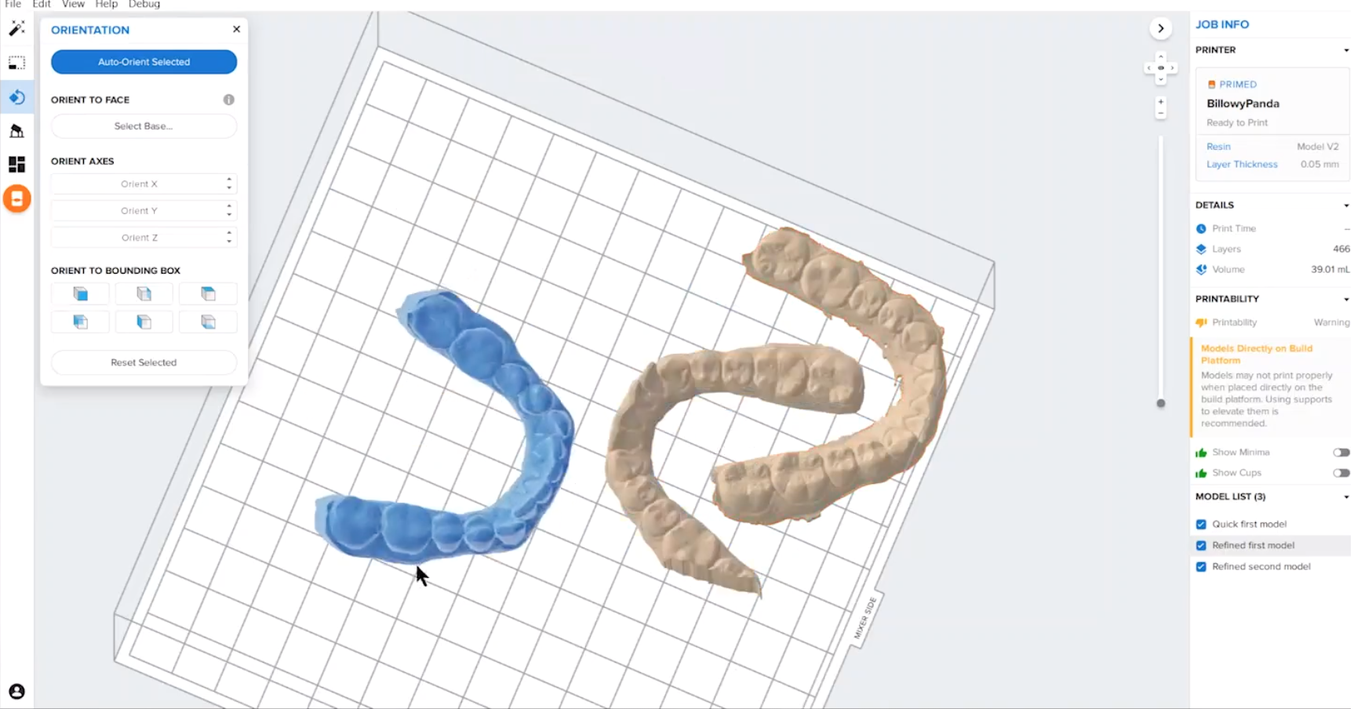
Here’s how to turn your 3D intraoral mesh into a printed model using Formlabs’s PreForm software:
- Export your model from Meshmixer as an STL Binary file, then open it in PreForm.
- On the left side menu, click Orientation → Select Base.
- Click on the bottom of the model to snap the model onto the build plate.
- Drag the models to arrange them on the build plate for printing. Prioritize your models toward the mixer side of the plate to expedite the process.
- Ensure your printer is ready and hit Print. Once the model is printed, you can wash, dry, and post-cure your model for its intended use.
3D printing your own dental models in-house can reduce costs and expedite the modeling process. While CAD software like Meshmixer may seem complex at first glance, any dental practice or lab can implement this process with short training.