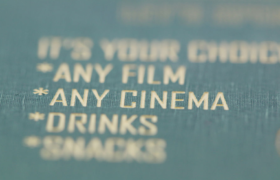
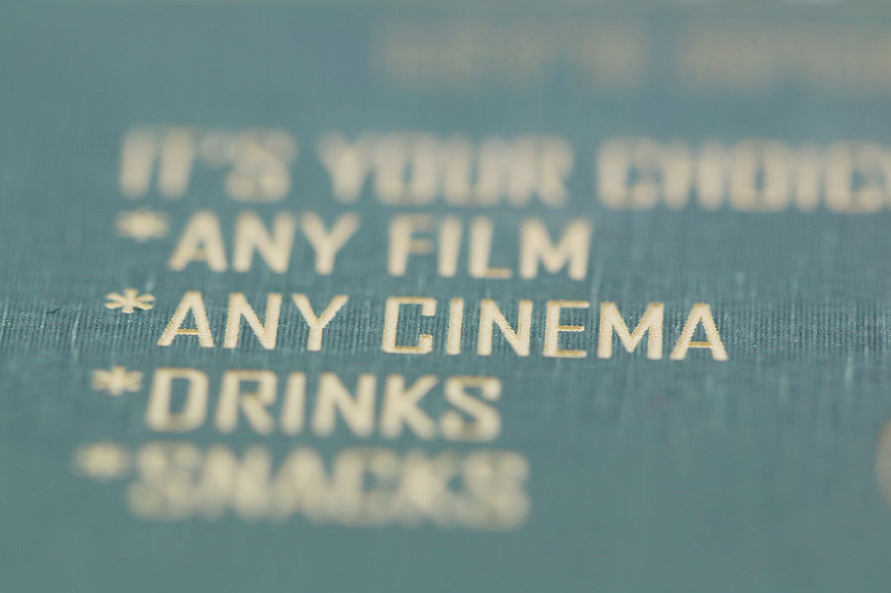
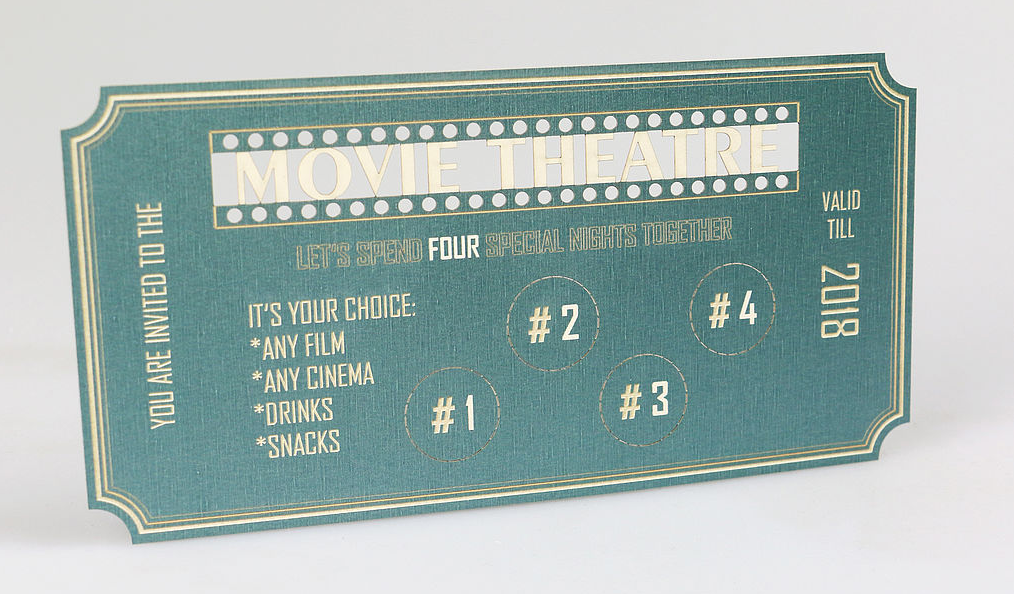
Paper is an exciting and ideal material for laser processing because it is extremely versatile, and can be laser cut and laser engraved for a wide range of projects. In the example below, we have shown several different paper processing techniques on a paper movie voucher, as well as listed the recommended parameters in the accompanying table.
For this application we processed “Aqua Silver” paper from the series Gmund 925 with a grammage of 290 g/m².
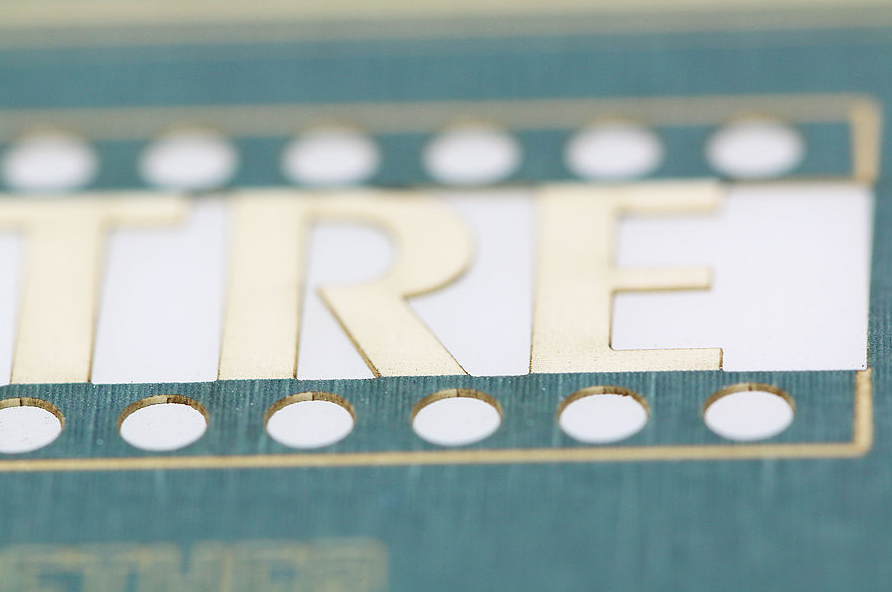
Deep laser engraving
To achieve deeper laser engraving results, higher power output is required.
Align the first engraving color, which in our case we used black. Then, under the parameter database, select the appropriate parameters for the color of paper that you are processing. Remember, if you are looking for deep engraving, utilize a higher power output accompanied with lower speed during processing.
Light laser engraving
There are several techniques that can create unique finishes with paper processing, and you can even bleach out the top layer of some paper types to create a luxurious effect. The process of bleaching out paper entails lightly laser engraving the material so that minimal material is removed.
Assign the next color for the surfaces you want to create, for our project we chose red. For light engraving, use parameters that process at a faster speed with a lower power than you might normally use.
Scratching
The scratching technique is suited for processing very fine markings and filigree.
Assign a hairline using a different color (we used blue) to contour the object. Select laser cutting as the process under the parameter settings, and laser mark the materials with a lower power output than the customary paper cut.
Engraving line
Similar to scratching technique, the engraving line is a process that allows for different thickness to be achieved, as defined by the parameter settings.
Assign a hairline to the object as we did with our desert blue. Under parameter settings, select a Z-offset of about 2-5 mm for the laser cutting process and tailor it accordingly to the line thickness that is desired. Utilize a power output similar to that used with the line scratching.
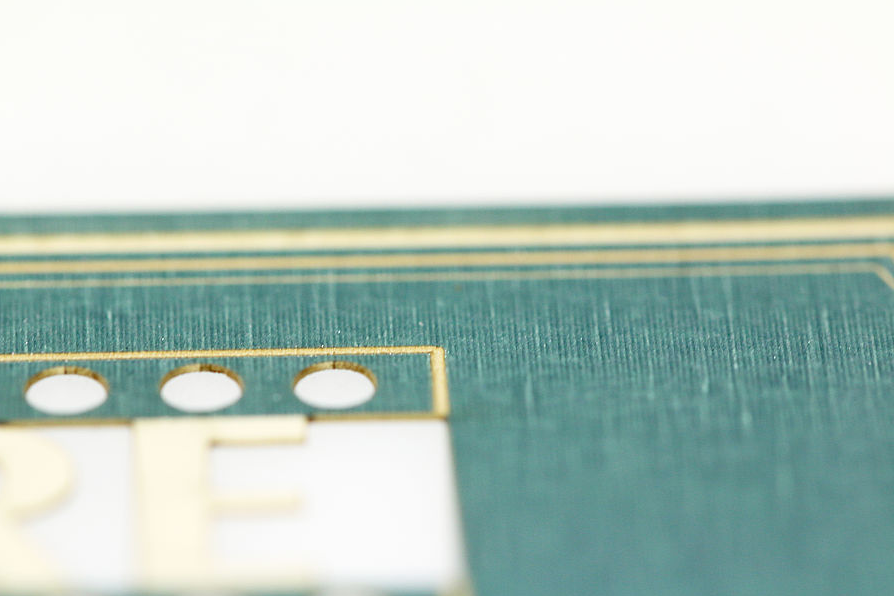
Perforation
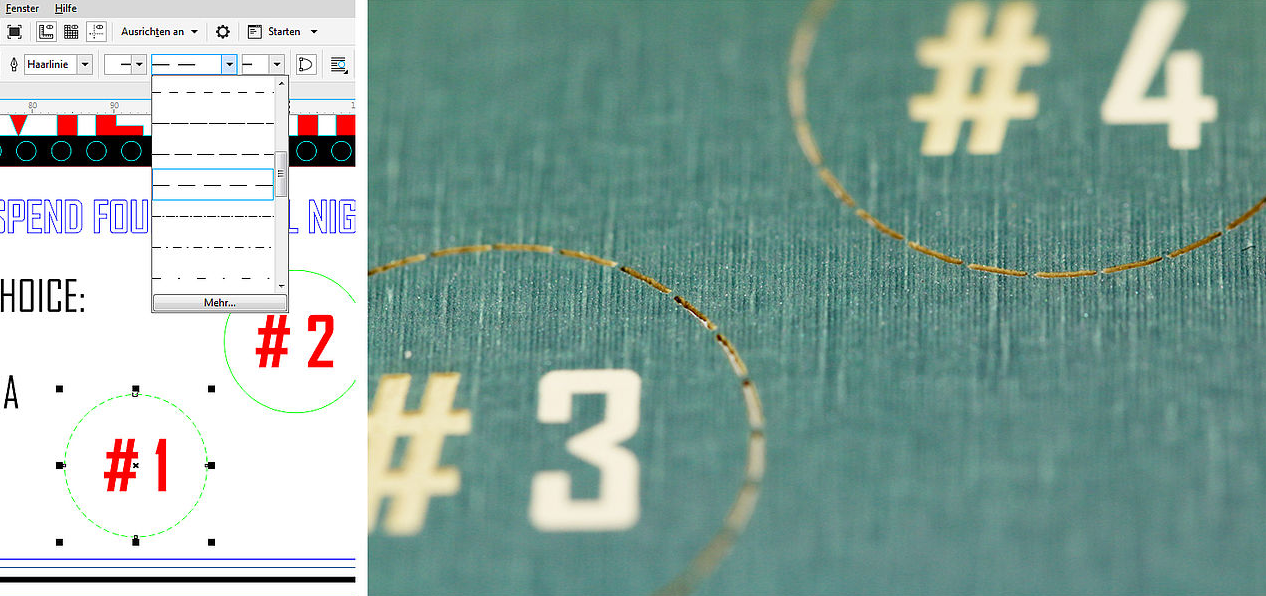
Perforation serves as a discontinuous cutting line, and portions of the card can also be separated using this technique.
To create a perforation, draw a cutting line as we did with cyan and convert it into a curve. Then, using the same parameter settings as used with filigree cutting, select a dashed line for the line style.
Filigree cut
You can also cut in a distinct filigree ornament, writing, or figure with the laser cutter by drawing a unique form with a hairline contour as we did with cyan for this.
Use a lower power output and speed than with the outer cut for the parameter settings.
Outer cut
A separating cut can be used when laser cutting out the card if there are no elaborate curves in the design. Assign a hairline of this similar to ours in green.
For straight laser cutting, up to 5% speed can be used depending on the length of the cut, and output power can be adapted as needed.
Printing adjustments
Using the following settings, send the job to the laser cutter and make sure to utilize color when screening to ensure all objects are processed.
We used a Speedy 360 with 80 Watt and a 1.5″ lens.
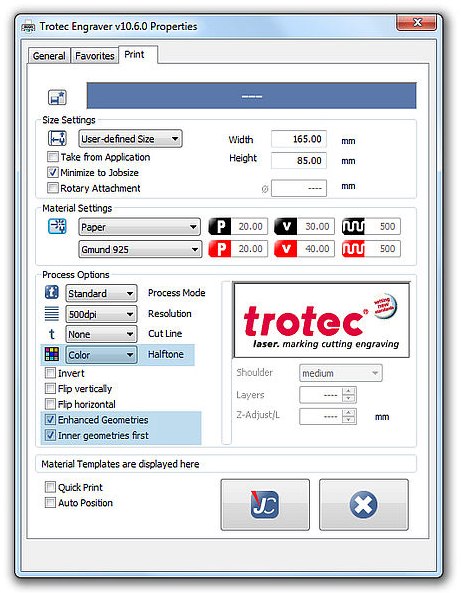
Print settings
| Process type | Resolution | Cutting line |
|---|---|---|
| Standard | 500dpi | none |
| Screening | Others |
|---|---|
| Color | Optimized geometries, internal geometries first |
Laser parameter settings
Next assign the parameter settings, and note that the parameters will change based on the type of paper used, as well as other variables such as type of laser cutter and available output.
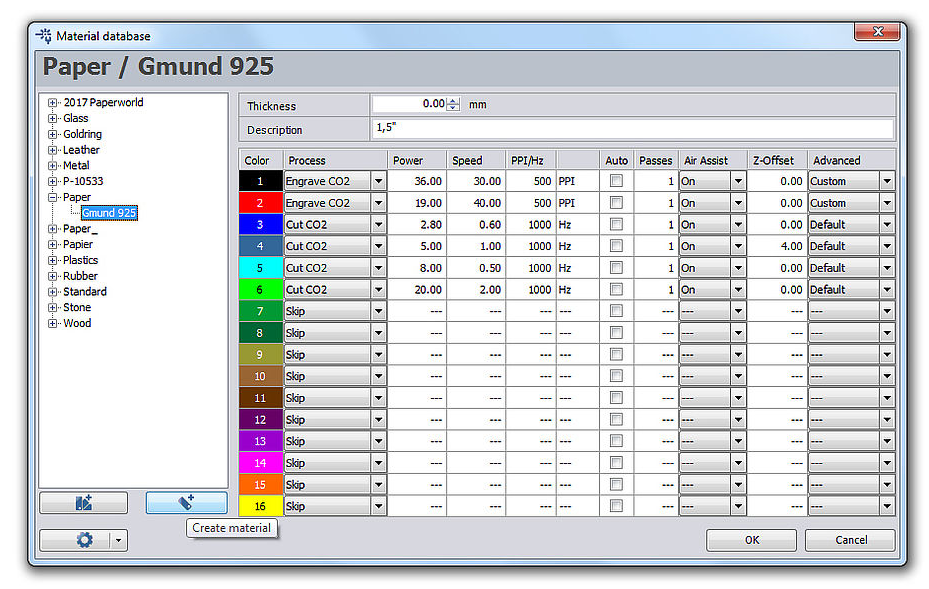
Tip: Test other papers and try out different settings in small areas that wont be needed later. Use our gray scale matrix for this.
Laser parameters
| Laser parameter | Color | Process | Power (%) | Speed (%) |
|---|---|---|---|---|
| Deep laser engraving | Black | CO2 engraving | 36 | 30 |
| Light laser engraving | Red | CO2 engraving | 19 | 40 |
| Scratching | Blue | CO2 cutting | 2.8 | 0.6 |
| Engraving line | Desert blue | CO2 cutting | 5 | 1 |
| Filigree cut/perforation | Cyan | CO2 cutting | 8 | 0,5 |
| Outer cut | Green | CO2 cutting | 2 | 2 |
| ppi/Hz | Passes | Air Assist | Z-Offset | Advanced |
|---|---|---|---|---|
| 500 | 1 | on | – | optimized quality |
| 500 | 1 | on | – | optimized quality |
| 1000 | 1 | on | – | – |
| 1000 | 1 | on | +4mm | – |
| 1000 | 1 | on | – | – |
| 1000 | 1 | on | – | – |
Inspirations
These techniques can also be used with different types of paper and materials.
Photoengraving can also be used to add a more unique and personalized touch to materials. Under the JobControl® print settings, select the process option “Photo” and halftone “Ordered Dithering.”
Caution: Other laser engraving techniques such as deep or light engraving cannot be used in combination with photo engraving or the halftone “Ordered Dithering.” The colors used for this would be screened and converted to grayscale, however the settings do not affect the colors of the cutting lines. If accommodating all techniques in the card is desired, simply send the image individually and adjust the markers for precise placement.