If your 3D printer enclosure lacks luster, or you don’t have one at all, learn how to make your very own Ikea 3D printer enclosure!
An enclosure is a structure that surrounds your 3D printer, and it is intended to keep heat, smells, and noise contained while keeping the drafts out. This way, you can print some of the more temperamental filaments, like ABS, without cracking or warping. Additionally, you can upgrade your enclosure to have all kinds of lights, sensors, and other modifications.
Building up your own modifications may not look as pretty as buying prefabricated solutions, but regardless of where you fall on the function-form spectrum, there are lots of options for those who are willing to build an enclosure for themself. In this article, we’re going to focus on one particularly popular option: The Ikea Lack enclosure.
Not Exactly a Walled Garden
If you’re wondering why more printers don’t come with enclosures, the partial answer might just be patents.
Stratasys was one of the first pioneers in 3D printing back into the 80s, but due to their overwhelming number of patents, commercially-available 3D printers remained out of reach of the general consumer until several key patents lapsed in the early 2000s. Many of these patents remain in place, including some that feature enclosures. However, several important patents are set to expire in the mid-2020s, which we’re hoping will allow for some amazing innovation.
Now that you understand the basics and some of the backstory, let’s move on to how to make your own!
Materials
The key components of an enclosure are fairly simple.
- The iconic Ikea Lack table (of course)
- Plexiglass
And, depending on your build, you’ll also need to find the following:
- Various 3D printed parts
- Accessories, such as lights or filament boxes and guides
Given this small list of components, we think the Lack is one of the most versatile designs for enclosures out there! Before we take a look at some great builds, we’ll go over the basic steps and accessories you might want to include.
Order of Operations
Thanks to the simplicity of the design, building a Lack enclosure is a breeze! To give you an idea of the process, here’s an overview of the steps:
- Print the parts and buy the materials.
- Install any accessories (like lights, smoke detector, and so on, if you choose to have them).
- Attach the legs to the tabletops.
- Carefully measure the areas for where the plexiglass will be, accounting for accessories and wires.
- Cut the plexiglass.
- Affix the plexiglass to the legs.
- Route the wires from your printer to the PSU (if you have the PSU outside of the enclosure, which is recommended).
- Manage your cables for a clean and tidy printing station.
While the specific steps for making your enclosure will be different based on which design you choose, these basic steps remain the same. The trickiest part will likely be cutting the plexiglass if you don’t have a laser cutter or glass cutter handy. Although plexiglass tends to be more forgiving than glass, it’s still a challenge to cut if you don’t know how to do it. The most common issues you might face are cutting it to the wrong size or shattering its edges.
Besides dealing with the plexiglass, the rest of the assembly should be pretty straightforward. Now that we are familiar with the basic steps, let’s have a look at the different options available to us!
Accessories
As every maker knows, customization is everything! Here’s a list of accessories that you might want to add to your enclosure to give it that extra panache when it comes to printing, safety, replicability, and usability.
- OctoPrint: Allows you to print on-demand and monitor your prints from anywhere in the world (with a stable internet connection, of course)
- Lights: Illuminate your enclosure to see prints better
- Active ventilation: Safely print filaments that off-gas toxic materials. This is a particularly good idea if you work near your printer while it’s printing
- Thermometer: Know the exact temperature in your enclosure; make sure that you aren’t reaching the glass transition temperature, which can warp your prints
- Filament guide: Feed your filament better and decrease the risk of jams or clogs in the hot end
- Filament dry box: Easily print hygroscopic materials; keeps your filaments usable without having to dry them
- External PSU holder: Keep your PSU cool so your printer lasts longer
Examples Makes
Since the Lack is such a popular basis of an enclosure, there are many great examples of what makers have done. Let’s take a look!
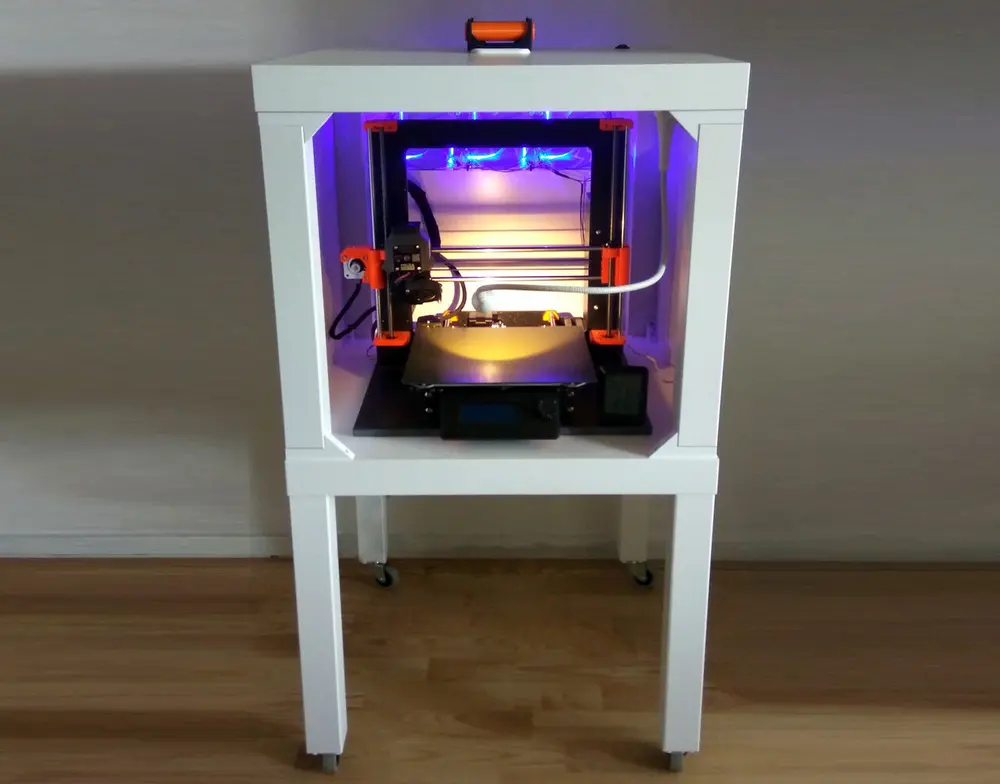
Creality
- Lights
- Smoke detector
- Taller than other versions, conserving desk space
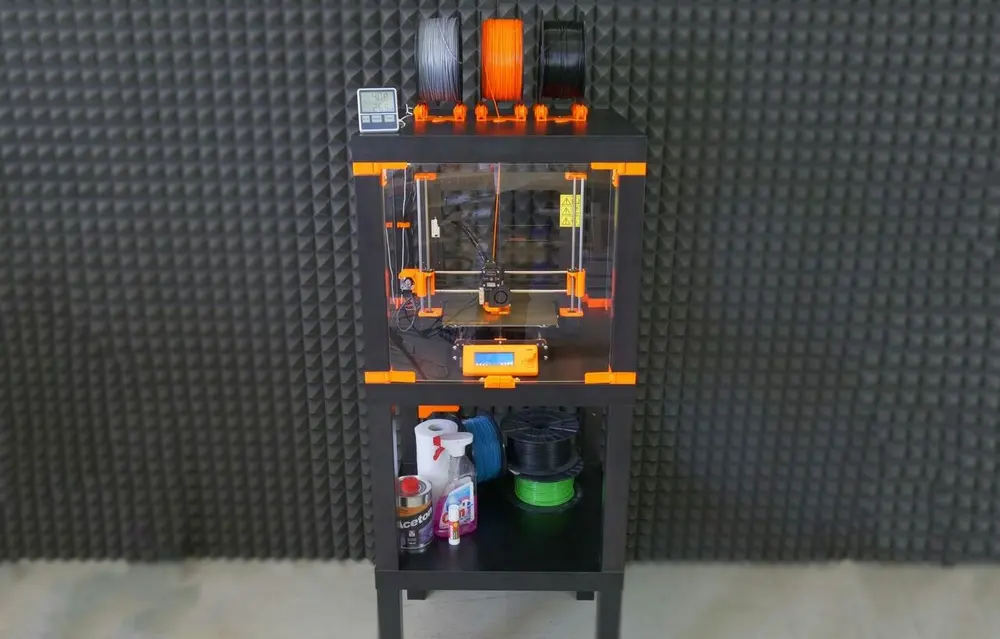
- Lights
- Smoke detector
- Shorter than other versions, perfect for shorter areas or under shelves
- One-spool filament holder
- Lights
- One spool filament holder
- Active ventilation
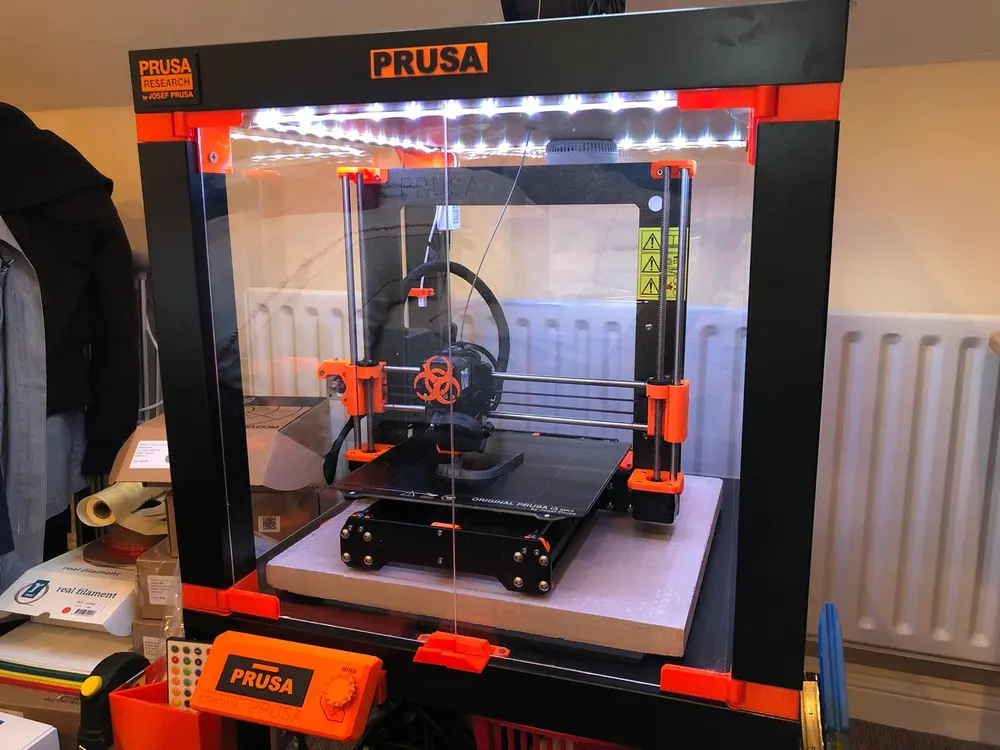
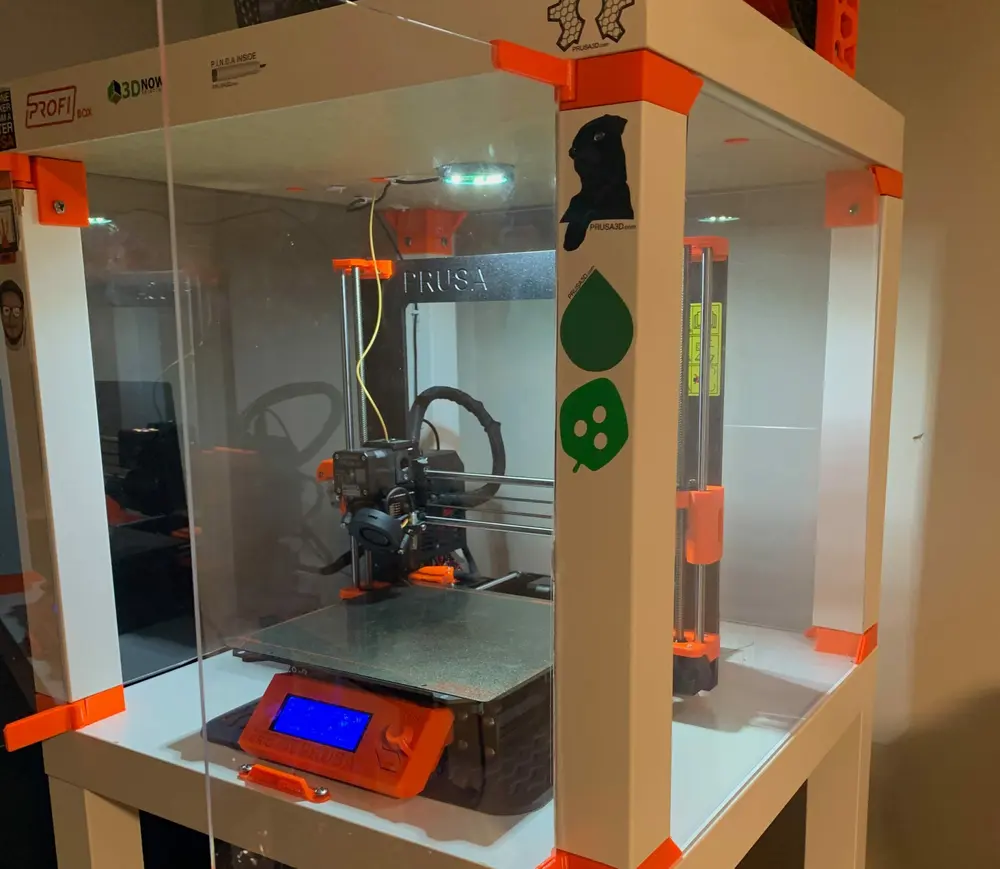
Prusa
- Lights
- Smoke detector
- External PSU holder
- Three-spool filament holder
- Top open design for easy access to the MMU
- Five-spool filament holder
- RBG lights
- Top open design
- Internal filament holder
Anycubic
- Lights
- Multiple doors for easy entry
- Internal filament holder allows for storage on top and under the printer
Source: Ikea Lack 3D Printer Enclosure: How to Make Your Own | All3DP