Printing gigantic or life-sized models in one go is almost impossible for most 3D printers. But with these techniques, you can print them no matter how big or small your 3D printer is.
So You Want to Print Big?
Regardless of whether you want to scale up your model or bring it to 1:1 life-size, you might encounter a hard physical issue: the build volume you have just isn’t big enough.
Don’t be deterred if you’ve maxed out your axes, as even massive projects can be made with a standard desktop printer. Simple techniques, such as splitting your models, cutting them up, or editing them directly in a 3D modeling software, will make them printable on most 3D printers.
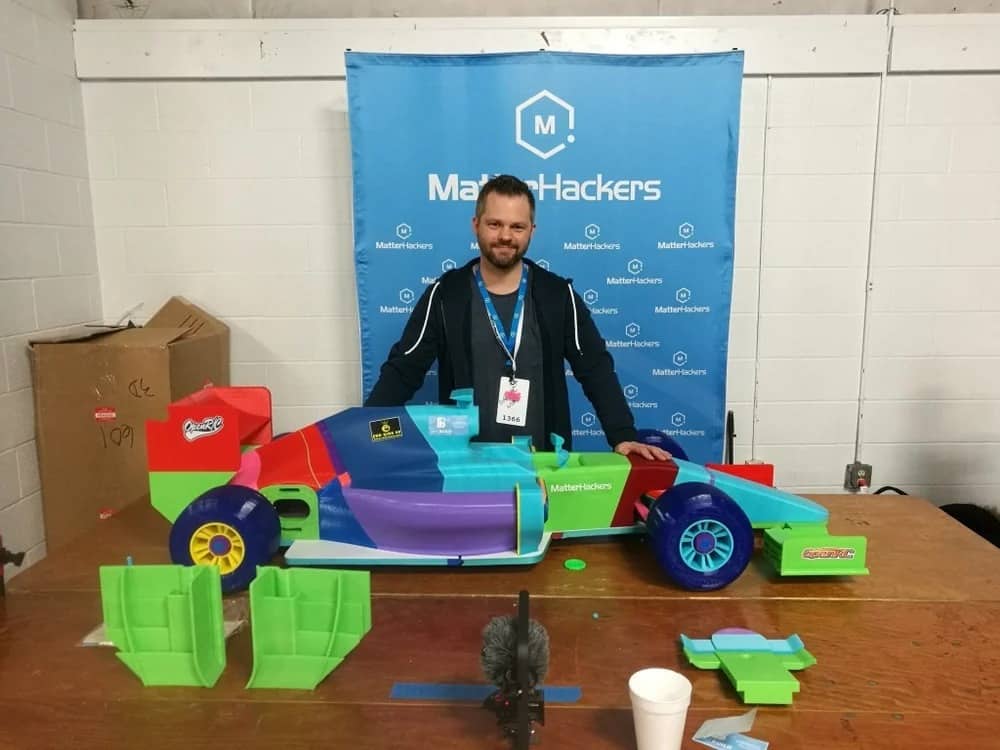
Of course, if you really want to nail your project, you can always use a 3D printing service, many of which offer large-format printing and professional operators, like FacFox.
Finding Readily-Split Files
When you’re looking for your favorite scale model online, try to find a readily-split model. Many designers upload these alternate versions if they know that most printers aren’t big enough.
A split model is an uploaded set of STLs ready to be printed part by part instead of all in one go. Most of these models go together perfectly when assembled, and some are even cut into pieces because it helps with printability. These files will save you time since you don’t have to split the files yourself.
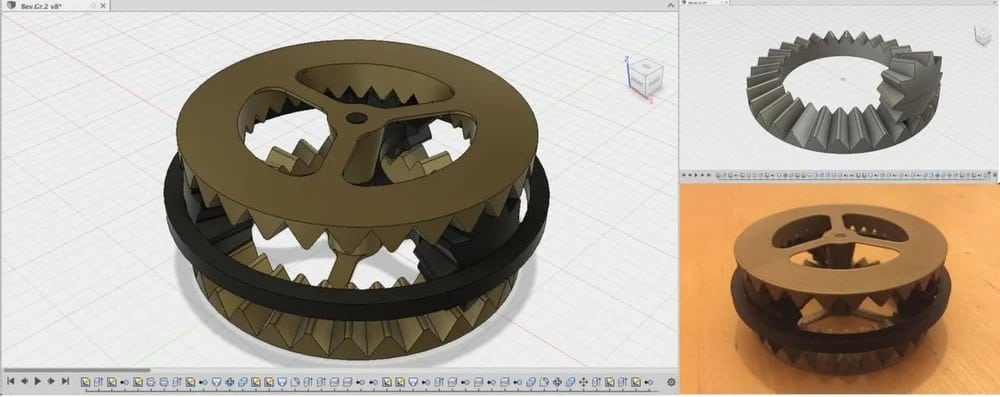
Separate Multipart STLs
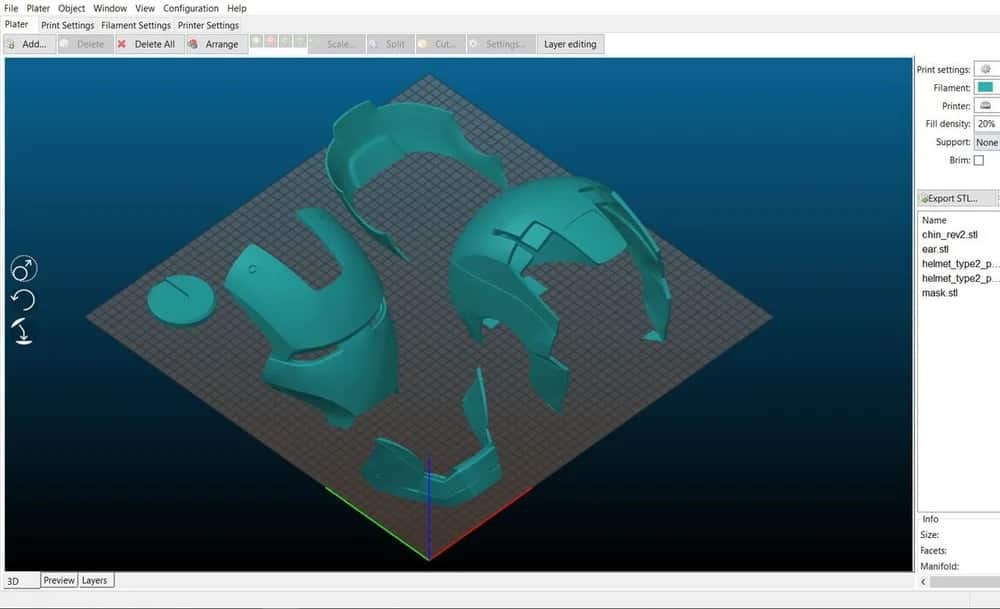
Some STLs uploaded online are modeled as multipart STLs. These kinds of files are essential in multicolor or multi-material printing, but they’re useful in printing large models, too.
For this task, you can use Slic3r, a slicing platform that is capable of separating multipart STL files into its individual parts.
In Slic3r, first, open the multipart STL. From the toolbar above, select the “Split” button, and your multipart STL will be separated into multiple STLs. You can now slice each part one by one after deleting the others, or export each part as its own small, printable STL.
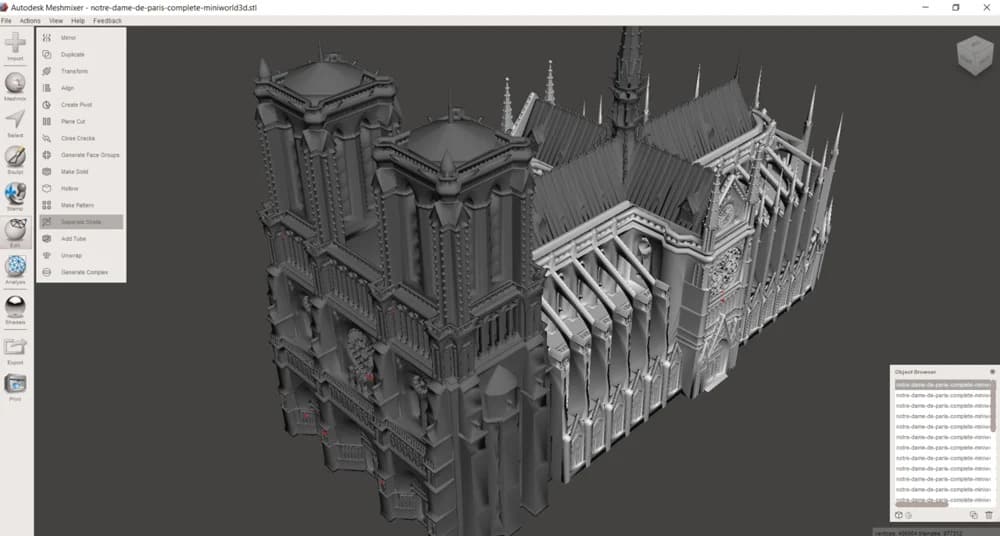
Autodesk Meshmixer is yet another tool you can use to separate these multipart STLs – all you have to do is use the “Separate Shells” command.
And if, for some reason, desktop tools won’t cut it, you can use this simple javascript page made by Thingiverse user Alexander Pruss. It can separate multipart STLs into single-part STLs. Simply open your multipart STL on the page and it will display some information about the STL. A checklist will then be available to select the STL files you need. Then hit “Download” to produce your single-part STL. Take note that you can only download one part each time you hit the button, as selecting multiple will combine them into a single STL again.
Split Your Files with Plane Cut
If the model you want to print isn’t available in different parts, you can split the STL file yourself. This is possible with a common feature called plane cut, which is available in most popular CAD programs. Here’s how you do it in some popular software:
- Autodesk Meshmixer: To create a plane cut in Meshmixer, import the STL file, and then click “Edit.” A menu will show a list of commands, including “Plane Cut”. Once “Plane Cut” is selected, you can either readjust the position of the cutting plane by clicking and dragging the arrows along the axes or rotating the plane by clicking and dragging the arches near the arrows. Aside from moving the plane or rotating it, you can also create the plane with which you want to cut the model by drawing a line on the model where the cut is supposed to be placed.
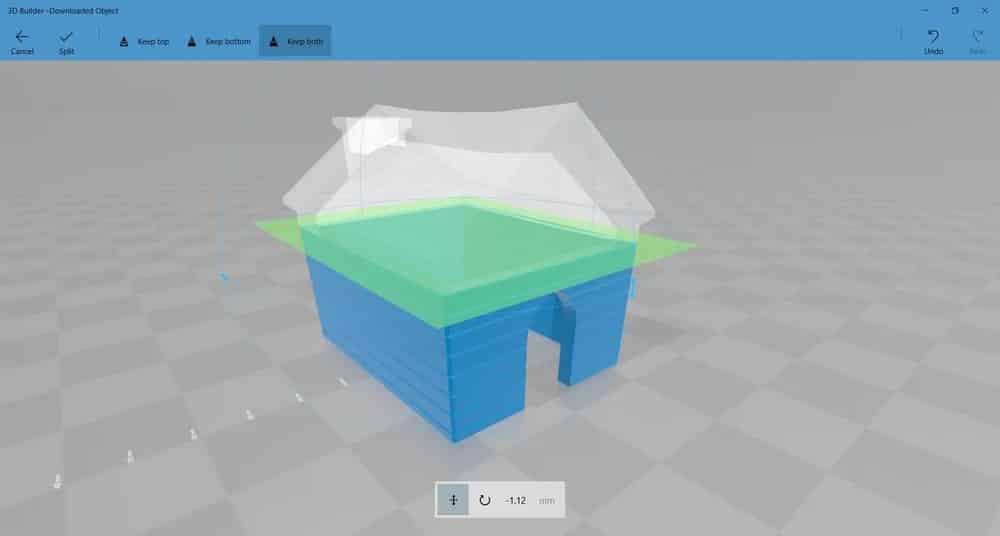
- Windows 3D Builder: Open the STL in Windows 3D Builder. Under “Edit”, select the split function to show the cutting plane in the model. You can rotate the cutting plane at any angle along the three axes and move it to cut at the desired position. Moreover, a fine-tuned cut is possible as the rotate and move tools can be adjusted precisely in degrees and millimeters, respectively.
- Slic3r: The cutting function in Slic3r is a quick cutting tool, but only works parallel to the XY plane. Selecting the “Cut” command allows you to drag the cutting plane along the Z-axis.
Albeit a simple task, make sure to cut the model strategically and consider some factors: First, make sure the slice will make printing the models easy so that you may lessen or eliminate supports when printing. Also, try to locate the slicing plane in the model where the seam will not be so obvious once the model is glued together.
Once printed, use an appropriate adhesive to join the pieces into a single model. The strength of the model will rely on the adhesive you use. If you worry about aligning those separated parts, there’s a quick solution for that, too.
Creating Keys and Joints
Most major CAD software allows you to use simple shapes to manipulate 3D designs. To make assembly easier, you could model pegs and holes in your parts, which will help them align and fit together when the time comes.
Another popular method for joining parts is designing a strategically-placed 2 mm hole in your parts, then inserting a short length of filament to align them before gluing them together. But if you’re going for a stronger part, you’ll want to use traditional joints and keys, such as those used in woodworking. If you’re interested in creating these, you can refer to this tutorial from Matterhackers.
The use of other materials, such as metal rods, screws, or bolts to fasten parts is also possible, especially when the joints need more strength. This could be a must if you are creating props or functional parts.
Modify with CAD or 3D Modeling Software
When you have the chance to access raw files of the model and not just the STL, you can use several CAD and 3D modeling programs to edit the model.
Some designers include the original files which can be accessed by the community. These are common for models that are customizable. Also, you can check out some CAD file download sites as well for an abundant stream of original design files.
The only problem with this is file compatibility between CAD programs. Not all programs are able to edit all file types. If possible, try to find a STEP or IGS file of the model you want, since they can be accessed with most CAD programs.
Bonus: Additional Tips for Fastening and Finishing
Once you have split, printed, and built your model, finishing it is crucial to the final look. Sanding can be done to remove the excess adhesive that sticks out of the bonded area. Also, this can smoothen any slight misalignment caused by gluing the model together.
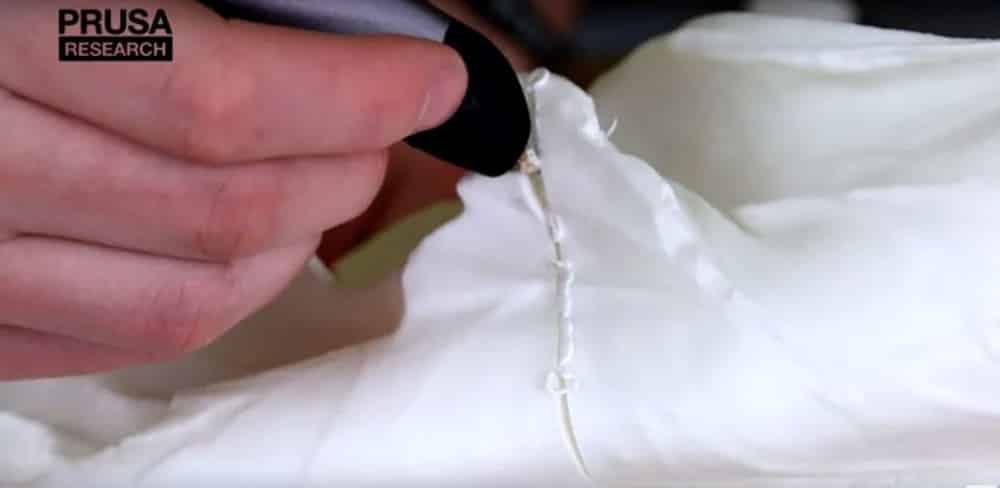
If gaps are present between the split parts, it’s possible to use a 3D pen to melt the same filament and run through the gaps. But if you’re planning to paint the model, putty, fillers, and other adhesives can be used, instead.