Whether you’re trying to choose the best file format for you, design your piece, or upload your files to be 3D printed, below are some tips to ensure everything goes smoothly and you receive your 3D prints as quickly as possible.
3D File Formats
i.materialise supports a large number of file types. For some, we can provide you with a price online, and for others, our support engineers will handle your request. If time is of the essence, we suggest that you select a file type for which we can generate an online price. If you decide to use an offline format, your files can be sent to us as .zip or .rar files via our upload link, or alternately, you can email them to us. If we have any problems opening your files, we’ll contact you.
[table type=”striped_minimal”]
[trow]
[tcol].3DS[/tcol]
[tcol].ZIP[/tcol]
[tcol].STL[/tcol]
[tcol].RAR[/tcol]
[/trow]
[trow]
[tcol].IGS[/tcol]
[tcol].OBJ[/tcol]
[tcol].PLY[/tcol]
[tcol].WRL[/tcol]
[/trow]
[trow]
[tcol].FBX[/tcol]
[tcol].3DM[/tcol]
[tcol].MAGICS[/tcol]
[tcol].MGX[/tcol]
[/trow]
[trow]
[tcol].STP[/tcol]
[tcol].STEP[/tcol]
[tcol].PRT[/tcol]
[tcol].ZPR[/tcol]
[/trow]
[/table]
STL Export
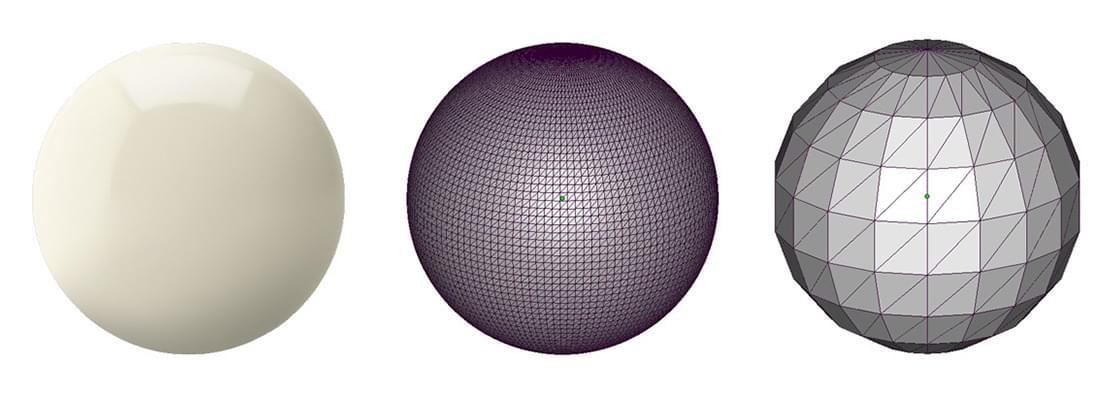
The 3D modeling software that you use to create your design may offer you a way to export it to .stl. STL stands for standard triangle language and means that your design will be translated into triangles in a 3D space. Not all modeling software, however, offers this approach. It may instead provide a description of your design as a mathematical function. For example, with most CAD software, a sphere is described as an object with a specific diameter or radius. With STL, your sphere will be described as a composition of triangles.
Unit Size
Currently, you can upload your designs in either millimeters or inches. Please be careful that you select the correct unit and that your model is sized accordingly. Once your file is uploaded, you will be able to check the global dimensions of your design in the model snapshot of the order page.
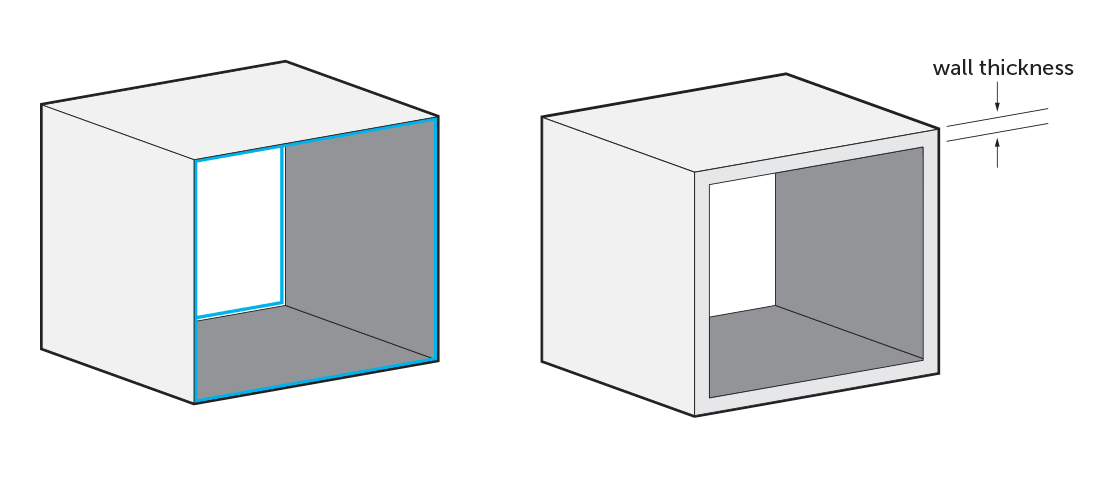
Wall Thickness
It’s very important that every surface in your 3D file has been assigned a wall thickness. Virtually, a surface can be designed without a wall thickness, but in order to have your design physically printed, wall thicknesses are needed. Wall thickness refers to the distance between one surface of your model and its opposite sheer surface. Many printing problems can be traced to surface issues.
Below is an overview of the most important ones:
-
Thin Parts
For every material that we feature on our website, we provide a minimal wall thickness. The wall thickness is related to the printing machine’s resolution, its process, and the strength of the material itself. We suggest that you stick with our recommendation, as while some items can still be printed with smaller thicknesses, these parts will likely break when removed from the machine or during shipment. -
Zero Thickness
As mentioned above, all walls need to have a thickness. It’s impossible for open surfaces to be printed. Make them solid by adding wall thicknesses to your design or closing the gap between the open surfaces.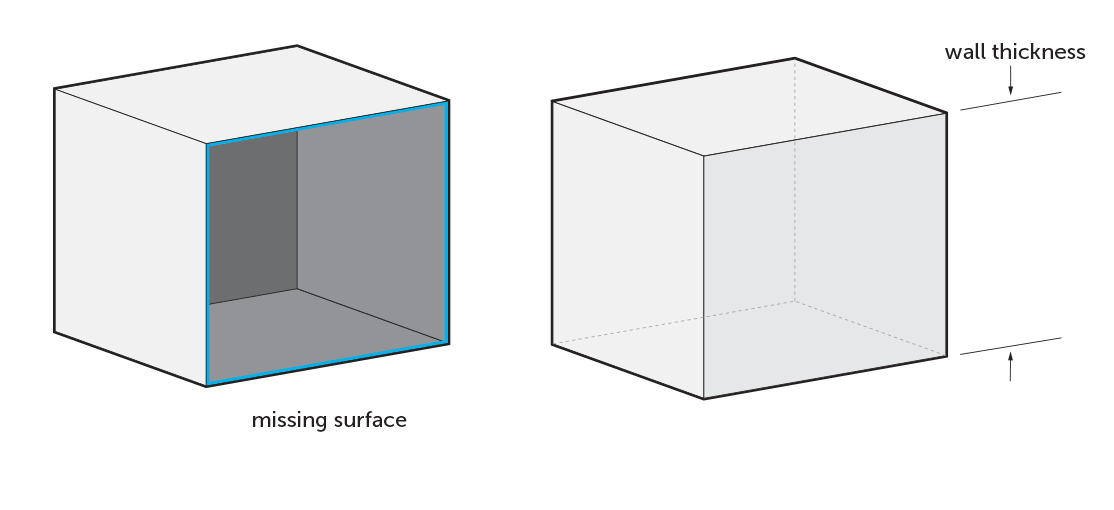
-
Gaps between Surfaces
Sometimes your model isn’t entirely closed because the different surfaces are well attached to each other. These so-called gaps between the surfaces prevent your model from being watertight. The term water tightness is referred to because your model would “leak” because of these gaps. Close the gap by welding or stitching the surfaces together in your 3D software program or create a surface in between.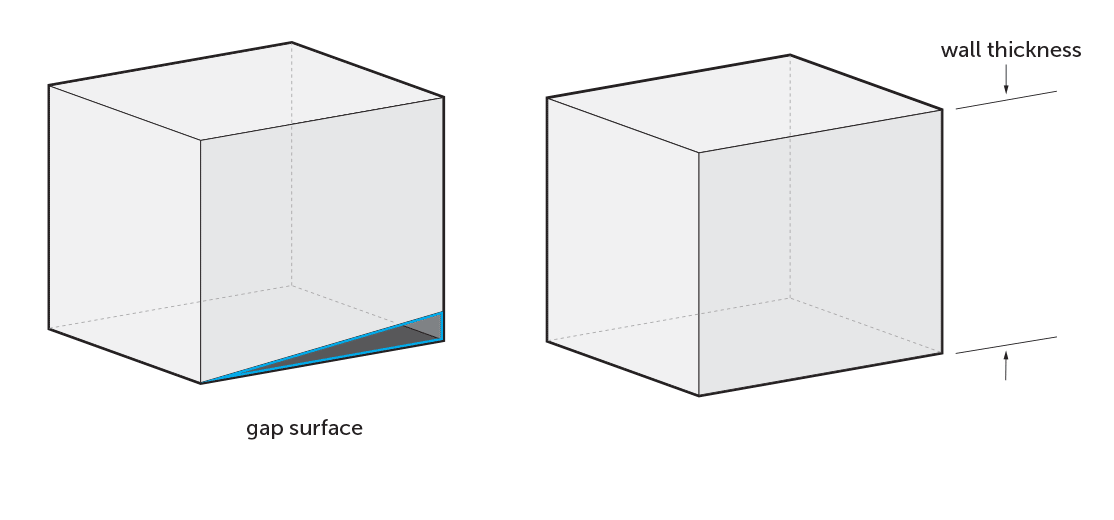
-
Touching Surfaces
If you have a design that’s built up from different solids or volumes, you need to make sure that these different elements don’t just touch but actually intersect (with 0.01 mm or more). With touching, rather than intersecting surfaces, different solids and volumes won’t be printed together correctly. Below is an example of how to solve the problem of touching surfaces, (on the left is the original design, and on the right, the improved one).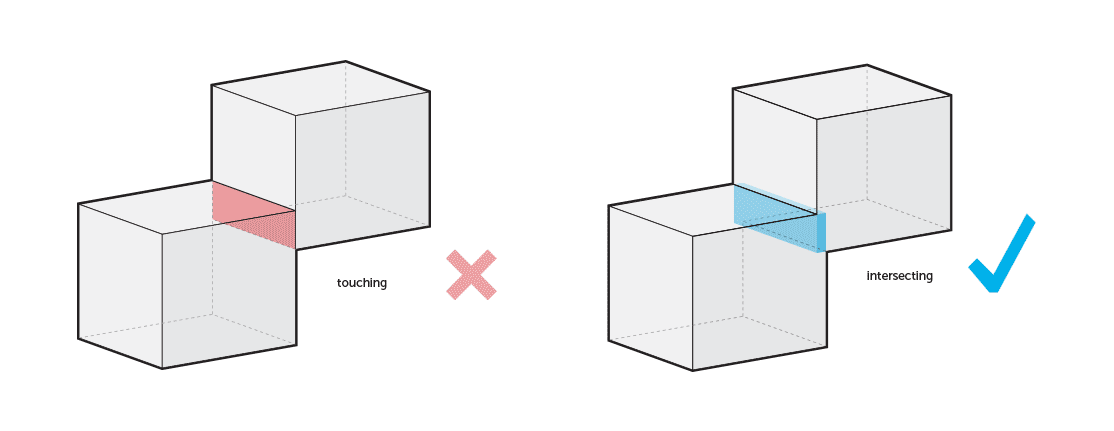
-
Self-intersecting Surfaces
Sometimes surfaces self-intersect due to bad sweep construction and other rail operations in your CAD software. The result is that one surface is sticking through another, and it is not possible to tell which is on the outside and which on the inside, causing the wall thickness to become negative. This negative volume can’t be printed.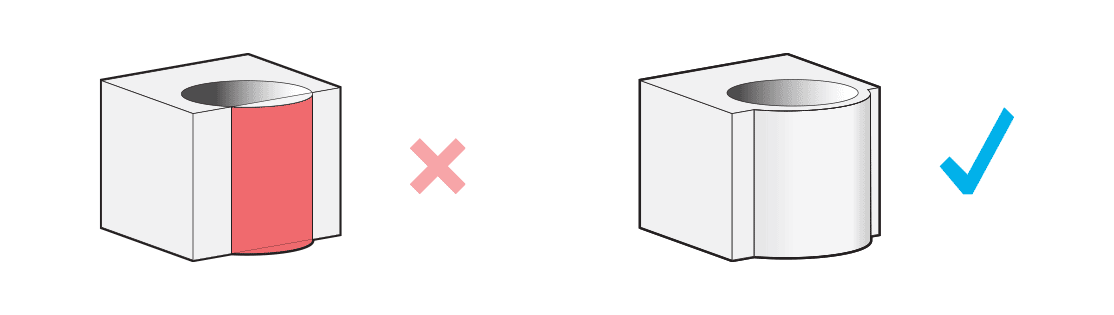
-
Double Surfaces
Sometimes, construction surfaces can end up in your final design. These double, overlapping surfaces can cause problems when your design is being produced.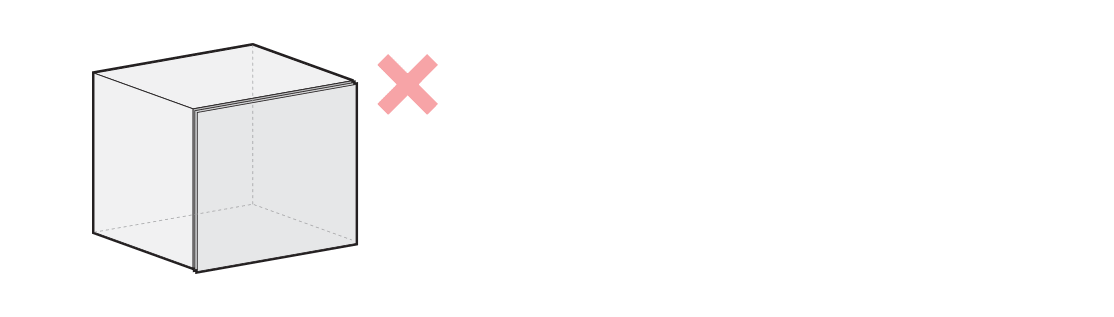
Add a Comment
You must be logged in to post a comment