
What Is PolyJet Multi-Color?
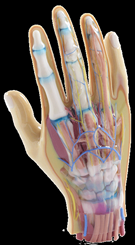
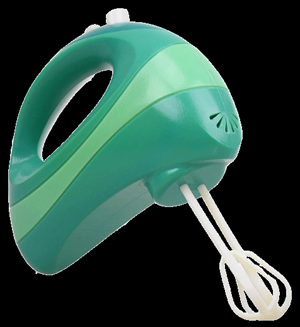
PolyJet (Rigid) Multi-Color allows you to print models with full color, including gradients, textures, transparent components and opaque components.
There are three file formats or workflows that multicolor PolyJet machines can read: Shell-Based File Format (Multiple .STLs), VRML File Format and GrabCAD Print. These file formats have different requirements and color application methods.
Shell-Based File Format (Multiple .STLs)
If the model you wish to print is separated into shells (different parts for one assembly), you can use a shell-based file format that allows you to assign different colors and textures per shell.
With this format you are free to choose the colors and level of transparency.
Make sure that each of the file names are appended with the associated RGB color code from the RGB Color Calculator.
Once the RGB color code for an .STL shell is determined, it should be added to the file name.
The shell-based file format is best for designs that incorporate Vero and those that include distinct colored sections as opposed to gradients or blending.
VRML File Format
Virtual Reality Modeling Language (VRML) is another standard file format (with the extension .wrl) for representing 3D interactive graphics. It provides the capability to apply colors and texture to a model, enabling it to be 3D printed with those textures.
External modeling software, such as Photoshop or CATIA are needed to design a VRML file. With this software you can either create the model or import it from other CAD software, and then apply the textures and colors before uploading the file to Stratasys Direct Manufacturing to print.
Texture Mapped Files
When ordering a texture-mapped model, you will need two files: a VRML (.wrl) file and an image file with the texture or images included. The image file resolution should be at least 600 DPI. Lower resolutions reduce print quality and higher resolutions will automatically be lowered to 600 DPI by PolyJet Studio.
Texture-mapped models are essentially “wrapped” with the texture in a process called UV mapping. For good printing resolution, make sure the UV mapping size matches the model size.
Designating Color in a VRML
There are four different ways you can assign color in a VRML file:
1. Color per object, mesh or shell:
The first is color per object, mesh or shell, in which you assign each component of an assembly with a solid color (usually referred to as diffuse color or material color).
2. Color per face:
Next is color per face, in which you assign each triangle or face of the model a distinct color. A face can be anything from one triangle in a mesh to as many polygons as you select.
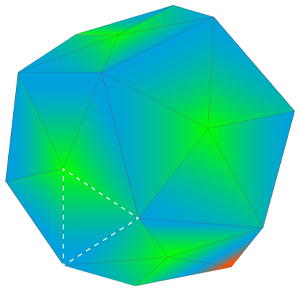
3. Color per vertex:

The third way you can designate a color is by assigning a different color to every vertex of every triangle in the design file. Each color value gets interpolated across the mesh. Note, the quality of the color is a result of the model resolution.
4. Color by texture / UV mapping:
Finally, you may also assign color by texture, or UV mapping. This is the process of adding an image or graphics to a 3D geometry. Color information is stored in a 2D image file, which is related to the coordinates of the mesh. This type of file shows the most detailed color information.