Whether you are a BJD veteran or a Mecha Musume enthusiast, the “Eyes” are the ultimate test of a custom build. We’ve seen a massive shift from traditional hand-painting to high-tech digital workflows.
To help you choose the right path for your next project, here is the definitive breakdown of the three types of eye technology:
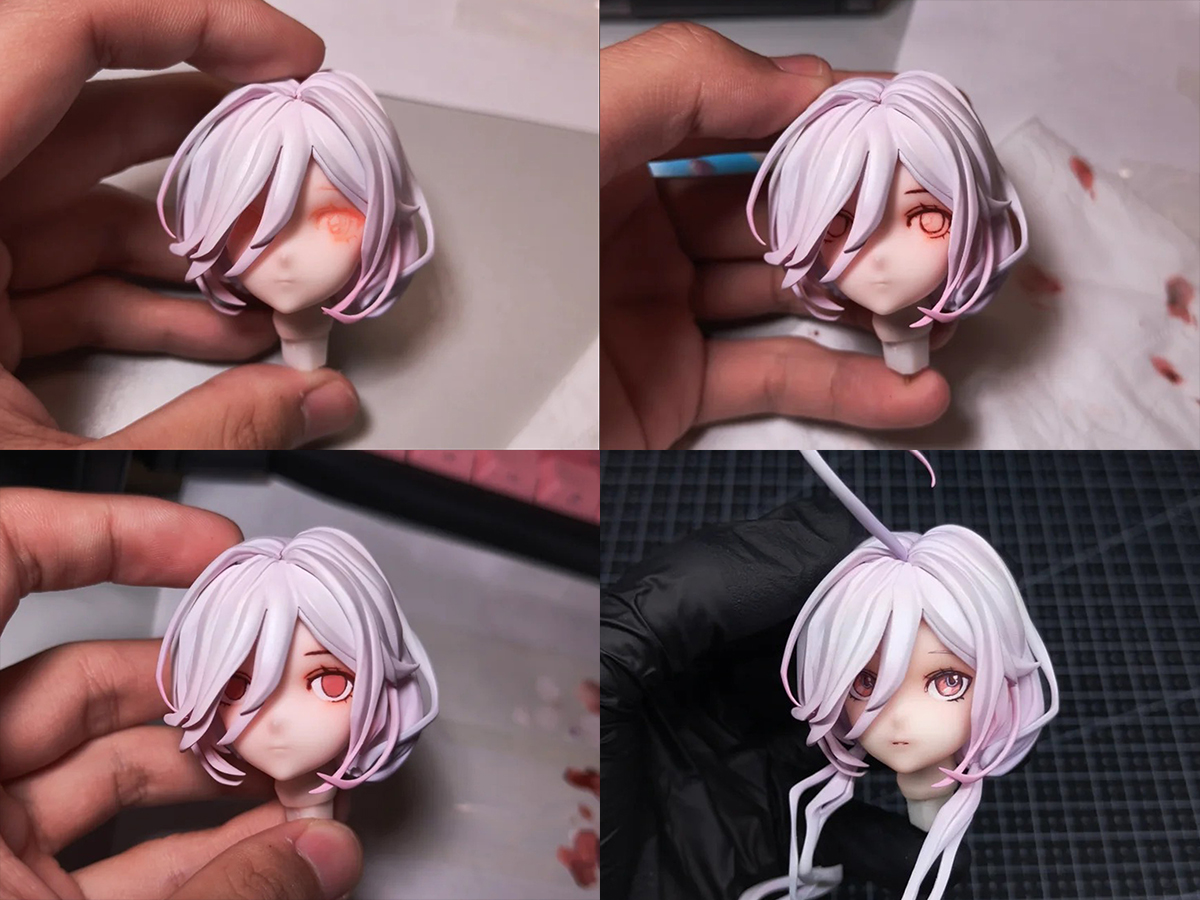
Type 1: Surface Application
The eyes are integrated directly onto the surface of the faceplate. There is no separate eyeball part.
Hand-Painted
The traditional “old school” way. Artists use lacquer pens and airbrushes directly on the resin head. It requires elite steady-hand skills and multiple layers of clear gloss to create depth.
Water Slide Decals
The industrial and DIY favorite. High-resolution pre-printed decals are applied to the eye area. It’s cost-effective for mass production and ensures perfect symmetry for anime-style characters.
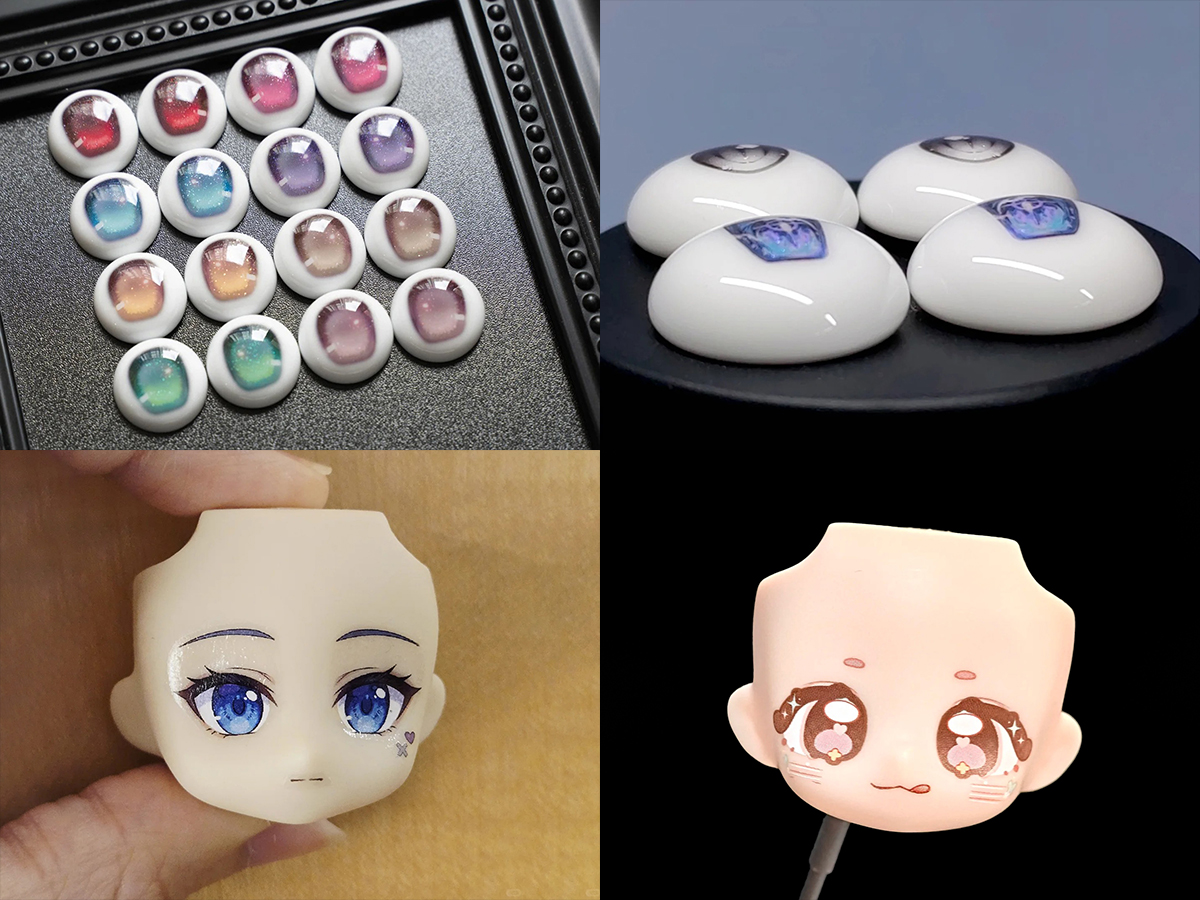
Note: Successfully mastering water slide decals is all about layering and patience. Here is the ultimate pro-flow for a durable, studio-quality finish:
-
Preparation: Start with a thick coat of matte varnish as a primer to prevent staining. Trim your decals with curved scissors for precision.
-
The Application: Soak decals for 20 seconds. If they curl, use a large water droplet to “float” them onto the face.
Pro-tip: Position your doll’s wig first to align the eyes with the bangs. Keep the surface wet while using tweezers to micro-adjust; only apply decal softener once the position is perfect, as it locks the film instantly. -
Perfecting the Fit: Roll a damp cotton swab from the center outward to flatten edges and remove bubbles. If edges lift, use a tiny drop of water to reseat them.
-
Sealing & Blushing: Apply a thin “fixative” coat of matte varnish.
Crucial: Never blush on raw resin! Wait for the first seal to dry to avoid splotchy pigment. Let the blush set overnight before the final thick topcoat. -
Durability: With 2-3 final layers of varnish, your “soul” can last over 9 months. Just avoid sharp scratches and prolonged plastic contact in summer to prevent stickiness.
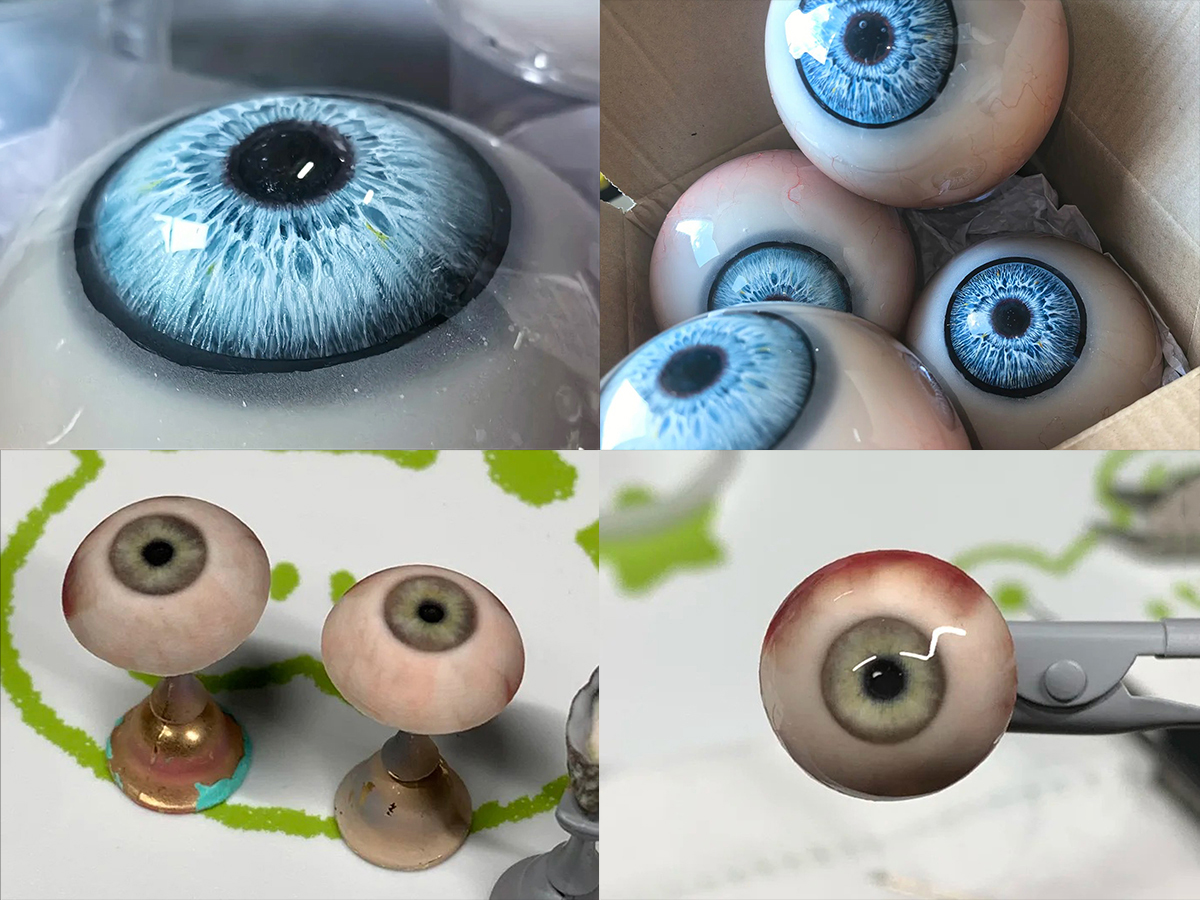
Type 2: Independent 3D Inserts
Separate hemispherical orbs or “chips” are inserted into the eye sockets from behind.
UV Resin/Drip Gels
Created using molds and layered UV resin. Each layer is cured individually to build up a 3D “flower” pattern or iris. It’s labor-intensive but creates a stunning “Follow-Me” effect.
Polymer Clay Slices
A budget-friendly DIY hack where colored clay is rolled into “canes” and sliced to reveal iris patterns.
Ready-Made Glass/Resin Eyes
Finished, mass-produced eyes bought from suppliers. Reliable, but lacks the uniqueness of a custom build.
Type 3: The 3D Printing Revolution
This is where FacFox shines. This logic ignores traditional molding/painting and relies entirely on 3D Modeling (ZBrush) + Precision Printing.
Standard Orb Printing (Clear/White)
We print perfectly symmetrical 3D hemispherical blanks. The shape is locked in digitally, so you only need to focus on the iris artwork. It’s the ultimate “Beginner-Friendly” hack for high-end results.
Full-Color 3D Printed Eyes
The iris, pupil, and gradients are all designed in the 3D model. The printer outputs a fully colored, ready-to-insert eye. No painting required.
Integrated Full-Color Faceplates
The “End-Game” tech. The eyes, skin tone, and makeup are printed as one single piece with the head. There are no separate eye parts at all—the “soul” is literally built into the resin.
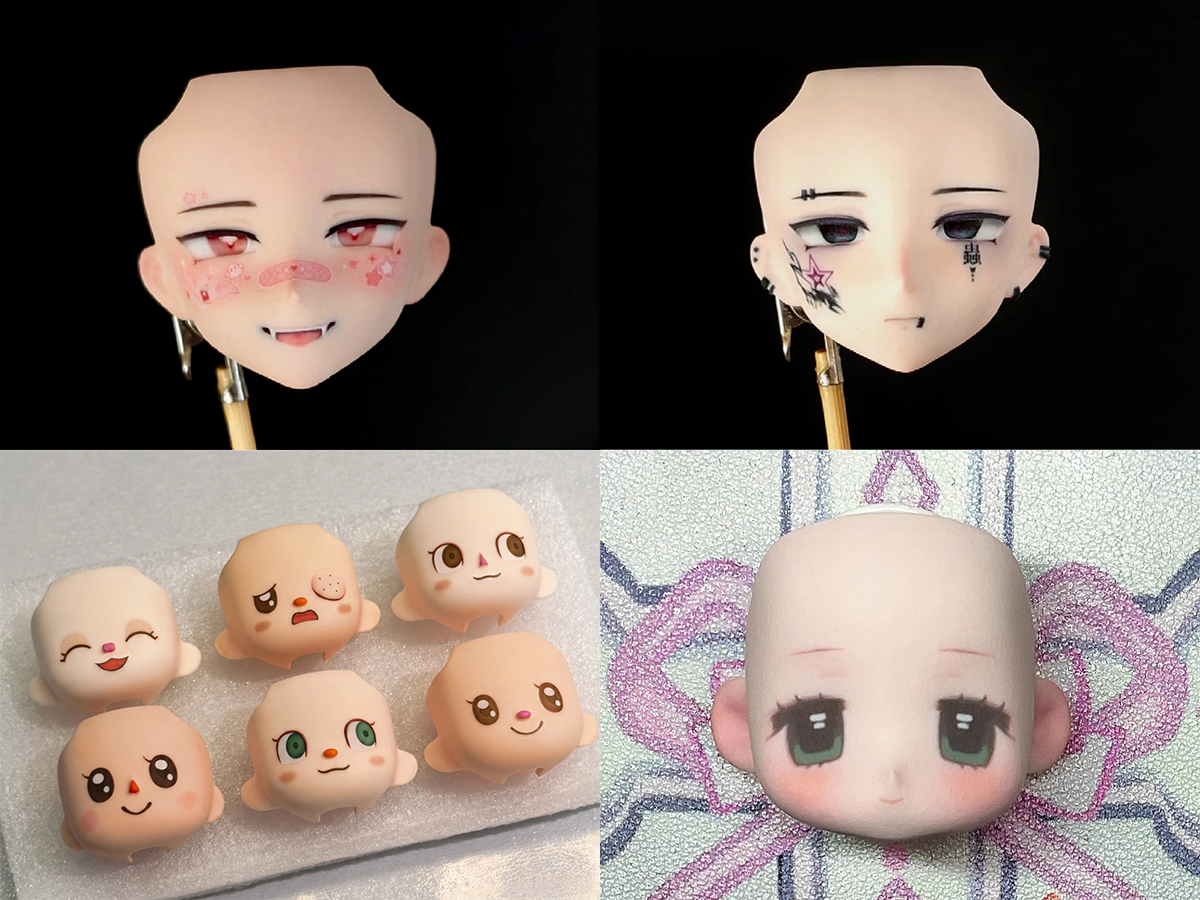
Note: If you’re moving into full-color resin, remember that what you see on a 4K monitor isn’t always what the printer spits out. The biggest rookie mistake is underestimating “color wash-out” —you’ve got to crank the saturation and contrast higher than you think to keep details from fading. Always zoom out while drawing to check scale; if a detail blurs on screen at actual size, it’ll be a muddy mess in person. Flat surfaces hold lines best, while vertical curves tend to bleed. Finally, go easy on the sanding, or you’ll buff that expensive digital makeup right off!
Why Choose FacFox for Your Custom Project?
At FacFox, we specialize in bridging the gap between digital design and physical masterpieces. We offer the industrial-grade tech that home printers simply can’t match:
Ultra-Resolution Resin
Our 0.025mm layer height ensures that your 3D-sculpted irises have zero visible “staircase” artifacts.
Optically Clear Resin
Our clear resin is engineered for transparency and low yellowing, making it the perfect lens for Tier 2 and Tier 3 eyes.
Mimaki Full-Color Tech
We utilize world-class full-color 3D printers to produce integrated faceplates and eyes with flawless gradients and vibrant colors.
Don’t let “hand-painting anxiety” stop you from creating. Whether you need clear blanks or a fully-printed 3D soul, FacFox is here to help. Upload your STLs today!