
Post-curing process after stereolithography (SLA) 3D printing can help you improve the strength and performance of your parts.
In this article, we’ll cover the science of post-curing, laying a baseline understanding of the essential ingredients for transforming parts’ mechanical properties. We’ll also outline a range of post-curing methods, from simply using sunlight to investing in a post-cure chamber engineered for specific materials.
Why the resins need a post-cure process?
When an SLA part finishes printing, it remains on the build platform in a “green state.” This means that while parts have reached their final form, the polymerization reaction is not yet completed, and full mechanical properties are not yet achieved. Through exposure to a combination of two important ingredients, light and heat, post-curing unlocks this last mile of material properties.
Post-curing is required for many kinds of resins. After post-curing, engineering resins reach their best functional properties and castable resin burns out cleanly. Post-curing is absolutely mandatory for using biocompatible materials like some of dental resins.
Post-curing is not required for standard resins, but increases parts’ strength and stability. Post-cured parts are also generally less tacky, which makes them easier to sand and paint.
The Science of Post-Curing
We know that post-curing improves material properties–but how?
At a basic level, exposure to light triggers the formation of additional chemical bonds within a printed part, making the material stronger and stiffer.
Our post-curing unit uses UV light (wavelengths between 10 nm and 400 nm). Even sunlight will post-cure parts, though exposure and effectiveness are weather-dependent.
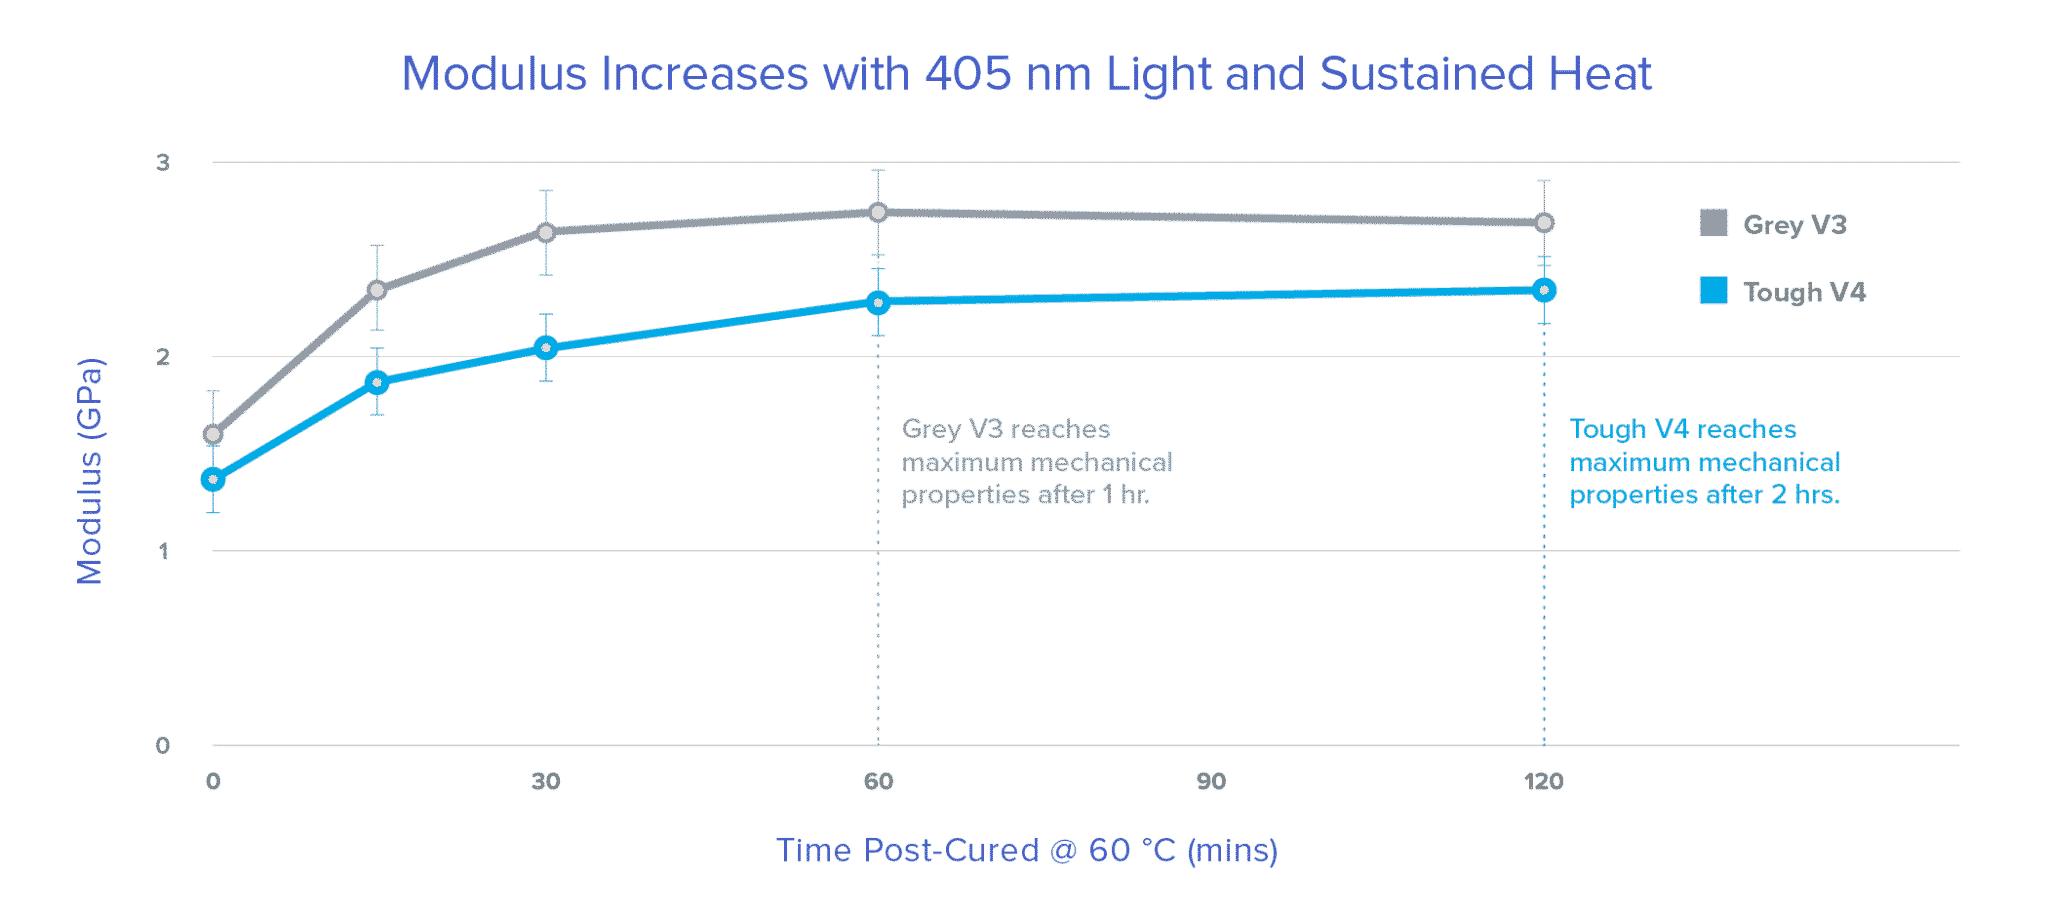
Some post-curing chambers also employ heat. Heat accelerates the process and enables even more complete bond formation, resulting in increases in material properties impossible to achieve with light alone.
Now, let’s dive a little deeper.
A Molecular-Level Look
Inside every resin is a continuous network of various types of polymer chains (monomers and oligomers). The resin itself is one highly cross-linked macromolecule (think: if you picked a spot anywhere on a printed part and zoomed into the molecular level, you could follow the polymer chain to any other spot in the part).
While the printed resin is a continuous molecule, there are still some open reactive groups that can further cross-link the polymer network.
As more cross-links form, material properties, such as modulus and tensile strength, improve. The objective of post-curing is to link as many of these unreacted groups as possible to bring a part to its maximum material properties.
Step 1: Heat
Optimal post-curing starts with heat. Rising temperatures increase the energy, and therefore mobility, in the polymer network. This gives reactive groups a higher probability of finding each other and creating more connections.
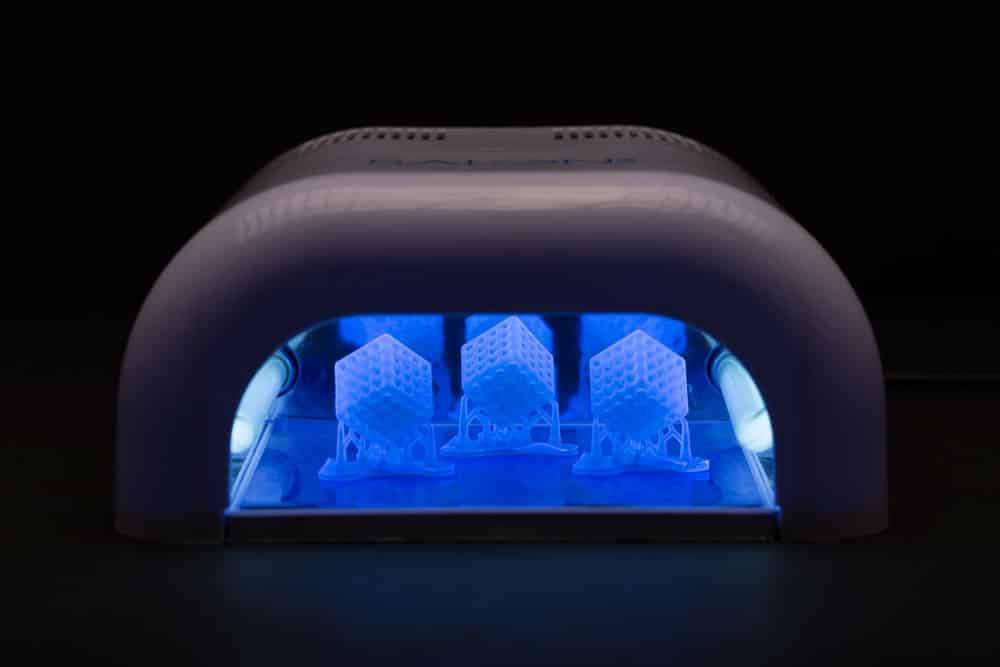
Post-curing maximizes material properties in SLA 3D printed parts through the precise combination of temperature and light. Some post-curing units also rotate parts to ensure uniform exposure.
Step 2: Light
This is where the magic happens: photons of light activate remaining photoinitiators and generate a radical, which causes bonds to form between nearby reactive groups, permanently cross-linking them together.
With each new cross-link, the polymer network becomes more securely linked together and material properties improve.
Choosing a Post-Curing Method
Many methods for post-curing exist, from curing simply with light (natural sunlight, UV nail salons, DIY cure boxes, etc.) to using both light and heat.
To help determine which post-curing solution is best for you consider the following:
- Materials used:
For each resin formulation there’s a certain wavelength range that works best to maximize its mechanical properties. - Intended applications:
For applications that require optimal dimensional accuracy, it’s important to choose a unit tuned to the specific materials you’re using. Such applications include prototyping products that need tight tolerances or dental applications that rely on precise fit (such as surgical guides or crown and bridge models). For applications where accuracy is less important, simpler curing solutions often suffice. - Size and complexity of parts:
For small prints, a low-cost UV nail salon can be an effective post-curing tool. For larger, more complex parts, be sure to consider units that provide even exposure (through well-balanced light placement, a rotating turntable, etc.) to ensure uniform curing.
Materials properties can also vary with part geometry, print orientation, and print settings. - Need for speed:
Heat speeds up and optimizes the post-curing process. If efficiency is essential, consider a unit that uses both light and heat.