3D printing shells are more important than you might think. Read on to learn more about them and see how they affect your model’s stability.
What Are They?
3D printing shells are the outlines or outer perimeters of each layer. Depending on the settings of your slicer, you can customize your shells.
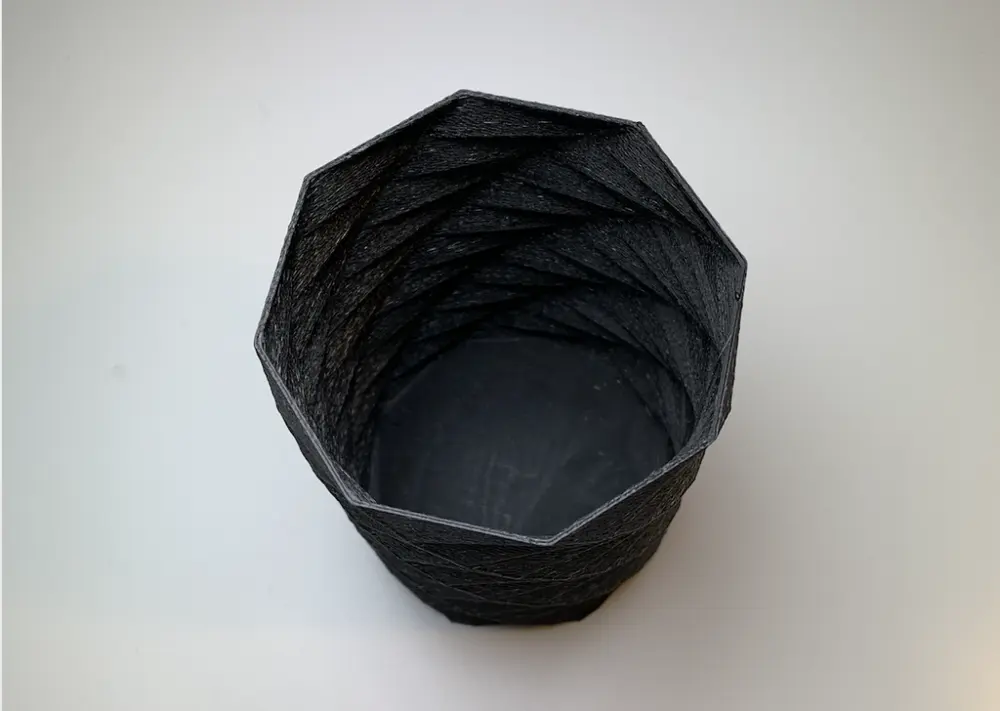
Imagine a 3D printed bowl (like in the picture above). Before printing, you can make some changes in your slicer (explained in more detail below). Examples would be the speed of the printer, the layer height, or the printing temperature. Theoretically, if you were to set the number of shells (i.e. shell thickness) to the highest available number for the bowl, your 3D printer wouldn’t actually print a bowl. Instead, you will get a solid, curved block, with no “hole”.
To avoid this, we outline the different settings you can use, and some limits to adhere to.
Settings
There are several ways in which the settings can affect 3D printing shells:
- Post-processing: If you want to refine or sand your 3D prints and then varnish them, for example, it makes sense to increase the thickness of the shells, as refinement usually removes layers from the model. An increased shell thickness can, therefore, mean that a little more can be sanded off and finer details can be worked out without affecting the structure of the model.
- Strength: Increasing the shell thickness also increases the strength of the model. As a result, much more robust objects can be printed. This setting can be changed for most slicers in the settings of your slicer.
- Cost: Increasing the number of shells can negatively affect the cost per print because it will require more material and longer print times.
What to watch out for:
You will probably ask yourself how you should adjust these shells to get good results and optimize your 3D printing. The rule of thumb is that the shells are usually printed with a thickness of 0.8 mm. This corresponds to 2-3 nozzle diameters, depending on the 3D printer. In most cases, it is important to make sure the shells are a multiple of the nozzle diameter, simply to avoid cavities.
However, for objects that have a certain cavity, such as a cup, vase, or something else, it is advisable to stay between 2-3 nozzle diameters. Everything beyond that changes the object so much that the cavities become closed, as in the example of the bowl mentioned above.
Adjusting Shells in Cura

Slicers are software platforms that convert CAD data into g-code, i.e. instructions that your 3D printer can understand. That said, files can not only be converted but also changed and modified through various settings. Here, we will use the Cura slicer as an example of how to change these settings.
Adjusting the Settings
In the picture, you can see the auxiliary line in blue, which is printed around the outside of the print, the shells in red, and the top and bottom layers in yellow.
To change these settings in your slicer, click on the “Custom” button in the upper right corner. The two main settings that will affect your print are the wall thickness and the top/bottom layer thickness. For both of these, the thickness to keep in mind is 1.2 mm.
Here are some guidelines for thicknesses of walls as well as top and bottom layers:
- <1.2 mm will result in lighter and more flexible models at the sacrifice of stability. Models that have very thin walls and/or top/bottom layers will be weak and prone to breakage.
- >1.2 mm will result in sturdier models with more balance. However, models with very thick walls and/or top/bottom layers can affect the final design of the model.
Example: How to 3D Print a Vase
A model that does a great job of demonstrating the use of the above settings is a vase.
A vase should be stable, but not too thick. To achieve this, set the wall thickness to a value between 0.8 mm and 1.35 mm and the top/bottom thickness to between 1.00 mm and 1.35 mm. The range of the top/bottom thickness is smaller than the wall thickness because the bottom must have a certain layer thickness to ensure a stable stand.
To better see this change in thickness, click on the dropdown menu “Solid View” in the upper right corner and switch to “Layer View”. Here you will see the model layer by layer and you can see where changes are possible and what effect they have. Using this layer view, you can easily and individually customize your models, depending on which settings suit your prints.
Feature image source: duncan916 / Thingiverse