If you’ve experienced the frustration of messy bridges, read on to see our easy tips and tricks to keep your 3D printing bridging clean!
What Is It?
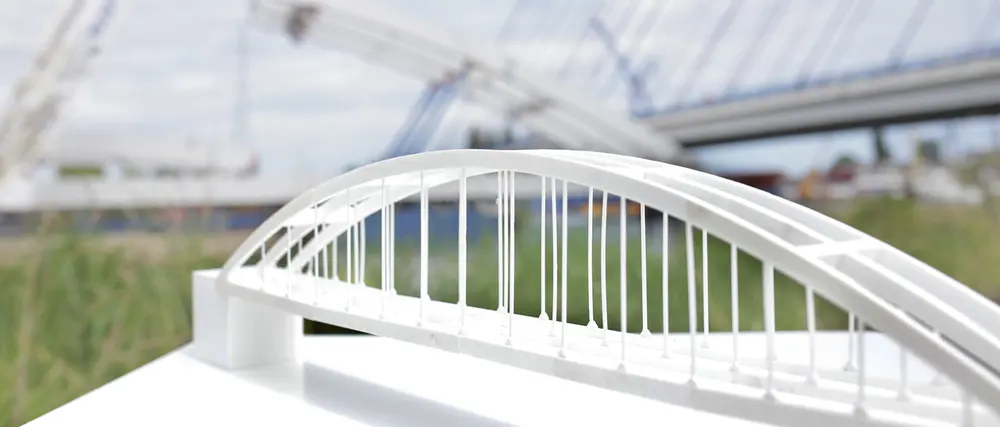
Bridging in 3D printing is an extrusion of material that horizontally links two raised points. However, if you’re reading this article, the bridges in your prints are probably not too horizontal. Don’t beat yourself up. Bridging problems are extremely common, and thankfully, they’re relatively easy to eliminate.
So, let’s dive into some quick tips and tricks to bring the best bridging 3D printing results!
Test Your Printer
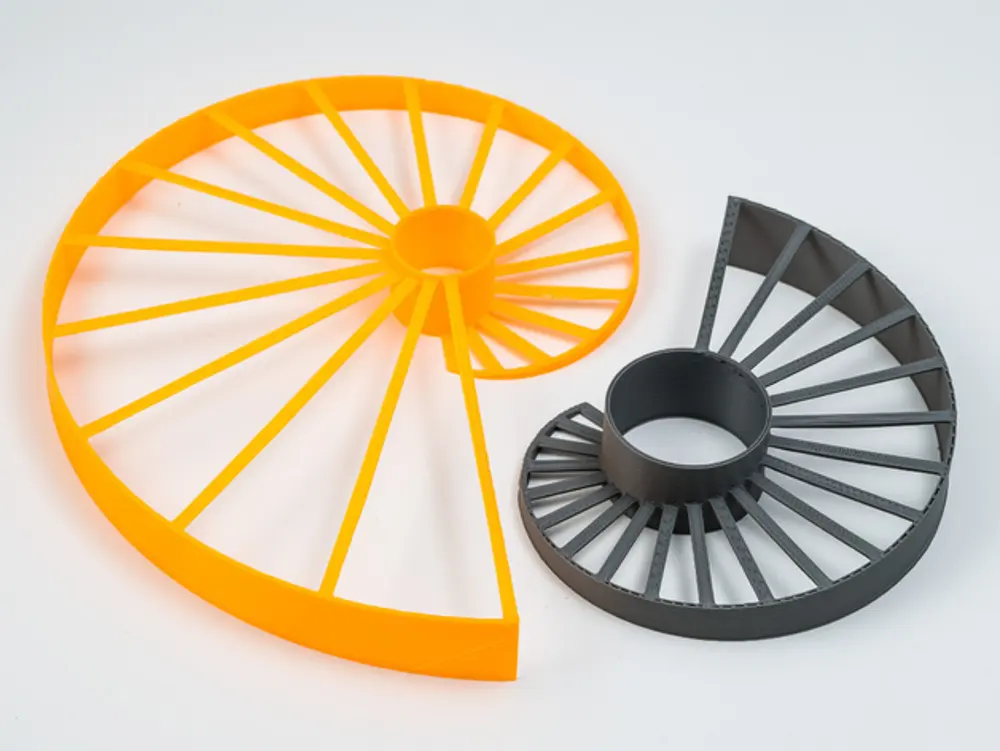
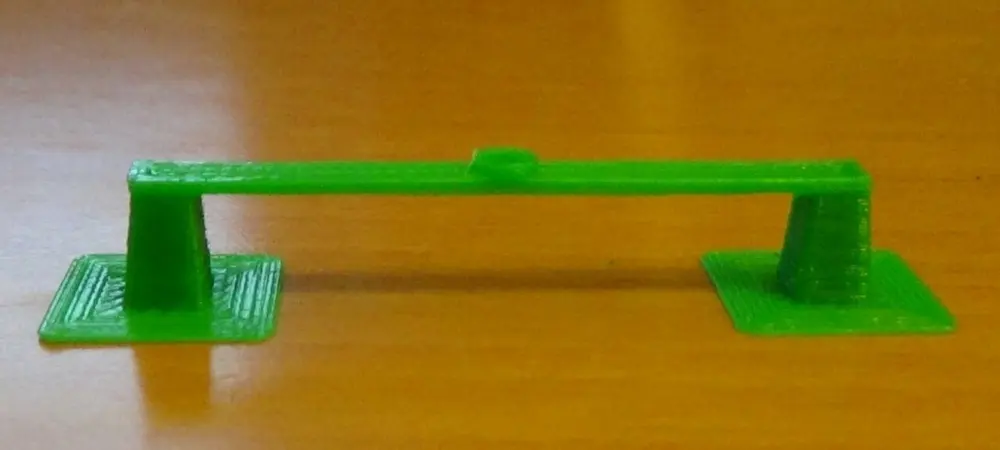
Before you begin tweaking settings, it’s important to see how well your printer can (or can’t) bridge. Try printing this bridging test. In one print, you’ll be able to see what bridge lengths are hard for your printer. 50- to 100-mm bridges are good, while bridges spanning 150+ mm are excellent. If this test doesn’t turn out well, don’t worry; this is just to figure out the extent of the problem.
Increase Cooling
When trying to optimize your printer’s bridging capabilities, first increase your print cooling (print fan speed). If you’re printing bridges with a low print cooling setting, the filament will just sink into a big mess of molten plastic. So, start at 100% fan speed, and keep an eye out for bridging improvements.
However, if you’re noticing clogging or poor layer adhesion, your fan setting is too high! Bring it back down in 5% increments, and move on to the next easy fix.
Decrease Flow Rate

For material to cleanly bridge a gap, it must set quickly. So, if too much-molten filament is flowing from the nozzle, it’ll have no time to set. This will most likely make your print look like London Bridge falling down.
By decreasing the Flow Rate (or Extrusion Multiplier) in your slicer, your printer will be able to extrude a steady flow of filament that can cool into a beautiful bridge.
Decrease Temperature
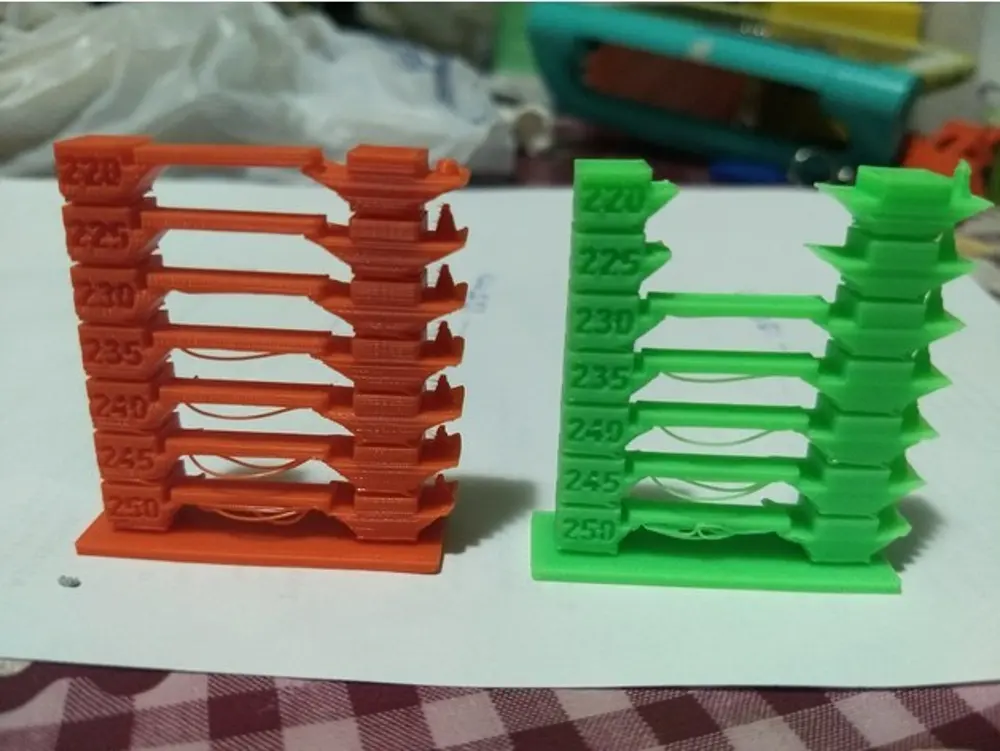
This next tip is very similar to the previous one. If your nozzle temperature is too high and too much filament is allowed to flow from it, the printing material will not have enough time to cool and set. This will probably result in filament sticking to your nozzle or forming a very messy bridge.
A temperature tower is a great way to test how your printer handles different temperatures. In order to print one, you’ll need to manipulate the G-code so the temperature changes with each level. To get to this option in Cura, Select Extensions > Post-processing > Modify G-code, and add the “Vary Temp With Height” plug-in.
From here, you can input the height increment (for how often you want to change temperature) and temperature increment (for how much you want to change it). The designer of the temperature tower model offers the necessary code for Slic3r and Cura in the Thing details.
Decrease Print Speed
High print speed can also affect bridge quality. If your nozzle is moving too fast, the filament will not have time to adhere to the previous layer or set in time to bridge a gap. In other words, high print speeds can result in huge messes.
Try decreasing your print speed in 10-mm/s increments until you see some improvement. Don’t go too slow, though. If your nozzle is moving too slow, the filament will be suspended in the air for too long and will eventually droop. So, play around with some speeds, and you’re bound to find the perfect one.
Adjust Model Orientation
If you’re completely tired of tweaking settings to get longer bridges or you don’t have the time to start, try orienting your model to totally (or mostly) eliminate bridges in the model. Just remember the 45° rule: If an overhang is greater than 45°, you’ll have to consider supports.
If you’re especially brave, check out our article on how to master printing overhangs exceeding 45°.
Add Supports

Speaking of supports, why not use them? Supports will eliminate your worries about messy bridges. They may be a pain to remove, but check out our article on easy steps for success with supports.
Don’t forget that you’ll have to remove supports after printing! Some models make this removal process nearly impossible, or it’s tricky to do so without damaging the surface of your print. Sanding and other post-processing methods are your friends!
Source: 3D Printing Bridging: 6 Tips for Perfect Bridges | All3DP