How to store PLA and other filaments correctly? Check out the best 3D printer filament storage solutions to build or buy!
When it comes to storage, 3D printer filament requires special accommodation. Among the most popular filament materials of PLA, ABS, PETG, and TPU, the most demanding storage requirement would have to be humidity (or lack thereof). After that, the absence of dust and particulates is another important consideration for filament storage. Let’s take a deeper look!
What’s the Big Deal?
The majority of materials used in FDM 3D printing can be considered hygroscopic, meaning that they absorb water molecules rather than repel them. This doesn’t mean that your Benchy will act like a sponge, but if you let your filament sit out in the open air on a humid day, your print quality will go down. Even what we might consider relatively low ambient humidity can be detrimental to filament through cumulative exposure.
Keeping filament in an airtight container is a must to prevent the absorption of humidity from the air, and the use of vacuum-sealed containers or ones with desiccant is even better. For more information on desiccants, check out the section at the end of this article.
Knowing if Your Filament Is Wet
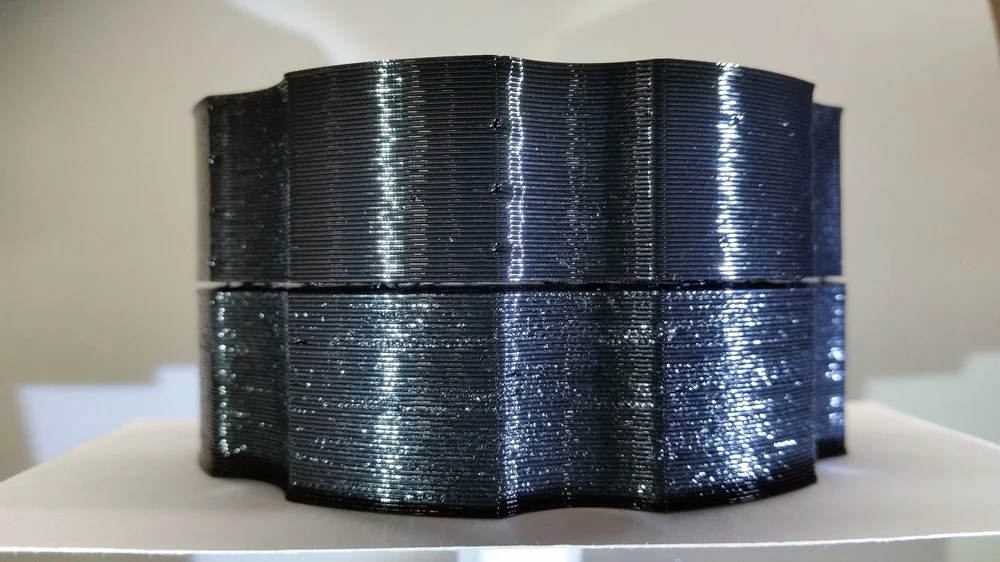
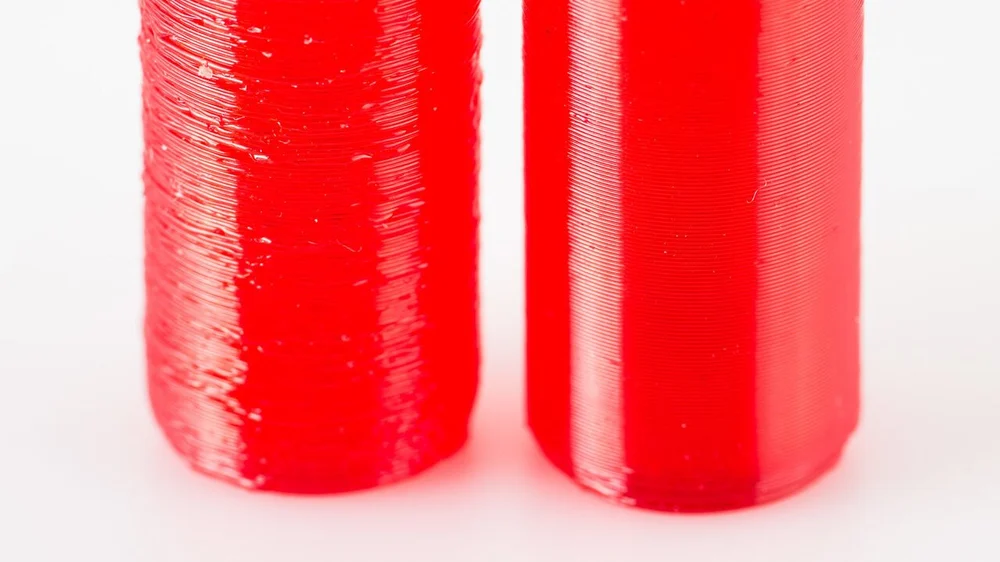
With “wet” filament, you might notice print surface quality go way down or poorer layer adhesion. One way to tell if filament has been saturated is to listen for popping or crackling sounds when it’s being melted in the hot end. What you’re hearing is the sound of water boiling out of the filament and evaporating.
That said, wet filament isn’t a lost cause, as most filaments can be dried using a repurposed food dehydrator, a low-temperature oven, or a purpose-built machine such as some of the ones included in this list.
Necessity of Storage
It’s natural that dust and particulates settle on spools of filament when they’re left out in the open. These tiny nuisances can lead to decreased print quality, even clogging the nozzle during printing.
Cleaning and changing nozzles can be a pain, so preventing the dust from getting on the filament in the first place is an easy choice. This can be accomplished by simply storing the filament in closed containers or places otherwise secluded from airborne particulates. Another line of prevention is the use of a dust filter (see the Add-Ons section towards the end of the article) that the filament slides through during the printing process, which wipes away any potential contaminants before they reach the hot end.
No matter your approach to storing your filament, we have the solutions you need! First, we’ll go over some of the best options, then we’ll give you a couple of add-ons that you’ll want to print no matter which solution you go with. Finally, we have a special section about desiccants so that you can learn all about this storage helper.
STORAGE SOLUTIONS TO BUY
The following are all solutions that are specially designed for storing 3D printer filament. With extras like drying capabilities, a scale, and a temperature indicator, these all have something special to offer.
Polymaker PolyBox
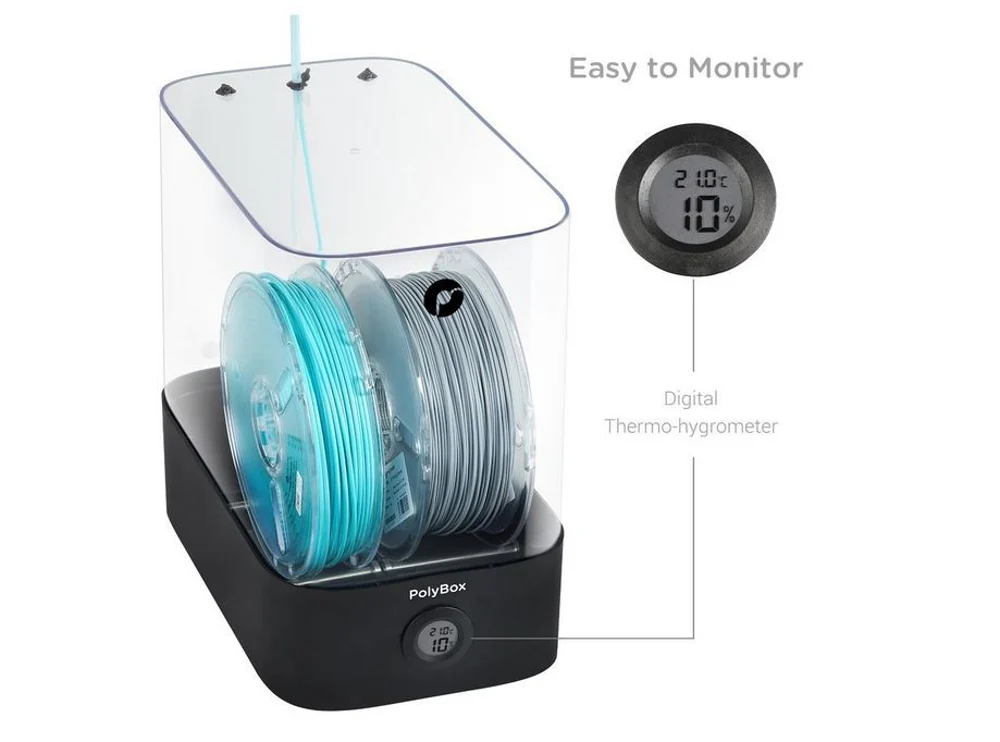
The Polymaker PolyBox is a comprehensive filament storage dry box and filament feeder. Featuring live temperature and humidity readings from inside the container, this solution is no mere plastic box.
It’s the only container on the list that’s specifically designed for two 1-kg spools, one 2-kg spool, or any other combination of two different weight spools. Held on ball-bearing rollers, the spools can roll freely. With the addition of two different sets of ports and neoprene tubing, the filament can be fed directly from the PolyBox to your printer.
This box includes two 100-gram desiccant pouches held in a bottom compartment to dry the filament, rather than a heating element. This means that the box cannot be used to replace a proper dehydrator.
The ~$70 price tag has drawn comments, as making a DIY version would only cost around $20. However, if you’re looking for a solid and easy storage solution, this should work well.
- Made by: Polymaker
- Cost: ~$70
Sunlu Dry Box
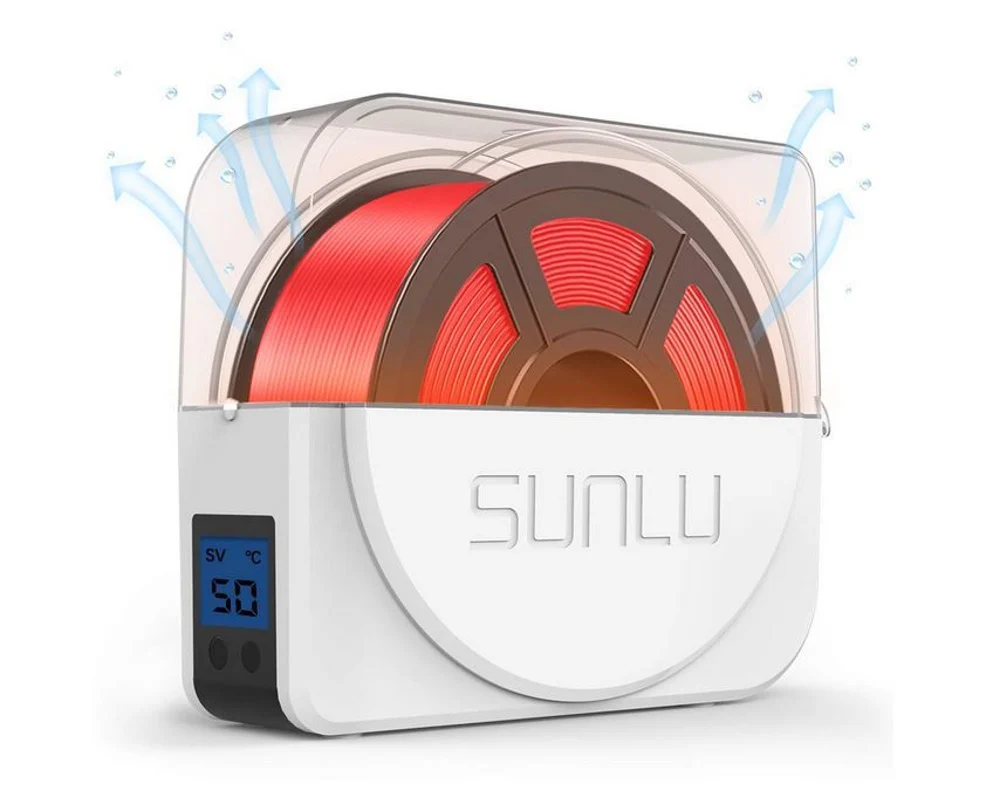
The Sunlu filament storage and dry box may seem similar to the PolyBox and other models, but it boasts some features that the others don’t. The main advantage that this product has is that, unlike the PolyBox, it has a heating element. You’re able to set the temperature and time for the drying process, and this box will heat up your roll of filament and purge it of moisture in the same way that a food dehydrator would.
On the other hand, this Sunlu solution is a little bit more expensive than the PolyBox, and it only holds a single 1-kg roll at a time. You’ll also need to be able to plug it in. With its price tag of ~$80, this solution likely doesn’t make sense if you have a large filament collection.
In fact, the ideal application for the Sunlu S1 would be using it to dry and store filament during printing. The included tubing makes it easy to print right from the dry box. Rather than purchasing one of these for every spool you own, consider using it in conjunction with another storage method when the spools aren’t in use.
- Made by: Sunlu
- Cost: ~$50
eSun eBox
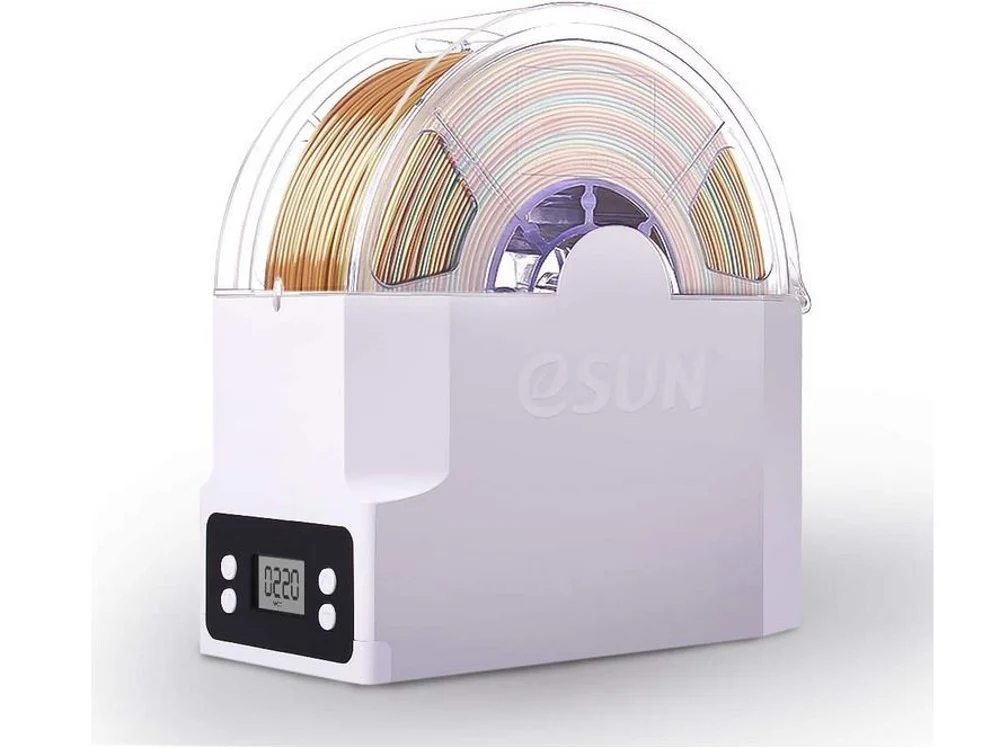
The eSun eBox is another traditional filament dryer. That said, there are a couple of things that set this product apart.
The first is that it has a built-in scale so you can see a live weight readout for your filament spool. This feature is handy when you’re trying to make a considerable-sized print with an almost empty spool, as we’ve all likely found ourselves attempting in the past. The filament weight could be cross-referenced with your slicer before you even start so you don’t run into problems.
Secondly, unlike the PolyBox (which costs about the same), the eBox includes a drying feature. Set a temperature and walk away as your filament gets a refreshing dehydration session.
The only downside is that the eBox requires household power in order to function, which makes it impractical for storing your filament long-term. As such, this filament dryer is best used in conjunction with another storage method.
- Made by: eSun
- Cost: ~$70
Sovol Filament Dryer Box
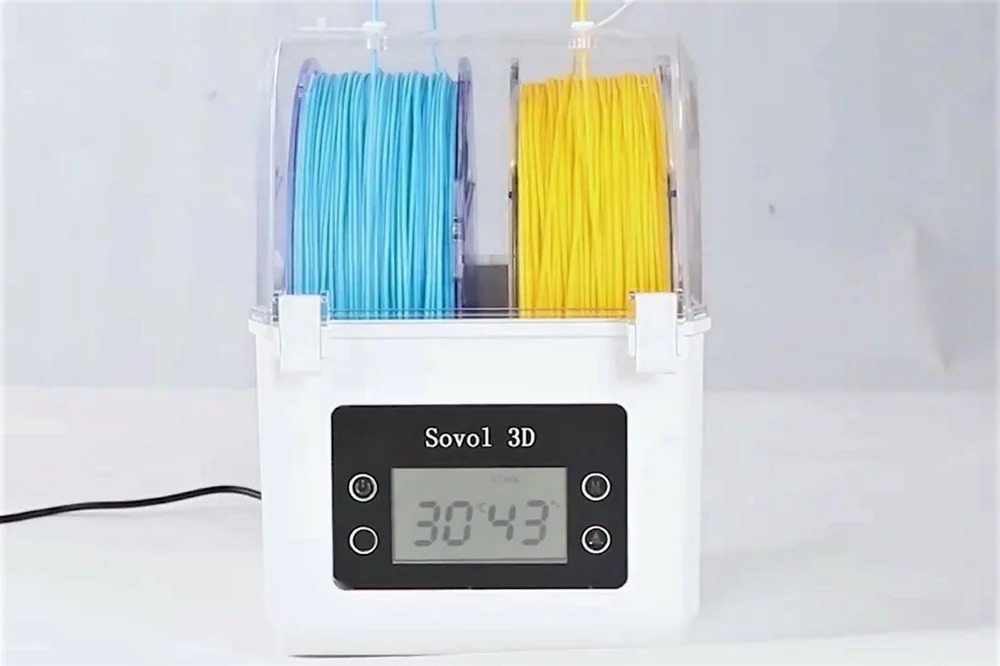
The Sovol Filament Dryer Box is a good alternative for active filament drying. It combines some of the features from the other storage boxes with a lower price tag. The spool is supported by two continuous rolling bars so it can fit either a big spool of 150 mm width or two of 70 mm just the same.
Regarding the drying capacity, the temperature can be set between 40 and 50 °C, suitable for the most popular materials, like PETG, PLA, and ABS. The drying times are controlled by a set timer of 6 to 12 hours.
In addition, it comes with silicon sealings and strong closing latches, which can secure a dry ambient inside even when the active heating is off. This makes the Sovol Filament Dryer Box a good choice for both drying and storing filament.
- Made by: Sovol
- Cost: ~$70
Dry Cabinet
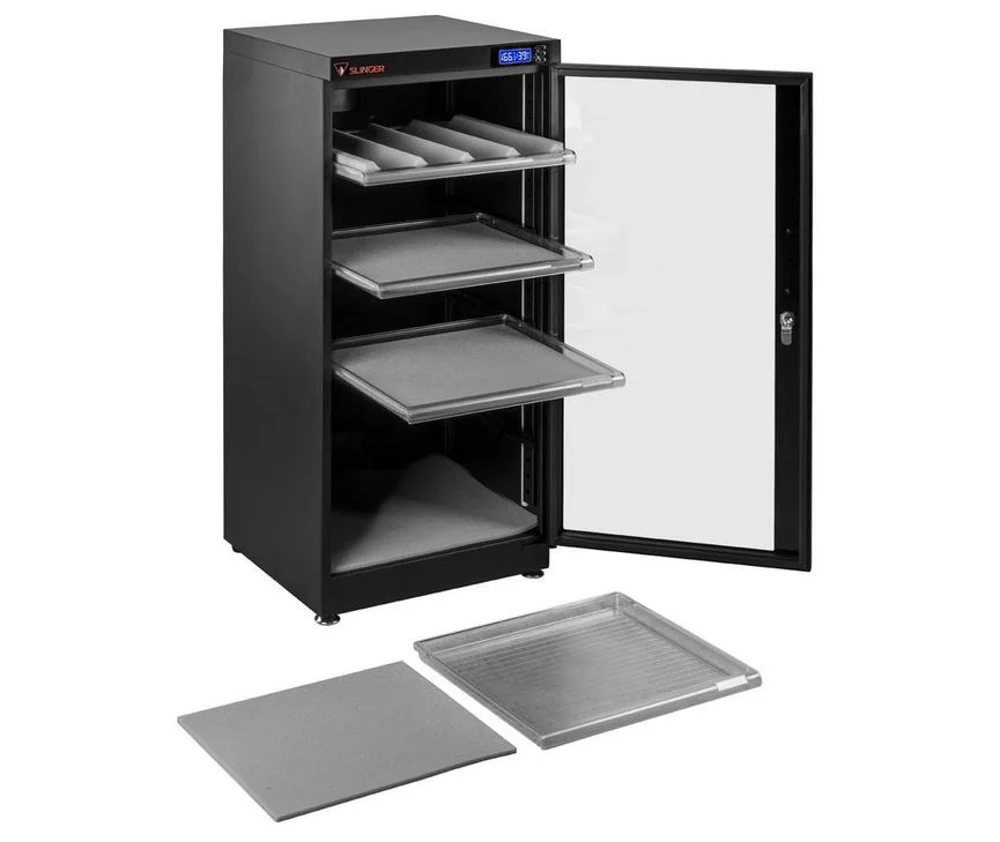
Dry cabinets are the new player in the filament storage game. They’re designed for professional cameras and other photography equipment that can be damaged by moisture, but they’re also marketed for other moisture-sensitive items. Why not 3D printer filament?
Available in sizes from 30 liters up to 125 liters, dry cabinets closely resemble wine refrigerators with their glass doors and a sleek look. A digital screen tells you the temperature and the humidity inside the cabinet, which you can set. A lock and keys, LED interior lights, and adjustable shelves are some other common features of dry cabinets.
A 120-liter dry cabinet can be purchased for around $250, and with the proper shelf configuration, could hold a dozen rolls of filament. No desiccant required, no unsightly containers or troublesome bags, and no worrying about the safety of your 3D printing materials!
- Made by: Slinger
- Cost: ~$250
Yodelbox
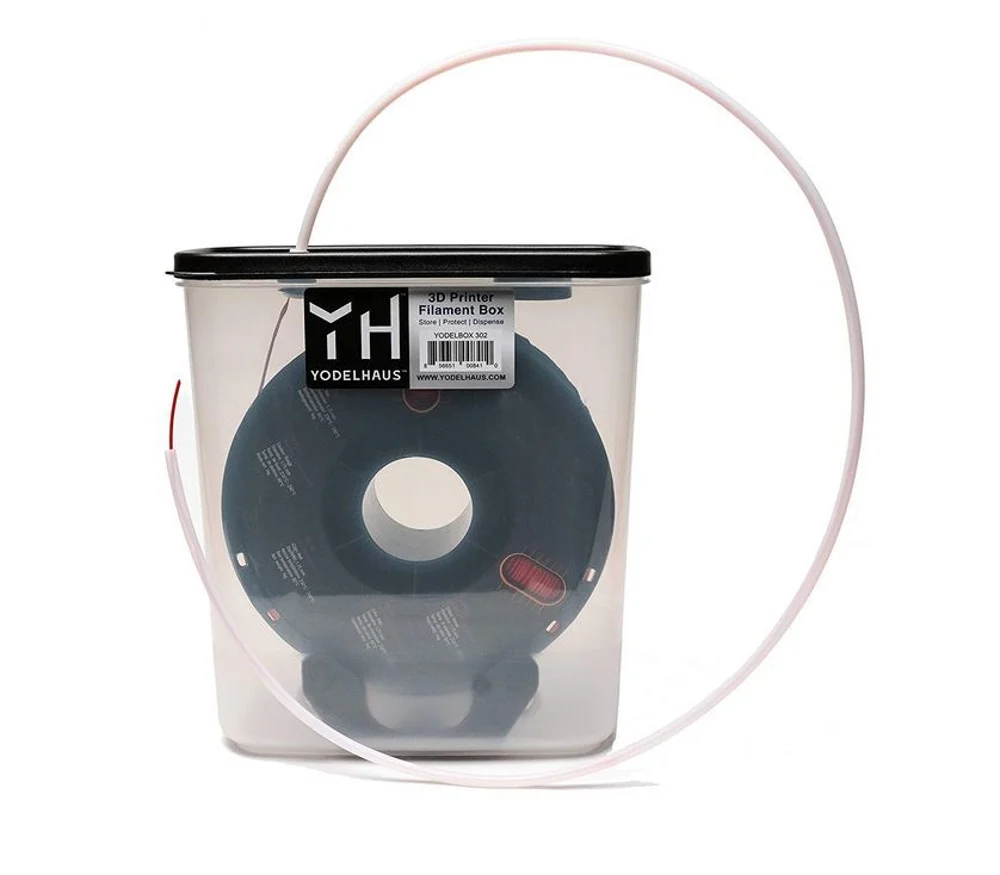
The Yodelbox is a filament storage solution that’s basically an inexpensive version of the PolyBox. Only holding one spool at a time, the Yodelbox functions best as a dedicated storage container. Featuring a battery-powered temperature and humidity sensor with an LCD screen, the Yodelbox gives you live data of the conditions inside.
The Yodelbox also has a length of tubing to connect it to your printer and plenty of room in the bottom of the container for desiccant. It would make sense to keep each spool in its own Yodelbox, so when you switch the filament you’re printing with, simply pull a different Yodelbox off the shelf and hook it up; that way, the filament never has to be exposed to the open air!
- Made by: Yodelhaus
- Cost: ~$45
Bigtreetech Filament Storage Box
Bigtreetech’s solution for filament storage goes in line with the Yodelbox. It’s basically a simple airtight box with reusable desiccant packs alongside PTFE tubing connections for the 3D printer. But there are some unique features.
For starters, there are three different options. The simplest one, a single-spool storage with a humidity indicator card (see the DIY category) can fit a 20 x 7 cm filament spool, whereas the so-called “double consumable” is able to fit two spools and comes with four tubing connections.
Last but not least, the third version is the same single-spool storage but comes with a Xiaomi Mijia Bluetooth thermometer and humidity indicator. It’s a wireless device that runs with a small CR2032 battery and connects with a dedicated smartphone app that tracks and records data.
As far as price is concerned, all versions are officially priced at $29.99 with slight changes based on the shipping costs.
- Made by: Bigtreetech
- Cost: ~$30
PrintDry container
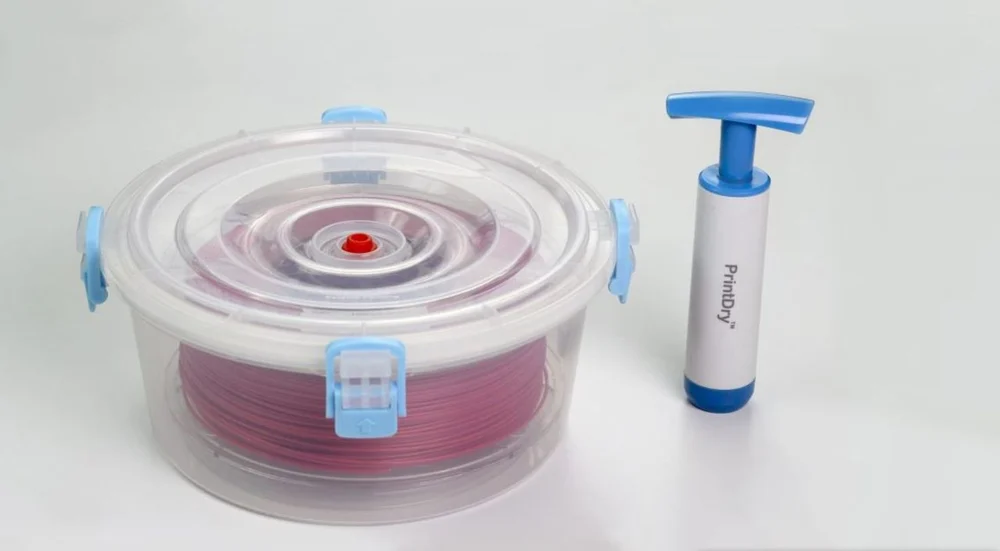
The PrintDry filament storage container definitely takes a different approach to keeping your spools safe. The container itself is designed with storage in mind, rather than actively drying the filament or feeding it to the printer, as many of the other solutions do.
The container is reminiscent of the kind of plastic container that you’d use to store leftover food. The main differences between the PrintDry and a normal plastic tub are the four robust-looking latches and the valve in the middle of the lid: There’s a hand-operated pump that you press against a one-way valve to vacuum all the air (and moisture) out.
These containers are airtight and can keep your filament safely stored (or they’ll be even safer with a packet of desiccant) so you don’t need to worry about them. The only downside is the price. For a pack of five, you’ll be out about $100. Each container only holds a single spool, so you’ll be spending about as much on the container as the spool of PLA you’d be putting inside.
- Made by: PrintDry
- Cost: ~$100 for five containers
DIY STORAGE SOLUTIONS
Now that we know what you can buy, let’s see what other options are out there! Some are fully DIY, some are repurposed from other household items, but all are great solutions that are likely to be more affordable than a purchased product.
Heated Drybox
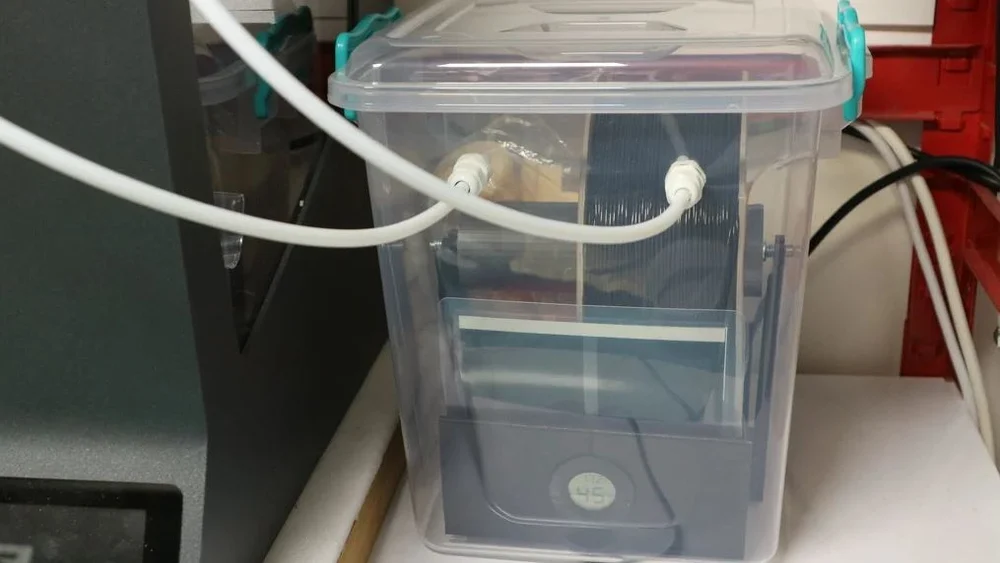
This solution sits at the top of the DIY side of filament storage. Featuring an almost identical design to the PolyBox, eBox, Yodelbox, and Sunlu S1, the maker community has given this DIY box optimal features for filament storage. In fact, we have an in-depth article about how to make this dry box yourself.
At its roots, this DIY solution uses a reptile heater mat placed in an 11-liter plastic tub to warm the filament while desiccant packs remove the humidity. A thermal hygrometer, otherwise known as a temperature and humidity sensor, keeps track of the conditions inside the box. 3D components are available through the build’s Thingiverse page.
All the components you’ll need should cost between $20 and $30 depending on where you source them. (You can always buy in bulk and build multiple boxes at a time to make it even more cost-effective.) Some components will need to be 3D printed, and it’ll take some time to construct. But, in the end, you’ll have an affordable storage solution with the same features as the pricier models.
- Made by: RichRap
- Cost: $20-30
- Where to get it: Thingiverse and All3DP
Airtight Roller Bin
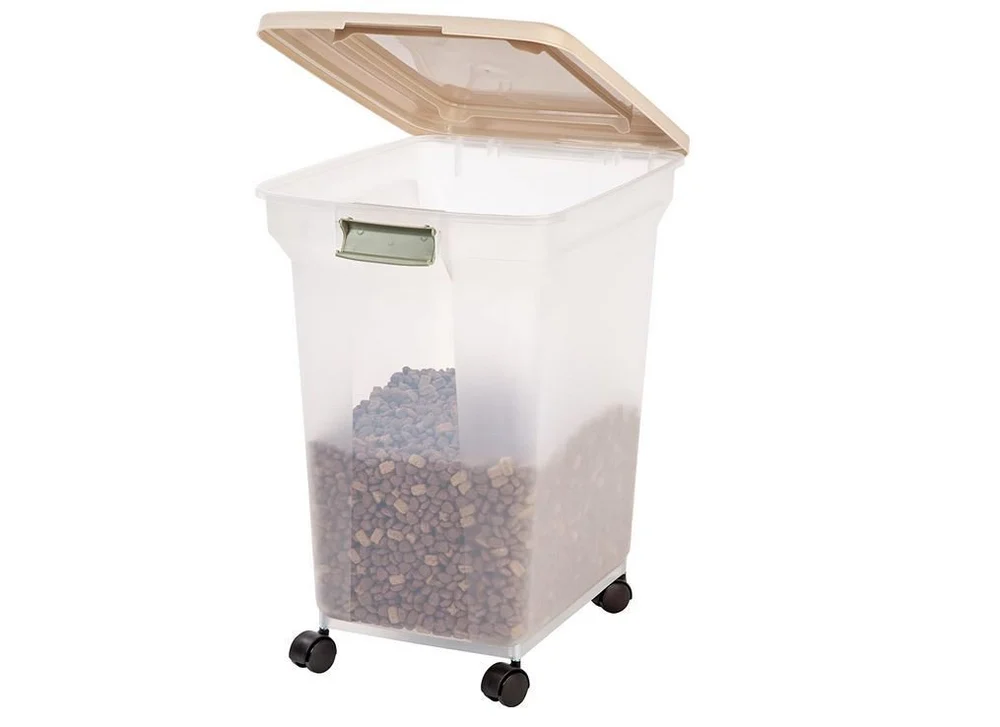
If you believe that you can never have too much filament, this is the solution for you. Boasting one of the largest capacities of all the containers on the list is this rolling pet food bin. The capacity of the largest bin allows for as many as 17 kilogram-sized rolls to fit in each container! With a price tag of around $40, it’s one of the most cost-effective solutions.
Rolling around on swiveling wheels, this pet food bin offers convenience, and its short height allows it to be tucked under a desk or table. Since pet food is also hygroscopic, containers marketed for pet food offer an airtight seal. Note that there are several sizes are available; multiple smaller bins could also be a good choice, depending on your setup.
You’ll want to place a hefty amount of desiccant in the bottom, preferably pellets, to keep your filament as dry as a bone. The only concern with the pet food bin is that to reach the filament on the bottom of the pile, you must first remove all the rolls on top.
- Made by: Iris USA
- Cost: ~$38 for 67-quart capacity
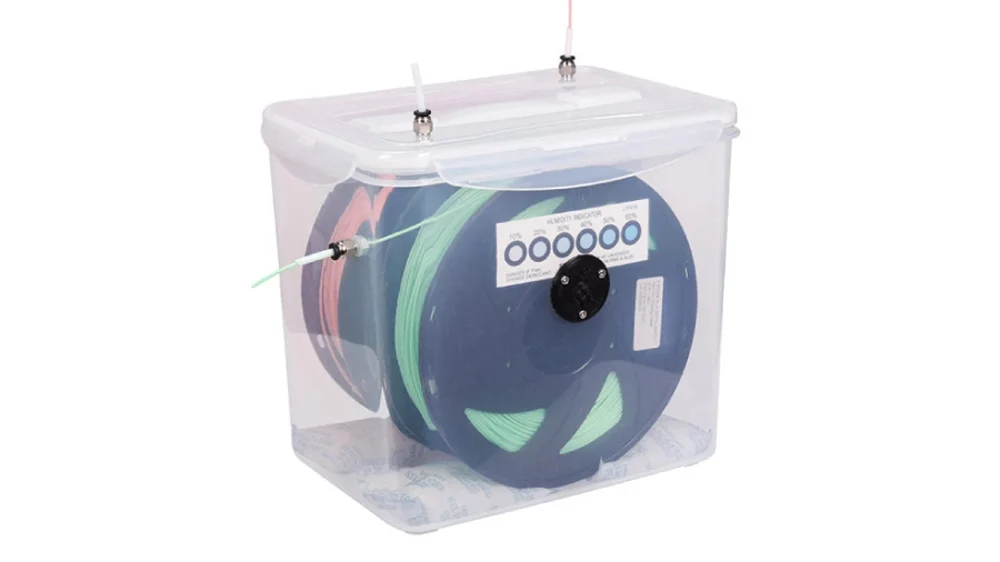
Plastic Bags, Desiccant, & Indicator Strips
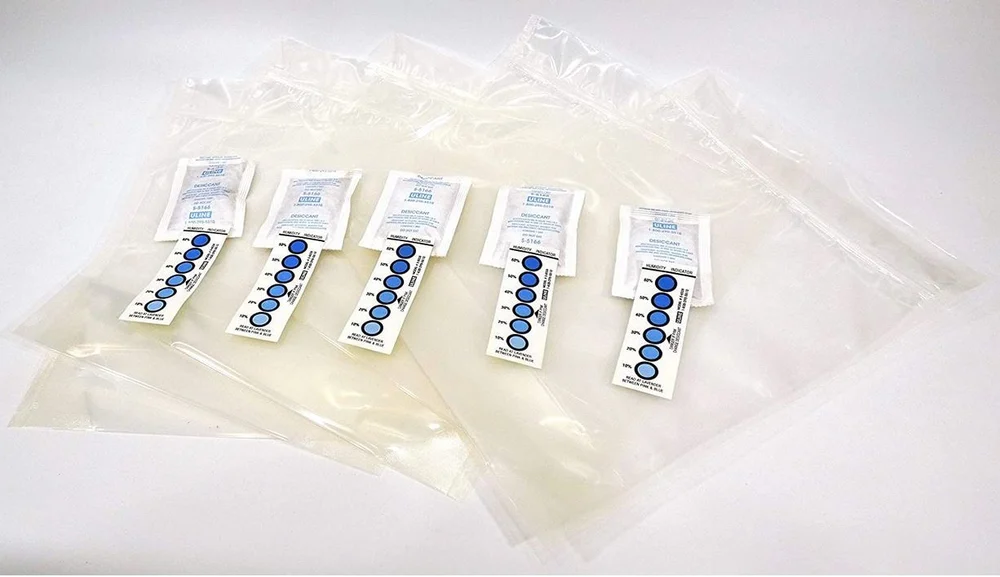
Resealable bags have always been a popular favorite for bargain filament storage. You could go the route of purchasing each item separately, but this bundle of resealable plastic bags, desiccant pouches, and humidity indicator cards gives you all you’ll need at once.
Although not as durable as a box, and you certainly cannot feed the filament from the bag straight to the printer, bags do just as good of a job as any other airtight container at keeping the humidity and dust out. Also, the indicator strips change color depending on the humidity level, functioning similarly to the LCD hygrometers featured on the pricier dry boxes. These 64-oz storage bags are designed to be more durable than standard food-grade ones, and the price tag of around $15 for a set of five makes it practical to store many, many rolls of filament with this method.
- Made by: NetSellslt
- Cost: ~$15 for five bags
Vacuum Storage Bags
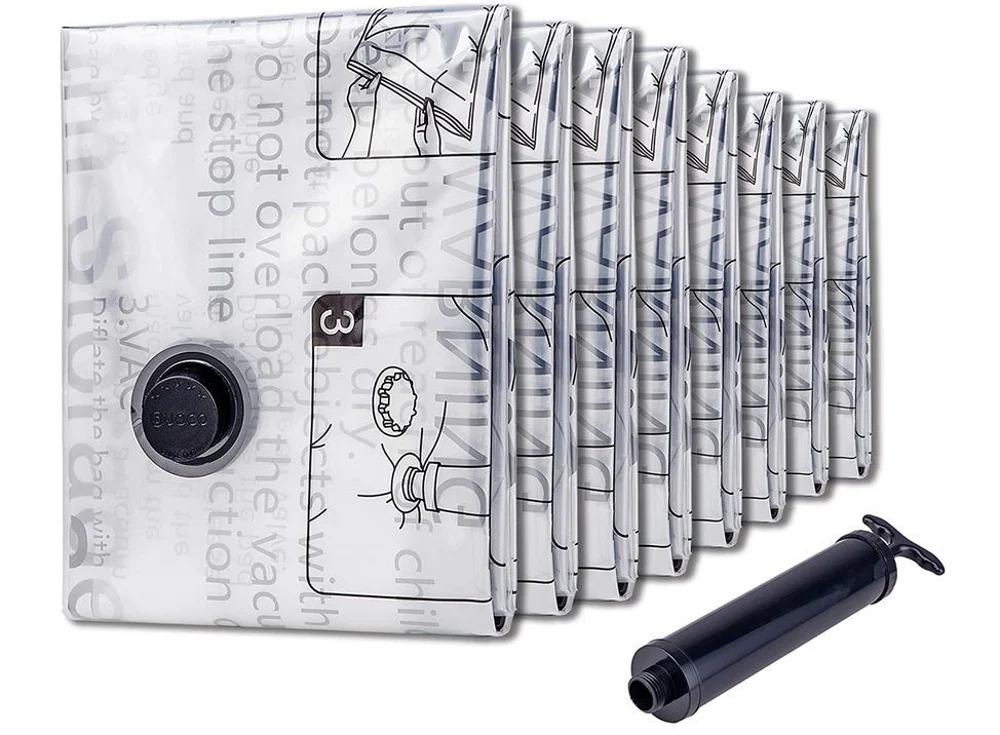
Many of us are familiar with vacuum storage bags. Most popular for storing and transporting clothes and the like, these bags work with either a hand-pump (often included) or a household vacuum cleaner (for faster results). Similar to the PrintDry solution, you suck all the air out of the heavy-duty plastic bag through a one-way valve, and the bag compresses whatever is inside.
We’d recommend adding some desiccant before sucking out all the air, but it’s not essential. No air means no humidity and no dust; it’s that simple!
These bags come in many different sizes, with the small being 16 by 24 inches. You should be able to fit three 1-kg spools in each to make the most of your space. At only a few dollars apiece, this solution won’t break the bank, either.
- Made by: Suoco
- Cost: ~$21 for eight bags
Add-Ons

Regardless of the solution that you go with, these two extras are 3D printable, small, and extremely useful.
Filament Clip
Storing filament with an unsecured end is a big no-no. If your filament spool doesn’t have a hole around the edge to secure the loose end, or the loose end doesn’t quite reach the hole, try this solution. This simple little clip fits on the outer rim of the spool and can hold your filament securely.
- Where to get it: Thingiverse
Dust Filter
As we know, dust is an enemy of 3D printing. To mitigate this, you can print a small capsule that clips over your filament and holds a scrap of sponge or fabric material, wiping the dust off the filament as it passes through.
- Where to get it: Thingiverse
While many variations of this design are available, you can also simply take a scrap of folded cloth or paper towel and secure it over the filament with a binder clip.
Bonus: Desiccants
Many of the filament storage solutions on this list require the use of desiccants. A desiccant is something that is so hygroscopic that it’ll preferentially absorb all of the ambient moisture in a space. Desiccants are most commonly found in small pouches, but can also be purchased as beads.
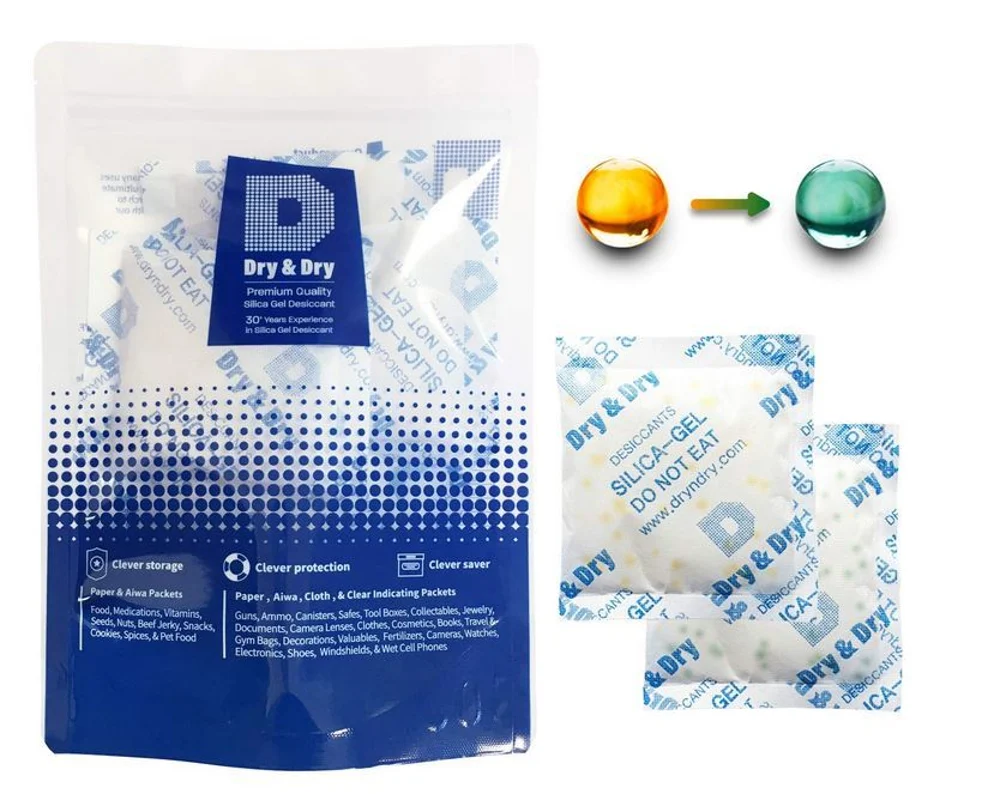
Packets or Pouches
Packets are the most common form of desiccants. They’re convenient, inexpensive, and available in many different sizes from 0.5 to 500 grams. Bulk purchasing is advised, as 50-gram packets can be purchased in a 24-pack for about $24, so a dollar apiece.
Beads
Inside desiccant packets are the desiccant beads themselves. These beads are about 2 to 4 mm in size and can be purchased by weight and used as is. If you’re in need of a large amount of filament drying power, the beads are a good choice. It’s about $35 for a gallon, which consists of 7.5 lbs of beads.
Rechargability
With disposable desiccants aside, the vast majority of beads and packets can be “recharged.” This is accomplished by baking the desiccant at a very low temperature in an oven, food dehydrator, or even microwave. When the desiccant becomes saturated, simply recharge it by baking out all the excess moisture, and you’ll be good to go. Keep in mind that the more desiccant you have in a given container, the less often you’ll have to recharge it.
Color-Indicating
Most desiccant on the market offers a color-indicating feature. This means that as the desiccant becomes saturated with water, the color will gradually transition from, say, blue to orange or orange to green, depending on the desiccant. This feature is available with both packets and beads, although sometimes it can be hard to see the color change through the fabric of the packet.
How Much Is Needed
While it’ll never hurt to err on the side of caution when it comes to desiccants, there’s a formula for how much desiccant is required for any given volume of air: Find the volume of your container in cubic feet and multiply it by 1.2. This will give you the number of units of desiccant you’ll need for that container.
A unit of desiccant is about an ounce, but, more specifically, it can be defined as the amount needed to absorb either three grams of water at 20% relative humidity or six grams of water at 40% relative humidity, both at 25 °C (77 °F). To simplify matters, however, it’s much easier to go with the formula: 1 unit of desiccant = 1 ounce.