Learn the basics of direct and Bowden extruders, hot and cold ends, direct drive and geared extruders, plus nozzle sizes, materials, and uses.
For most makers and hobbyists, 3D printing takes the form of desktop machines that use the process known as Fused Deposition Modeling (FDM) – or Fused Filament Fabrication (FFF), depending on who you ask.
In a nutshell, FDM involves feeding a thread of plastic material into a hot metal block with a nozzle. The filament melts, and the printer’s movements deposit it in the desired shape. This traced path is repeated, stacking incrementally until a solid 3D object forms.
The business end of handling the material – melting it and spitting it out – happens in an assembly of parts that (to some folks) are together known as the extruder. While not that complex mechanically, there are still plenty of parts that, in a specific sequence, allow your 3D printer to extrude plastic.
In this beginner’s guide, we’ll address the main sections of the 3D printer extruder, the variations, styles, popular models on the market, plus the 3D printer nozzle and the usual materials therein.
Note: A previous version of this article conflated direct extruders and direct drive extruders. These are two different things that are commonly mistaken for one another. This guide now makes the appropriate distinction between the two. Apologies for any confusion we may have caused.
WHAT IS AN EXTRUDER?
The 3D printer extruder is a series of parts that handle the moving and processing of plastic filament.
Some people think of the “extruder” as being exclusively the motor and associated parts that push and pull the filament. Others, the entire assembly including the hot end – where the melting and deposition of the filament takes place.
To keep things simple, we’re considering the entire assembly as the extruder. Explaining the extruder requires a close look at two crucial assemblies, commonly referenced to as the “cold end” and the “hot end”.
The Cold End
As the name suggests, the cold end is just that – cold. Cold end refers to the upper portion of the 3D printer extruder system where the filament is fed and passed along into the hot end (the lower portion of the extruder system) for melting and extrusion onto the print bed.
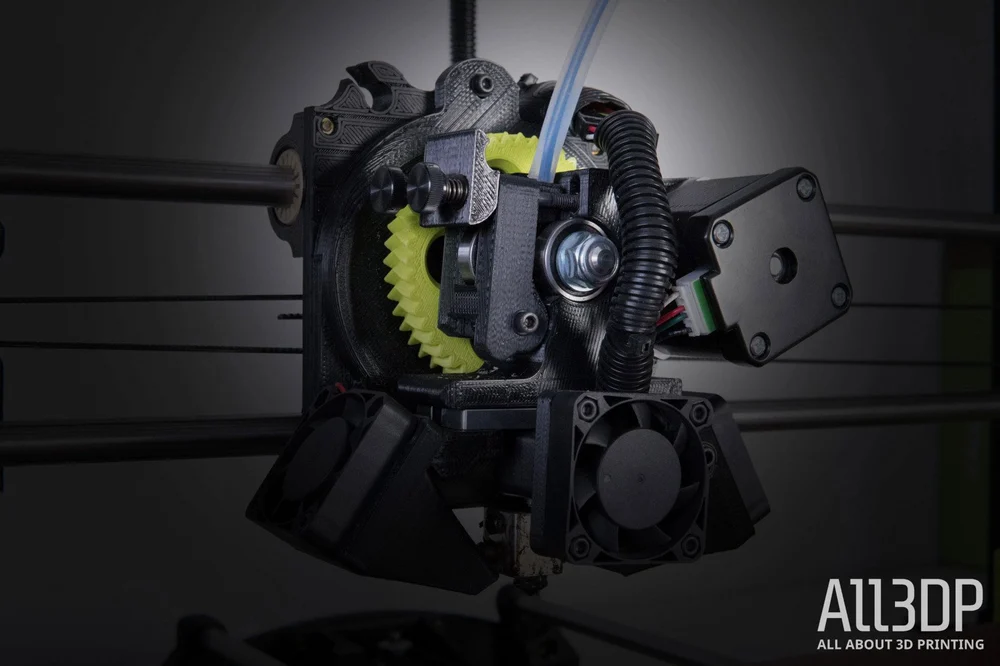
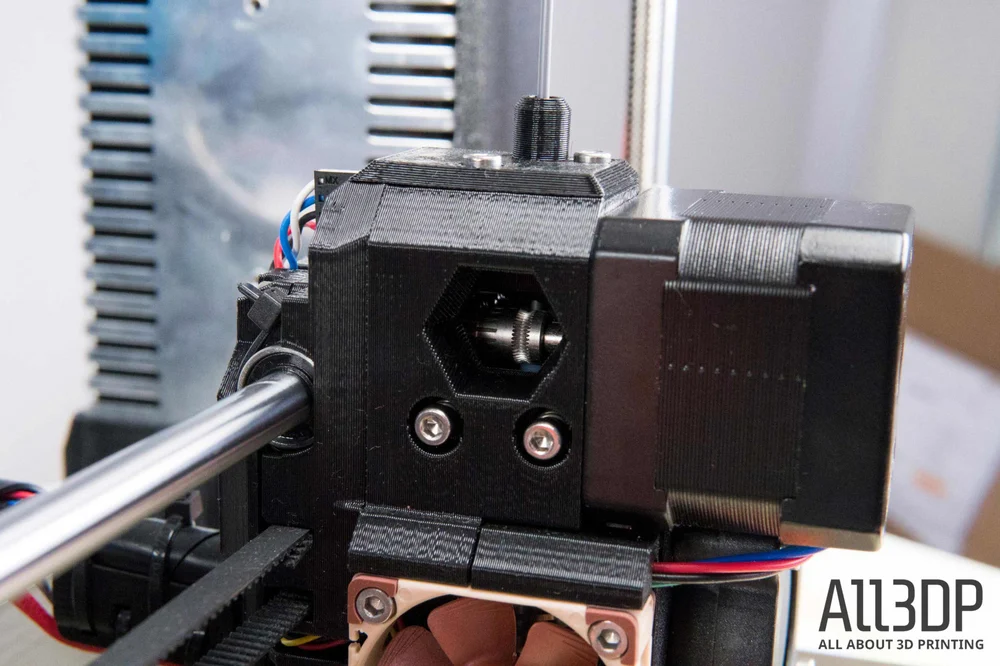
The layout and position of your 3D printer’s cold end are generally determined by whether it is a direct or Bowden extruder. The Lulzbot Taz 6 pictured at the top of this section uses a direct extruder, in which filament is pulled into the print head – the general term for the entire assembly that moves to deposit filament onto the build plate – and pushed into the hot end directly. What we consider the cold end – where the push or pull of filament takes place – is highlighted in the picture above.
The cold end consists of an extruder motor and gearing mounted either to the printer’s frame or the print head itself, depending on the style of extruder. Additionally, there may be PTFE tubing present to guide the filament into the hot end – a necessity in Bowden extruders.
Cold End Anatomy: Gears, Motors & Teeth
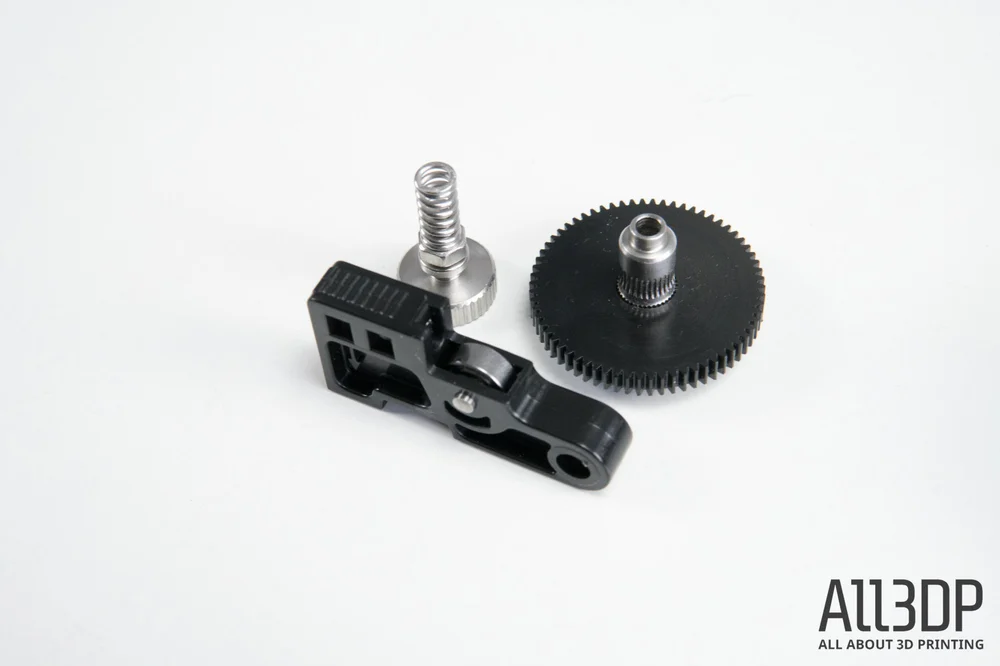
The cold end of a 3D printer extruder typically consists of a stepper motor to drive the motion of the filament, a hobbed bolt or toothed gear mounted to the motor’s shaft to bite into and transfer that movement, a spring-loaded idler (typically a bearing of some kind) to maintain pressure on the filament, and some PTFE tubing to guide the filament to its destination.
This is the broadest description of the cold end of a 3D printer extruder. However, there is a lot of variation in how the extruder works and specific terms that can apply to different arrangements, positions on the printer, and sophistication in the transferral of power from the stepper motor to the filament – we cover these in the following sections.
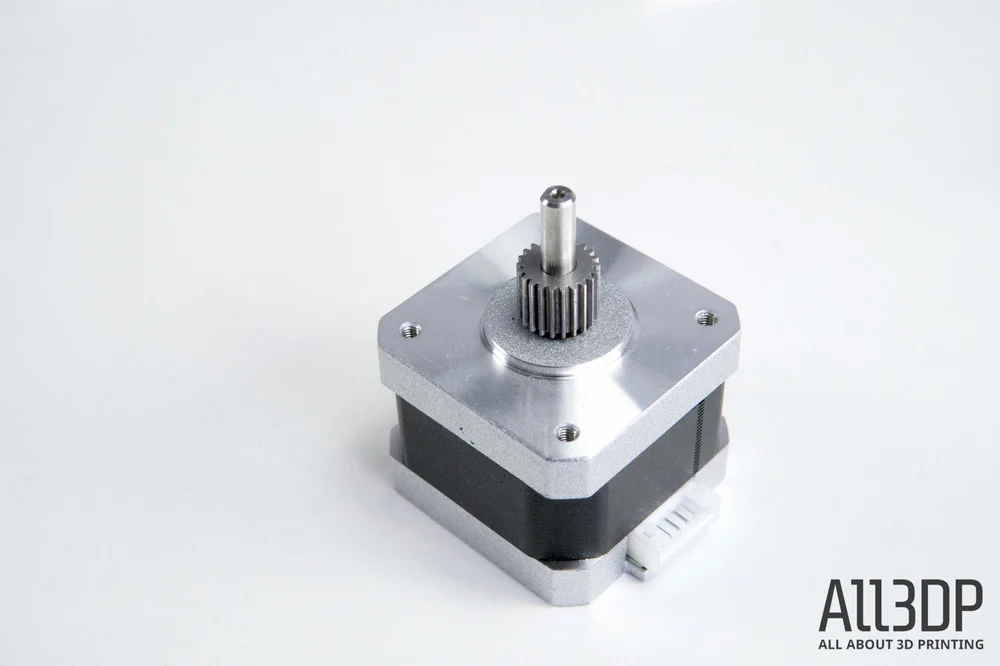
The humble stepper motor – seen here with a metal gear essential for the 3D printer extruder – drives the motion and extrusion of filament in most if not all modern desktop 3D printers. Stepper motors are brushless DC motors that achieve a high level of precision in small movements and impart full torque at low speeds. Exactly what one wants when pushing exacting amounts of filament around a 3D printer extruder. The stepper motor alone is not enough to feed filament to the hot end though. Parts attached to and working with the stepper motor’s driveshaft are required to physically grab the filament and push it along on its path to the hot end.
The most basic version of an extruder will have a toothed or hobbed gear mounted directly on the motor’s driveshaft to grab and feed the filament. This is known as “direct drive” – the stepper motor is directly driving the filament.
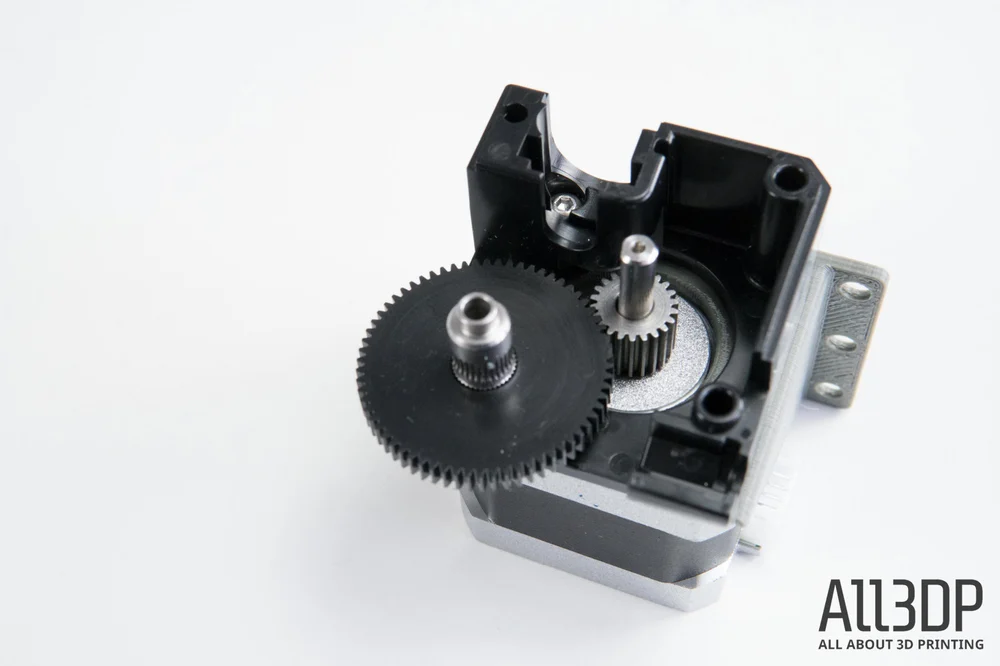
It is also not uncommon to see the use of gearing to alter the torque applied to the filament, in what is known as a geared extruder (see picture above, E3D’s Titan extruder with 3:1 gearing ratio).
Regardless of direct drive or gearing it is almost universal that the cold end of a 3D printer extruder is made up of at minimum a stepper motor, some form of toothed or hobbed gear or bolt, and then the necessary pathway for the filament to advance along toward the hot end.
How tightly the path of the filament is contained within the cold end can impact your printing — most notably with flexible filaments. Since the filament is passing between several components inside the cold and hot ends, any air gaps between constrained pathways give the filament a chance to buckle and escape. If you intend to print with flexible materials or at high speeds it’s important to understand whether the path your filament will be traveling through the whole extruder system, especially the cold end, is tightly constrained. That means channels and tubing that butt right up onto the filament feed gearing.
This is a potential issue most commonly attributed to Bowden extruders, but can affect direct extruders, too.
But what exactly are Bowden and direct extruders, some of you may be asking at this point. As mentioned, there are variations of 3D printer extruder that utilize these same parts in slightly different arrangements. Each can have strengths and weaknesses. Next, we’ll dive into what the differences are between direct and Bowden 3D printer extruders.
The Hot End
Where the cold end applies force to the filament, pushing and pulling as required by the 3D printer, the hot end is where… well, the hot stuff happens.
Inside the assembly known as the hot end, the filament passes into a heated chamber where it transitions from solid to liquid. Sounds simple, and it mostly is. Though there is a lot going on to allow the filament to silkily extrude onto your build plate.
Hot End Anatomy: Tubes, Heat & Nozzle
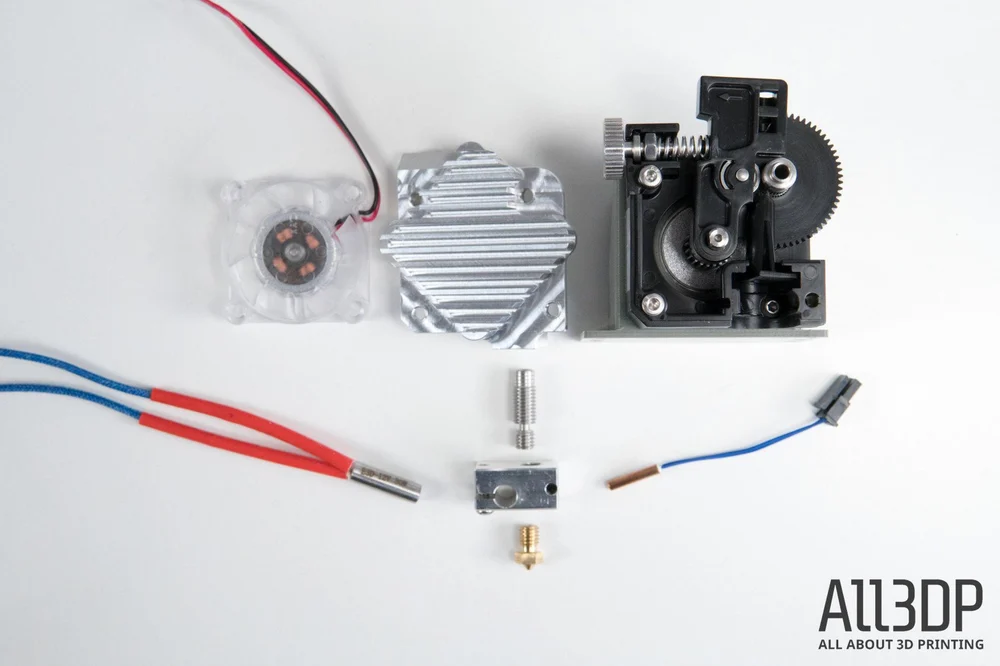
From top to bottom, your typical 3D printer hot end is comprised of a specific sequence of parts, with a slight difference depending on whether you are using a PTFE/PEEK or all-metal hot end. Here we explain the all-metal hot end – a breakdown of the differences between PEEK/PTFE and all-metal hot ends can be found in the section below this.
Firstly, there is the filament feed tube (not pictured above). This will simply be the PTFE tube running from your cold end (if using a Bowden extruder) or guiding filament from the spool. Not all direct extruders feature this – sometimes you’ll see the filament running directly into the print head (of which the hot end is a part) with no tube.
On a Bowden 3D printer extruder, this feed tube inserts the filament directly into the heat break through the heatsink. The heat break, which is threaded into the heatsink, is often simply a threaded stainless steel (or other non-heat conducting metal, such as titanium) tube.
Divided into two parts (notice the two separate threads on the image below – longer for the heatsink, shorter for the heater block) and featuring a treated interior surface, the heat break allows the filament to pass freely into the nozzle for extrusion.
But, since we’re dealing with accuracy and material that turns into a liquid to be rapidly re-cooled, the management of temperature is crucial. The heat break, in combination with the heatsink, maintains a specific boundary at which the filament is hit with high temperatures.
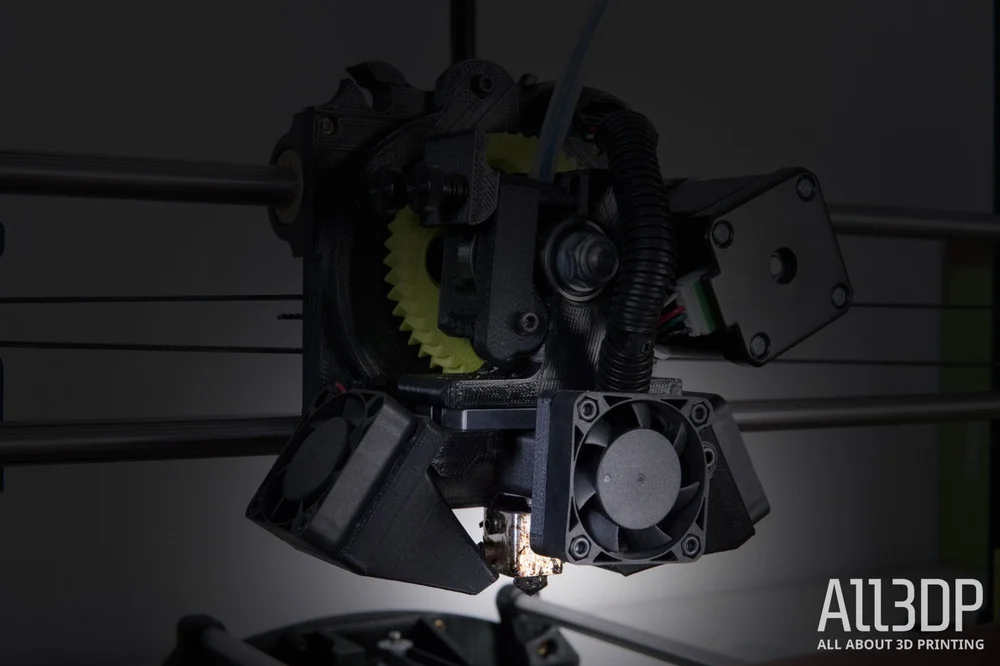
The upper portion, which is actively cooled by the heatsink and a dedicated fan (or water cooling system, in some extravagant cases), prevents heat from escaping the hot end and weakening the filament before it is where it needs to be for extrusion. This undesirable phenomenon is known as heat creep, and can lead to blockages and headaches all-round in your pursuit of 3D printing perfection.
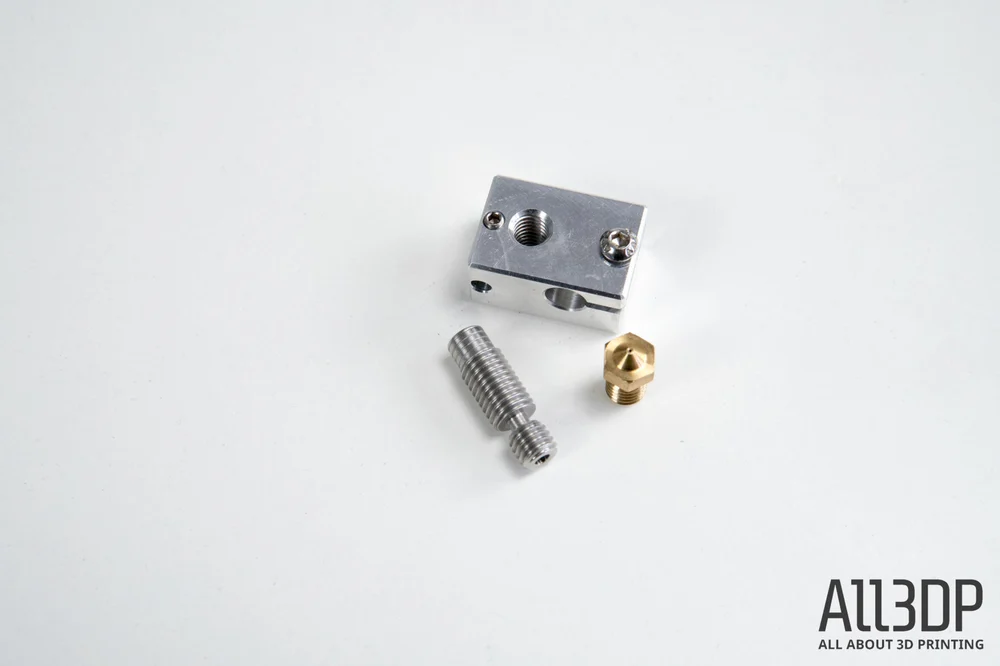
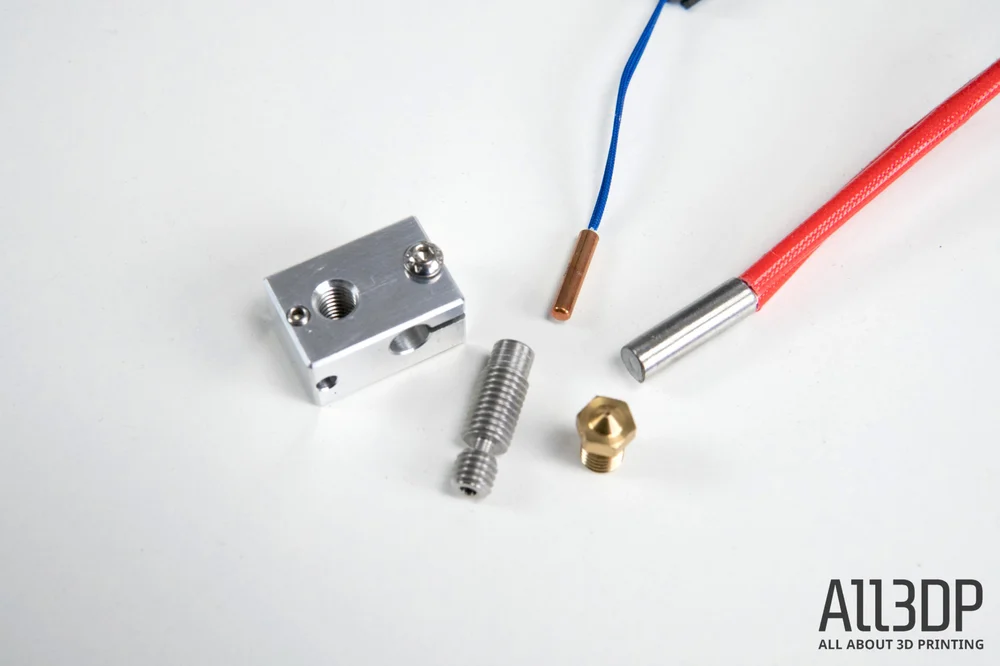
The lower portion of the heat break sits within a heater block, along with a heater cartridge, temperature relaying thermistor, and nozzle.
Usually constructed from aluminum, the heater block ensures a seamless transition for the filament from the open end of the heat break tube, into the nozzle.
The temperature to melt the filament has to come from somewhere though, which is where the heater cartridge comes into play. Under an electric current, the heater cartridge gets hot, transferring heat to the nozzle via the heater block they are both encased in.
Power resistors are an alternate means to heat the hot end but are less common these days.
Also housed within the heater block is a thermistor – a small probe that relays the temperature of the block to the 3D printer’s mainboard, allowing for the correct adjustments to be made. In layman’s terms (we’re not electrical engineers here – it’d be disingenuous to attempt to explain in detail), it does this by nature of its resistance changing in correspondence with its temperature, and thus the printer’s board can get a read on the temperature based on the resistance at that current point in time.
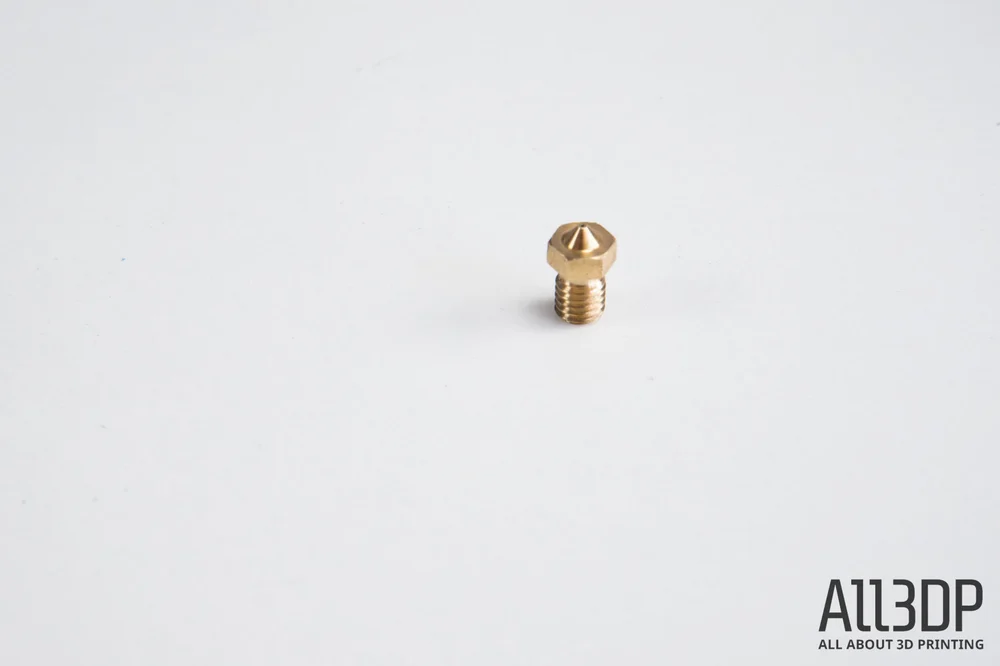
And then, at the raggedy edge of the whole system, there is the nozzle. A small nubbin of machined metal, the nozzle itself has a chamber where molten filament pools, pressure builds, and finally, extrudes through a taper into the nozzle’s opening and out onto your printer’s build plate.
The nozzle opening is a precise diameter, which is the measure by which you purchase it. Most desktop 3D printers ship with 0.4mm nozzles as standard, but there are many other sizes available.
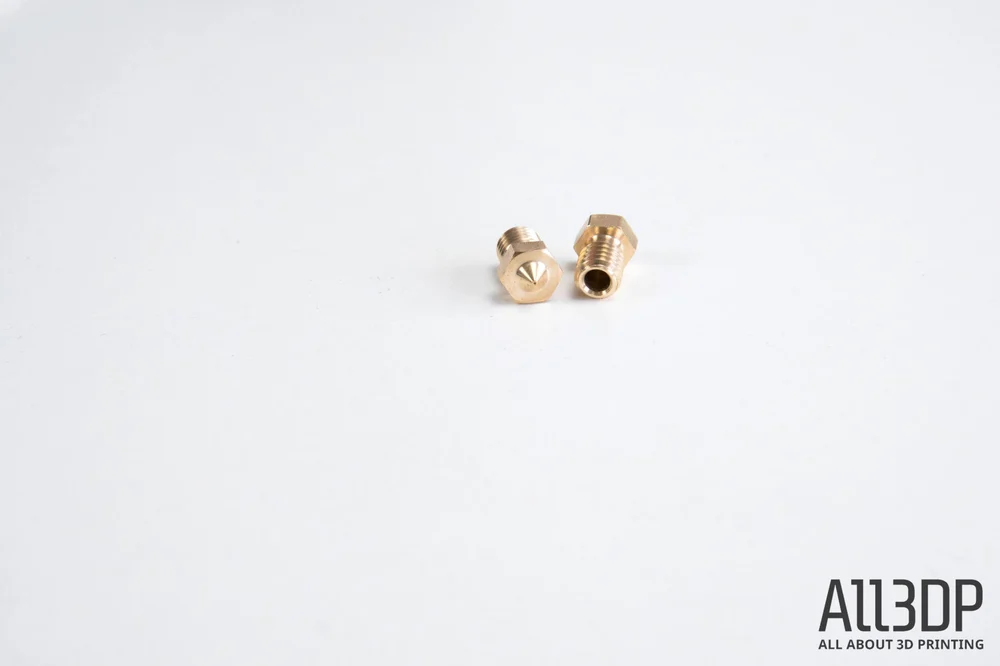
Brass is the preferred material for factory-shipped default nozzles but, while fine for softer materials like PLA and ABS, filaments with tough additives such as carbon fiber will quickly wear away and deform a brass nozzle’s opening. For specialist filaments, 3D printer nozzle materials like stainless steel and ruby are preferred.
The 3D printer nozzle is a veritable world of options, so we’ll detail the popular choices and differences between them below in their own dedicated section.
HOT END VARIATIONS
There’s one more important distinction and glossary check to keep in mind: “all metal” hot ends. Traditionally, hot ends used PEEK (Polyether ether ketone) as an insulator for the PFTE (Polytetrafluoroethylene) tubing inside the heat break, guiding the filament into the heater block for melting.
In the days of simply printing PLA or ABS – which typically require low temperatures to print – PEEK was sufficient. However, attempting to print tougher and more demanding filaments requires higher temperatures that risk breaking both PEEK and PTFE down, releasing noxious fumes, ruining prints, and generally making a mess of your hot end and endangering your health.
All metal hot ends were introduced to allow for the printing of materials that require higher temperatures. In place of a PEEK insulator, we now often see a stainless steel heat break (as described above) separating the PTFE tubing coming from the cold end, and our heating block.
THE 3D PRINTER NOZZLE
The 3D printer nozzle is an integral component of the hot end, exerting influence over the final output of your printer. It is perhaps the most visible part of the system since most folks will – at some point or another – intently watch the first layers of a print extrude from their printer’s nozzle. We’ve all been there.
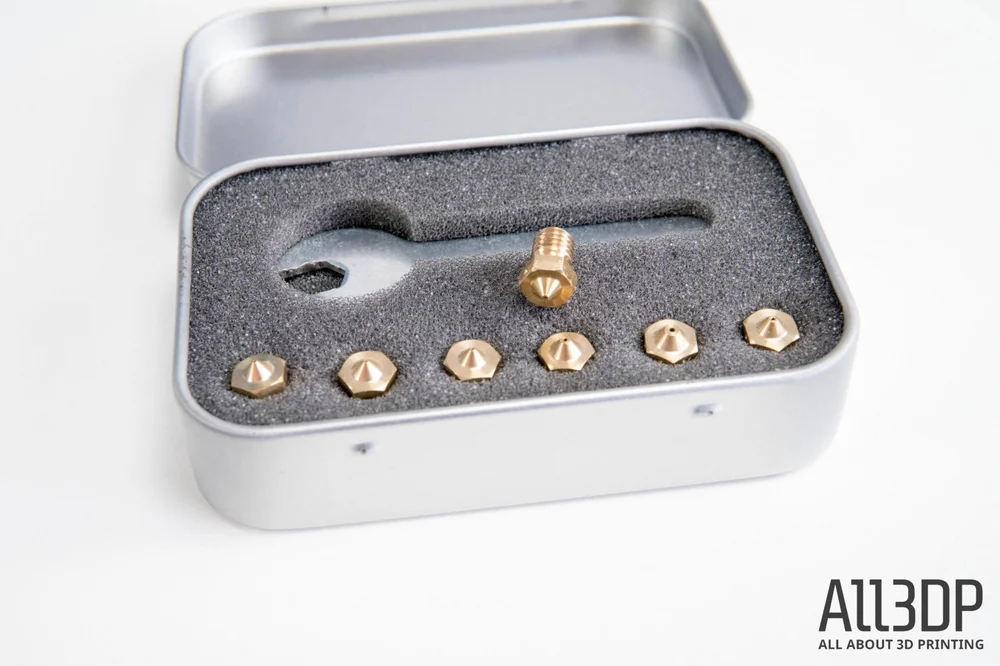
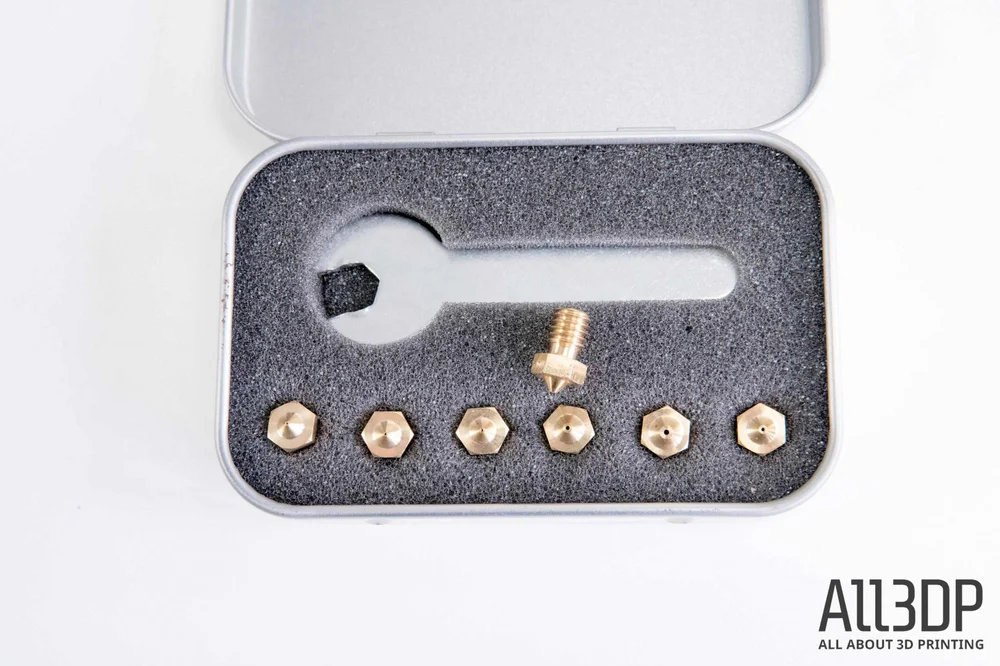
One of the great flexibilities in desktop 3D printing is the ability to swap out nozzles to suit your printing purpose. There is a wide selection of nozzle sizes and materials that grant repeatability when printing with exotic materials or increase the detail and speeds at which you can print.
What Happens in the Nozzle?
There’s little to understand about the 3D printer nozzle. Screwed into the hot end heater block, a small chamber lies within. Filament travels from the cold end into the hot end and through the heat break where it meets the nozzle.
This transition into the heater block is where the filament liquefies. From here it is channeled through the 3D printer nozzle to a taper ending in the nozzle opening.
There are two main considerations when it comes to 3D printer nozzles: the diameter of the opening and the material of the nozzle.
Nozzle Materials
On your average out-of-the-box desktop 3D printer, you’ll find a 0.4mm nozzle. And chances are it is brass. This is fine and dandy for printing run-of-the-mill materials such as PLA and ABS, but when you start to look further afield at exciting materials like glow-in-the-dark PLA, or metal-filled filaments, the softness of brass becomes an issue.
With the continual extrusion of filaments that contain hard particles, the 3D printer nozzle gradually erodes. Over time this distorts the opening and inner dimensions of the nozzle, reducing the consistency of what is extruding from the nozzle and impacting print quality. This is why it’s wise to use a hardened nozzle to print “tough” or particulate-filled filaments.
Here’s a rundown on some of the 3D printer nozzle materials kicking about the market these days:
BRASS 3D PRINTER NOZZLE
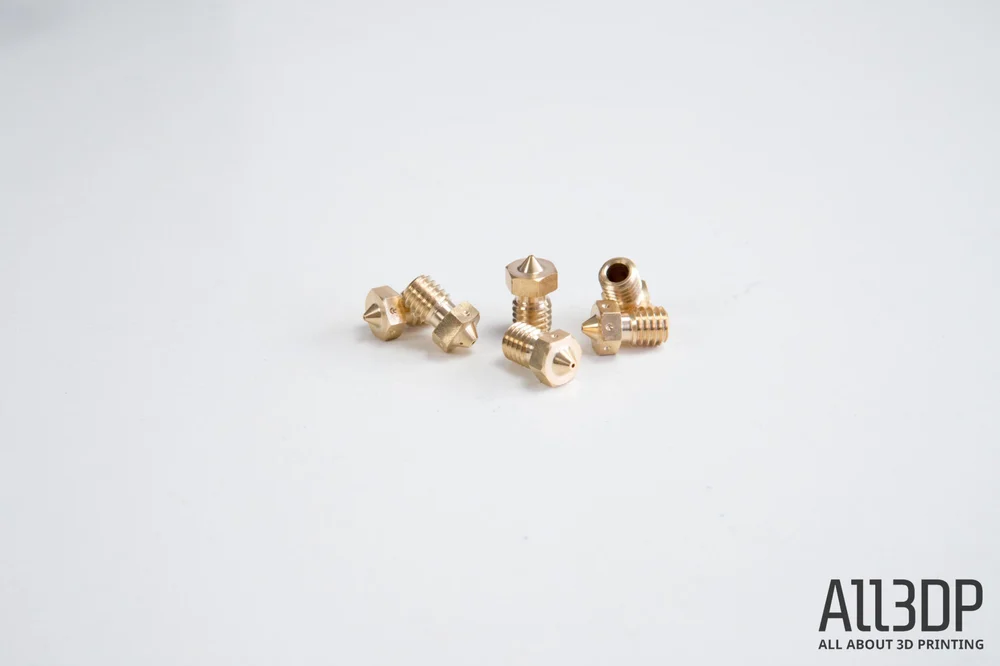
The standard 3D printer nozzle material. Of all 3D printer nozzle materials, it’s the softest around. Easily machined, brass nozzles are cheap and widely available, making them the ideal stock nozzle. Its excellent thermal conductivity also makes it the material of choice for exotic nozzles that use a different, harder material for their tips.
Characteristics:
- High thermal conductivity
- Resistant to corrosion
- Relatively soft
- Low abrasion resistance
Best uses: “Soft” plastic filaments such as PLA and ABS, and PETG. Filaments that do not include particle additives (metal and carbon fiber, for example.)
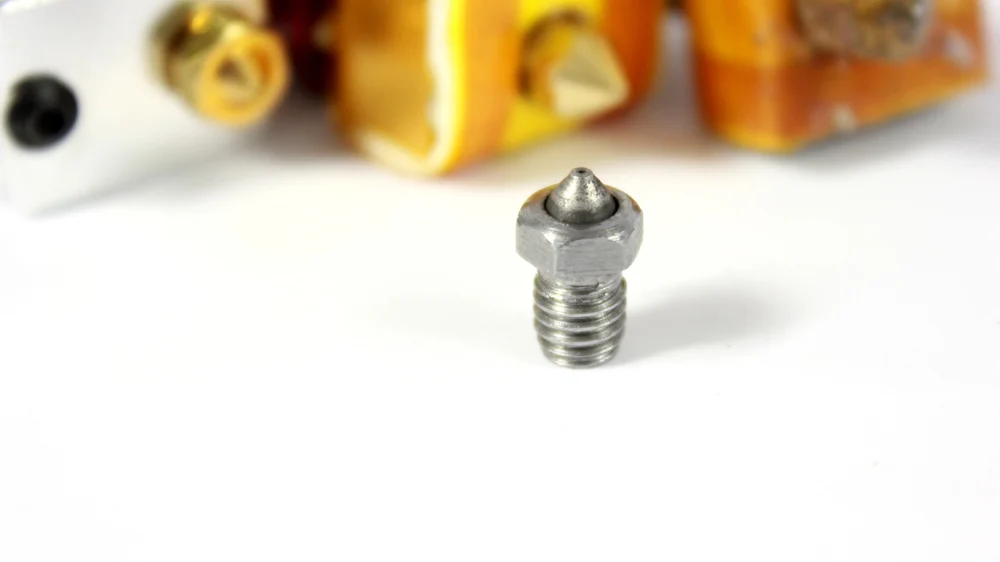
STAINLESS/HARDENED STEEL 3D PRINTER NOZZLE
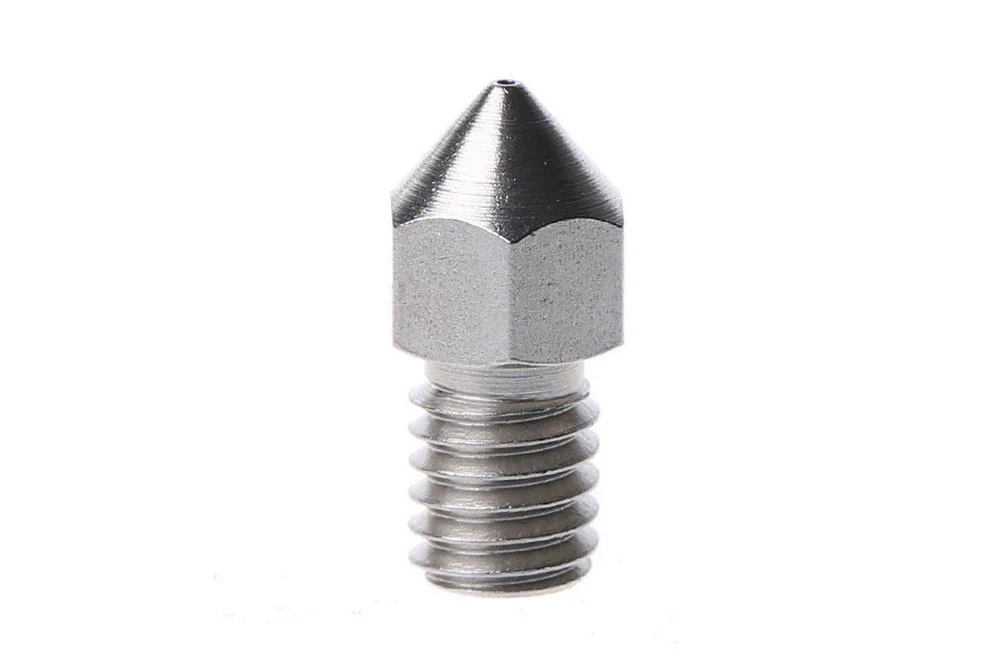
Harder than brass, multiple forms of steel can be found in use as 3D printer nozzles today. Typically stainless steel or hardened steel, these materials allow for the long-term printing of filaments enriched with hard particles like carbon fiber and metal without the risk of the 3D printer nozzle eroding and print performance suffering.
One downside to steel as a 3D printer nozzle is its poor thermal conductivity compared to brass. This can mean inconsistent flow performance, especially at larger nozzle sizes.
Characteristics:
- Low thermal conductivity
- Resistant to corrosion
- Relatively hard
- High abrasion resistance
Best uses: Filaments laced with hard additives such as metal, carbon fiber, and glass.
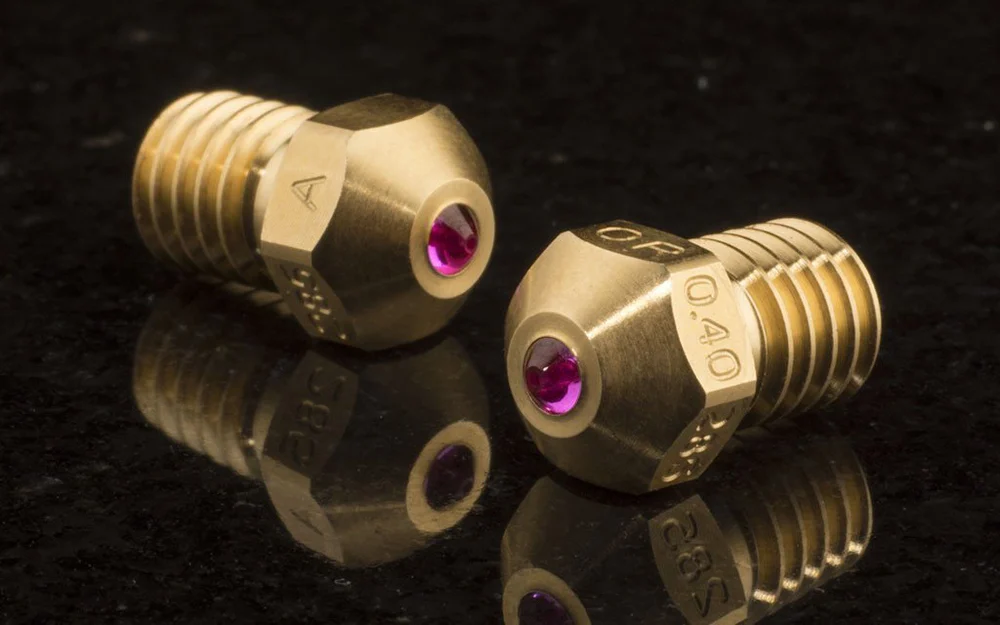
RUBY 3D PRINTER NOZZLE
There is a glut of other materials used for 3D printer nozzles, some more exotic than others.
The Olsson Ruby is one such nozzle. Developed by Anders Olsson, a research engineer at Uppsala University in Sweden, it’s the result of a requirement for a specific experiment 3D printing a filament blend containing Boron Carbide. After as little as 1kg of the filament, standard brass and steel nozzles wore down to unusable distortions of their former selves.
And so Olsson created the Olsson Ruby: a brass nozzle with a ruby tip. The nozzle retains the thermal conductivity of brass and pairs it to the superior abrasion resistance of ruby (specifically aluminum oxide).
It could be argued that the ruby element itself in the Olsson Ruby nozzle has a low thermal conductivity, making it less reliable in some instances, but we’ve seen little chatter online to back this up.
Characteristics
- High thermal conductivity
- Resistant to corrosion
- High abrasion resistance
Best uses: As with steel, highly abrasive filaments are the prime use case for a nozzle like the Ruby. The one difference here is that it was specifically designed to print the third hardest material in the world without giving up the ghost after a few hundred grams of material.
TUNGSTEN CARBIDE 3D PRINTER NOZZLE
A relative newcomer to the 3D printer nozzle market is the Tungsten Carbide nozzle. Produced by Canadian manufacturer DyzeDesign, it is inspired in part by the heavy mining industries and their use of ceramic for cutting metals and drilling rocks. Tungsten Carbide strikes a balance of hardness, abrasion resistance, and thermal conductivity.
Characteristics:
- High thermal conductivity
- High abrasion resistance
- Hard
- Resistant to corrosion
Best uses: Billed as the best “all-rounder”, a Tungsten Carbide 3D printer nozzle would more than comfortably deal with the abrasive filaments that demand a tough nozzle.
Nozzle Sizes
The nozzle diameter affects how fine a level of detail you can aim for in your prints, affecting not only on how wide your line widths are, but the recommended layer heights, too.
For starters when printing with a 0.15mm 3D printer nozzle versus a standard 0.4mm nozzle, there is the obvious advantage of being able to theoretically achieve higher X- and Y-axis resolution. Finer lines can mean sharper corners, but this is only achievable on a well-maintained and tuned 3D printer.
That’s not to say you shouldn’t consider a smaller nozzle for your prints if you don’t feel your machine is as precisely tuned as we mention above, there is another advantage in the reliability in printing finer layer heights.
As a loose rule of thumb, the 3D printer nozzle diameter should dictate the layer heights you aim for. Aim to be printing layer heights approximately 25-50% of the nozzle’s diameter.
This (along with a properly calibrated bed) ensures better adhesion between the lines you lay down. For example with a stock 0.4mm 3D printer nozzle, you should aim to be printing with a 0.1 – 0.2mm layer height.
So, to have a better chance of successfully printing superfine layer heights below 0.05mm, you might be better served opting for a 0.2mm 3D printer nozzle. Like any thumb though (and its rules thereof), it bends. Your mileage may vary and experimentation with your print settings will no doubt accommodate successful prints outside of this rule.
One downside to using smaller bore nozzles is the likelihood of clogs. A smaller 3D printer nozzle opening, by nature of having a smaller path, is more likely to get clogged by particles that would otherwise flow through a larger nozzle. Be prepared for the possibility of regular cleaning and unclogging.
Adding to the possible drawbacks of using a smaller 3D printer nozzle is the dramatic increase in print time, with more passes of the print head required to cover the same distance a larger nozzle would achieve in fewer moves.
On the other side of the coin for 3D printer nozzle sizes is increasing nozzle size. Doing so can have a pronounced impact on your print for the better. Wider extrusions can cut print time exponentially – a single 0.8mm wall takes half the time of a 0.4mm wall that is two lines thick, for example.
In addition, larger line extrusions bond better, resulting in stronger prints. These advantages make large 3D printer nozzles a boon for fast prototyping where fine surface detail is a low priority.
Of course, the downside of printing larger extrusion lines comes at the expense of definition in your print. It logically stands the fatter lines of extruded plastic will render fine surface detail poorer than smaller nozzles.
You could argue that the benefits of using small nozzle sizes are limited to hobbies and professions that demand fine detail, most likely model making and jewelry design. For the average Joe, there’s probably little reason to go finer than 0.4mm (there’s a reason it’s the standard stock 3D printer nozzle size.)
DIFFERENT TYPES AND STYLE OF EXTRUDER
Direct, Bowden, direct drive, geared, remote… There’s a lot of variation in extruder design. Here’s how they break down.
Direct Extruders
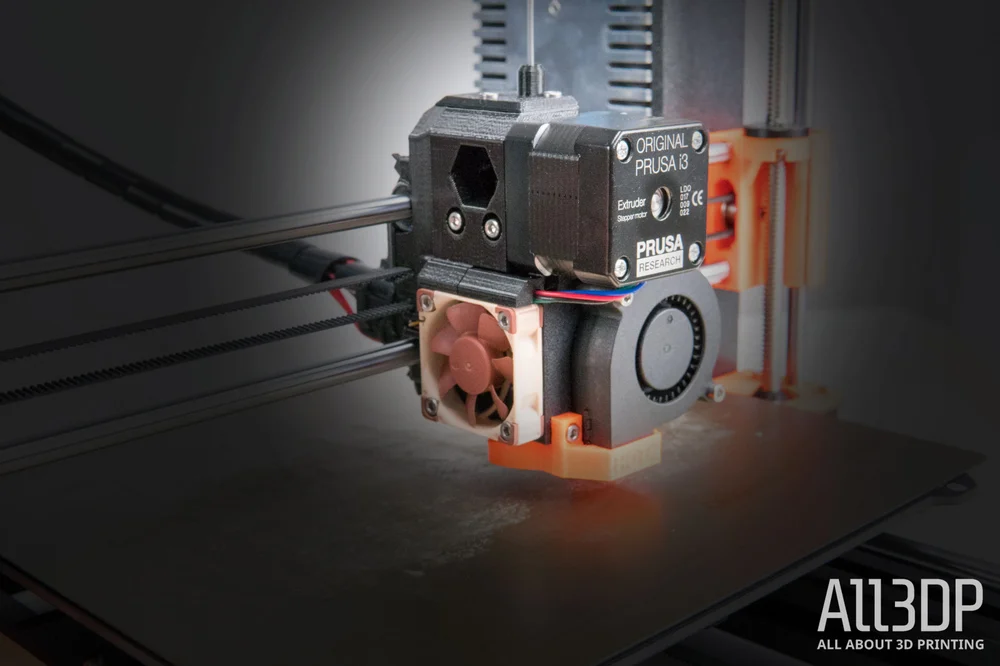
A direct extruder is distinctive for its placement of the extruder motor directly on top of the hot end. Such an arrangement minimizes the travel distance of the filament to the hot end and can allow for more reliable 3D printing of flexible filaments.
Note though that because a 3D printer has a direct extruder does not necessarily mean it can print flexible filaments – soft wiggly filament can and will find its way out of unconstrained paths. For success printing flexible materials, pay more attention to the position of the pinch and the path immediately next to it inside your cold end.
A benefit of direct extruders is the finer control of retraction. Because of its position directly over the hot end, there is less travel between the pinch action and the filament passing through the heat break into the hot end. Consequently, there is less room for the filament to bend and buckle under the pressure exerted on it.
You will find a direct 3D printer extruder contributes to a bulkier, taller print head. Since it is adding a motor and other parts on top of the hot end, it’s apparent that such an extruder is also adding mass to the print head. With this in mind, manufacturers turn to smaller and lighter geared extruders and toughen up the kinematics of their printers to mitigate this mass.
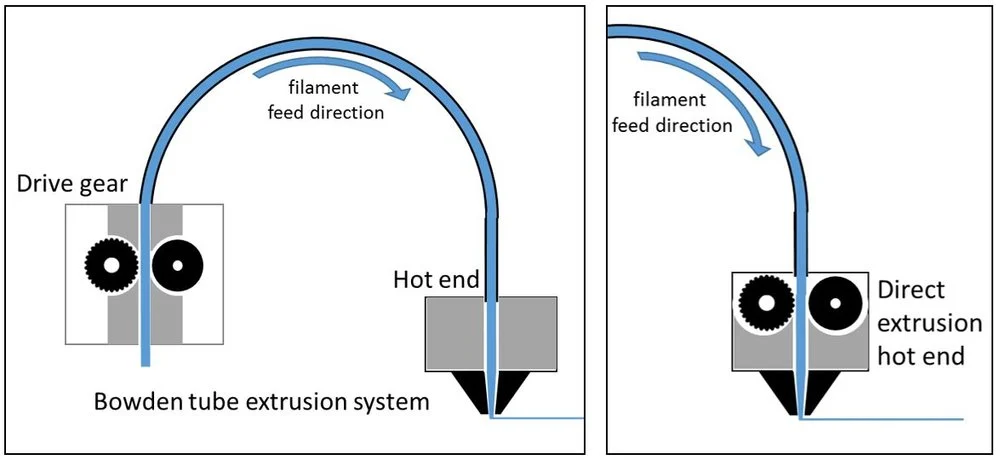
Bowden Extruders
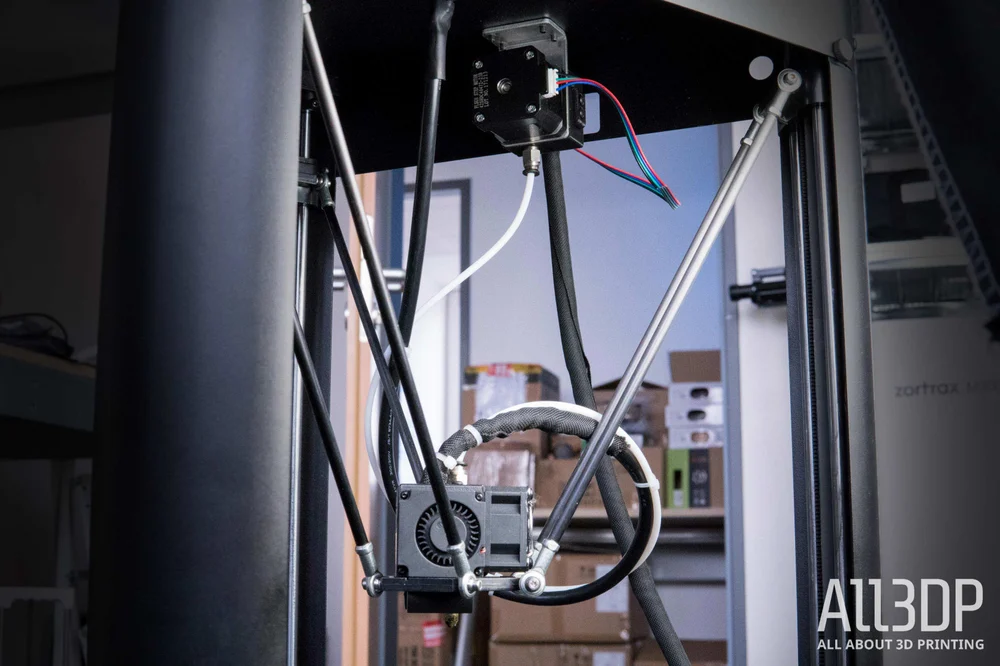
Describing the difference between Bowden and direct 3D printer extruders can be simplified down to two scenarios – the cold end is either: removed from the print head and therefore any vigorous movement as part of the print (Bowden,) or mounted as a part of the print head and moving along with the hot end (direct.) The first places the cold end some distance from the hot end and melting of the filament. The second has it mounted directly over the hot end, reducing the distance filament has to travel before melting.
The Bowden extruder’s placement has one strong benefit – the print head is lighter and has less mass to control, freeing the hot end to move at higher speeds without introducing print blemishes from the resonance, such as ringing (ghosting).can contribute to higher print speeds and quality.
Mechanically a Bowden 3D printer extruder is no different from a direct 3D printer extruder. You still have a stepper motor driving a toothed gear or hobbed bolt, which bites into the filament passing through it. Since the filament now has some distance to cover before entering the hot end for melting, the use of PTFE tubing is necessary to guide it. This tubing, typically with an internal diameter slightly larger than that of the filament, constrains the material’s path and allows the cold end to exert pressure as it feeds.
There’s a widely held belief that direct extruders have greater control over the flow of filament into the hot end, by nature of the placement directly on top – better even than Bowden extruders. Certainly, it’s true that your retraction settings might need more fine-tuning with a Bowden extruder-equipped 3D printer.
Direct vs Bowden Extruders: Flexible Filament

There are common arguments for and against Bowden and direct extruders – mainly against Bowden extruders, and their supposed inability to handle flexible filaments.
Such arguments likely arose from the development and availability of flexible filaments for 3D printing, and their attempted use in 3D printers designed before such materials were a consideration. Because of this, there’s a bit of a stigma around Bowden extruders and their supposed inability to print flexible filaments. While it’s certainly true that a lot of inexpensive 3D printers will struggle to print flexible filaments, it’s not inherently because they use Bowden extruders; more that the Bowden extruders they use weren’t designed to print flexibles.
Any extruder is capable of pushing or pulling wiggly flexible filaments. The problems arise when that filament is ineffectively constrained beyond the pinch point of the extruder. This is a design quirk present even on some direct extruders.
Materials such as TPU are soft and wiggle like cooked spaghetti, so require better guidance through the 3D printer extruder to avoid buckling and wrapping around moving components. If you’re looking to print flexible filaments, there needs to be as little open space from where the filament is gripped by the hobbed gear and bearing, and its entrance into the heat break.
That should be about it with regards to the 3D printer extruder and printing flexible filaments. But that alone isn’t enough for success. There are print settings you must consider that will ensure it, such as speed and retraction.
And this is all without mentioning that flexible filament is a pretty broad church. There’s a world of difference between a low shore hardness A-rated filament and a high A-rated (or low D-rated) flexible filament. Some materials print like PLA, but result in soft, bendable prints. Others are extremely soft and bendable and require extremely cautious print settings to not overstress the filament while printing. You can learn more in our article Flexible Filaments for 3D Printing – Simply Explained.
Direct Drive Extruders
There is a further complication in this terminologically dense area of 3D printing: the direct drive extruder, which is not the same thing as a direct extruder.
A direct extruder, as detailed above, refers to the placement of the cold end and its direct proximity to the hot end. A direct drive extruder however is one that has its toothed gear mounted directly on the stepper motor’s driveshaft. Any motion of the extruder’s stepper directly transfers to the filament.
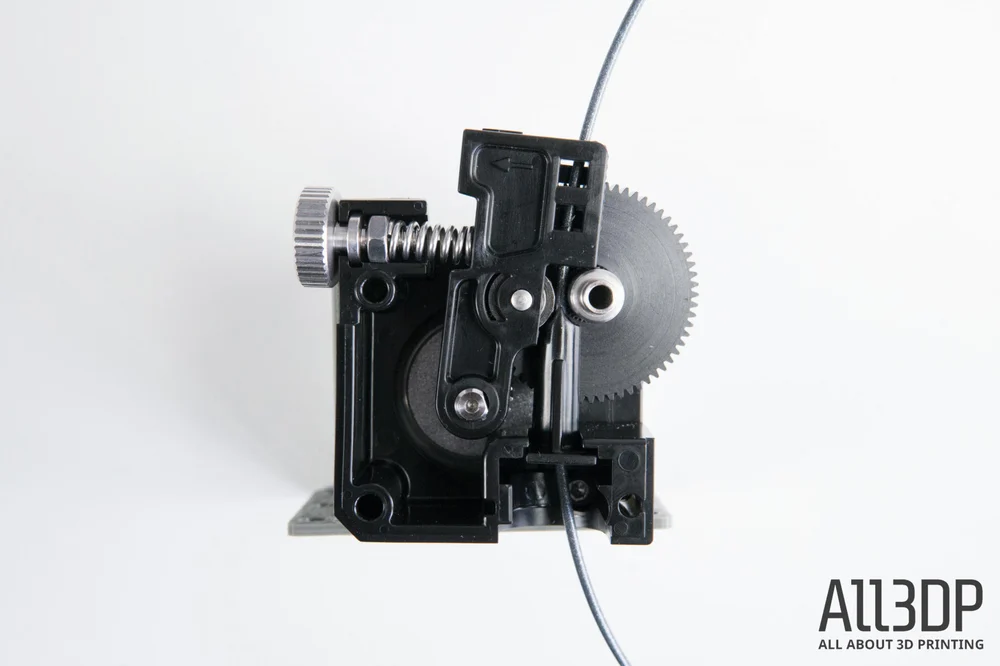
Why is this significant? For one thing, it’s perhaps the cheapest and simplest way to configure your printer to extrude filament. Many low-cost printers use direct drive extruders — the MK8 style using a toothed gear and spring-tensioned idler being a prominent example seen on many inexpensive desktop 3D printers.
That an extruder is a direct drive is agnostic of the extruder’s placement. Many Bowden and direct extruders are direct drive, with the pinch point of the filament coming directly from a toothed bolt mounted to the extruder stepper motor’s driveshaft.
There are also dual-geared variants of direct drive extruder that distribute the force across two toothed or hobbed bolts, digging into the filament from two sides. Such a system reduces the chance of filament grinding and stripping and increases grip, but does not inherently alter the amount of torque being applied to the filament. That’s where geared extruders come into play.
Geared Extruders
Where direct drive extruders give agility and a fast filament feed, this doesn’t necessarily translate to a steady and powerful flow.
For that, you can turn to a geared extruder, which employs a transmission ratio that lowers the rotational speed of the filament-biting gear, but increases the torque applied. It’s easy to see this simply as “more power”, but the nuance of a geared extruder is not necessarily to draw upon more power, but to use smaller and lighter (weaker) stepper motors while still giving sufficient filament pushing power. Of course, it goes without saying that more power can be necessary sometimes, especially if you’re printing fast, or with thicker gauge filament – a geared extruder is where this power comes from.
Popular examples on the market today include the many extruders designed and produced by Bondtech. The Bondtech Mini Geared (BMG) extruder, in addition to a dual-gear feed, has a gearing ratio of 3:1. As does E3D’s Titan extruder – it doesn’t feature dual-gear feed but does use a 3:1 gearing ratio with the explicit intent of being a lighter unit for direct extruder mounting.
Geared extruders have a long history in the RepRap project, with numerous designs using 3D printed gearings to step up the torque applied to the filament.
POPULAR 3D PRINTER EXTRUDER AND HOT END UPGRADES
One way you might improve your 3D printer’s performance is to swap out its stock extruder and hot end for an aftermarket upgrade. Here’s a selection of popular 3D printer extruder and hot end upgrades that should be compatible with a vast number of the desktop 3D printers available today.
If you are considering upgrading your 3D printer extruder or hot end, make sure it is compatible with the filament size setup of the equipment you will be pairing it with (for example, 1.75mm or 3mm filaments, 12V or 24V printer).
E3D Hemera
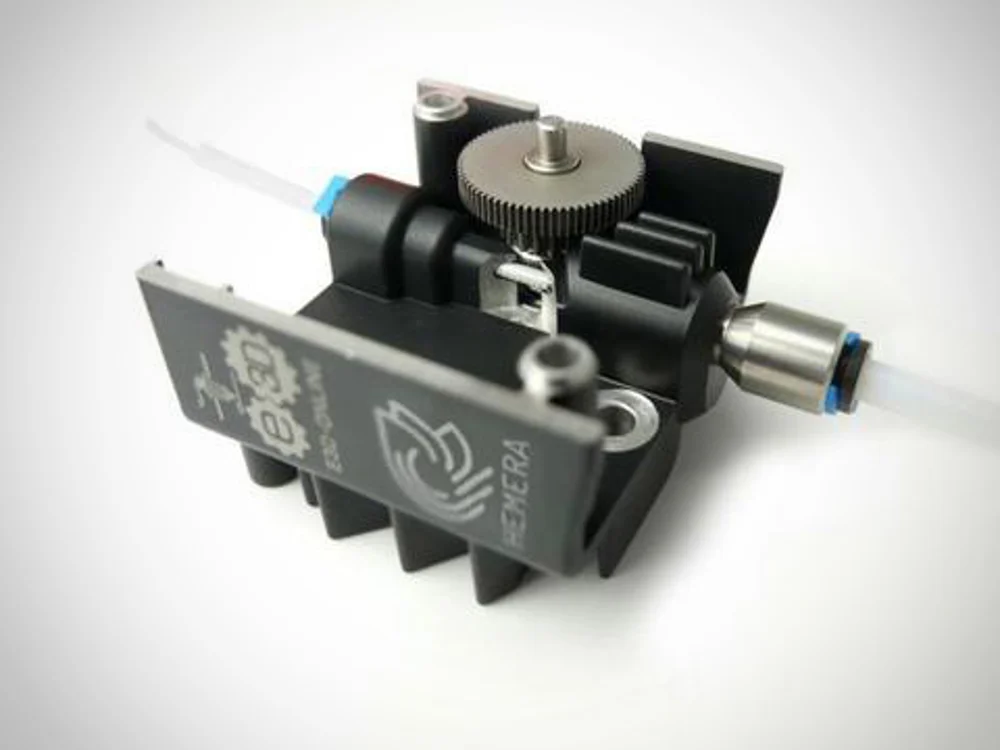
With its distinctive heatsink design and compact frame, E3D’s Hemera dual-geared extruder is a micro-powerhouse capable of up to 10 kg of pushing force on filament. It utilizes a gearing ratio of 73:22 to achieve this, giving incredible grip for such a small extruder. Compatible with the company’s ecosystem of hot ends, including the V6 and Volcano families, the Hemera serves as the successor to E3D’s popular Titan extruder. Configurable as both direct and Bowden extruder, the Hemera comes in 12V and 24V variants and is compatible with 1.75 mm filament.
Slice Engineering Mosquito

With the blood-sucking creepy-crawly emblazoned on its side, you’d be forgiven for thinking the Mosquito was a bit icky. In reality, it’s a smart alternative hot end that radically rethinks hot end design. The heat break is braced by stand-offs between the heatsink and heater block, meaning that single-handed nozzle changes are possible without endangering the heat break. Lightweight, with a tight filament path tolerance and capable of up to 500 ℃, it can produce high-detail prints from demanding engineering materials. Pricy but radical.
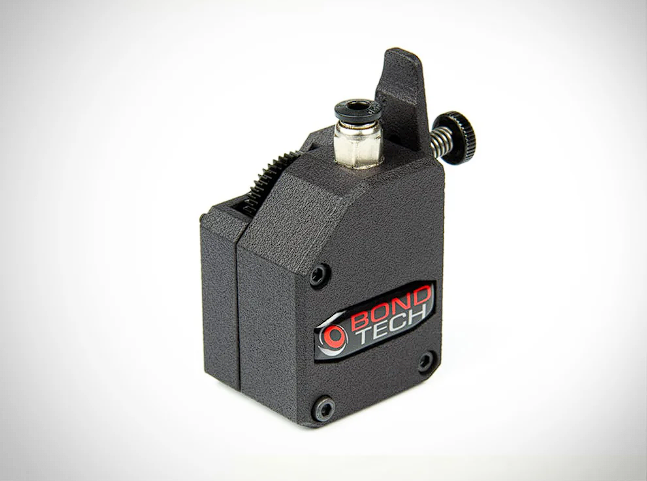
Bondtech BMG
And there you have it – more than you could possibly want to know about 3D printer extruders. It’s a messy, terminological minefield, and one that has even tripped us up. If we’ve missed something, sound off in the comments.