This guide is designed to take you from a resin printing enthusiast to a master of metallization. Adding copper to resin involves bridging the gap between organic polymers and inorganic metallurgy.
Below is the definitive, deep-dive guide covering every technical nuance, based on the best practices from industry leaders like Prusa and specialized electroforming communities.
Phase 1: The Metallurgy of Resin (Preparation)
Electroforming is additive manufacturing at the atomic level. Unlike a “coat of paint,” you are growing a crystal structure.
1.1 Model Engineering
- The “Hollow” Trap: If your resin print is hollow, the trapped internal gases or uncured resin will expand during the plating process (which is an exothermic reaction). Action: Drill two small holes (entry/exit) to allow the plating solution to flow through and be rinsed out.
- Feature Sharpness: Electroplating tends to “round off” sharp edges and “fill in” deep crevices. If your model has micro-details, you may need to scale them up by 2-5% to compensate for the metal thickness.
1.2 Surface Activation
Resin is chemically inert. To get copper to stick, you must create “mechanical tooth.”
- Chemical Etching: Some pros use a brief dip in a chromic acid solution to “rough up” the resin at a microscopic level, but for DIY, wet sanding with 600-grit is safer and effective.
- Degreasing: Even the invisible film from your skin will prevent metal bonding. Use a 10-minute soak in an ultrasonic cleaner with a mild degreaser.
Phase 2: Establishing the Conductive “Seed” Layer
You have two primary paths to make your resin conductive.
Option A: The “Nickel Spray” (Professional Standard)
Nickel-based conductive sprays (like MG Chemicals 841AR) provide the best conductivity-to-detail ratio.
- Technique: Apply in 2-3 “mist” coats rather than one heavy coat to avoid drips that obscure details.
- Curing: Let the paint cure for at least 24 hours. If the solvent hasn’t fully evaporated, it will react with the acid bath and cause the copper to “bubble.”
Option B: The “Graphite Slurry” (The Maker’s Path)
- The Recipe: Mix high-purity graphite powder with a carrier (like wood glue or acrylic matte medium) and a splash of distilled water until it’s the consistency of ink.
- The Test: Use a multimeter. Measure the resistance between the two furthest points on your model. You want to see less than 500 ohms. If it’s higher, the copper won’t grow evenly.
Phase 3: The Chemistry of the Bath
The “Electrolyte” is your fuel. You can buy premade “Bright Copper” solutions or mix your own.
3.1 The Standard Electrolyte Formula
For every 1 Liter of Distilled Water:
- Copper Sulfate (CuSO4): 200g (The copper source).
- Sulfuric Acid (H2SO4): 50ml (Increases conductivity and prevents copper hydroxide formation).
- Hydrochloric Acid (HCl): 1-2 drops (Helps the anode dissolve).
- Brightener: 1ml of “Brightener” (usually a proprietary organic compound) to ensure the copper grows in tiny, shiny crystals rather than dull, matte bumps.
3.2 The Anode Setup
Use Phosphorized Copper Anodes. Pure copper creates “anode sludge” that settles on your model, causing pits.
- The Mitten: Wrap your anode in a polypropylene filter bag (an “anode mitten”) to catch any falling debris.
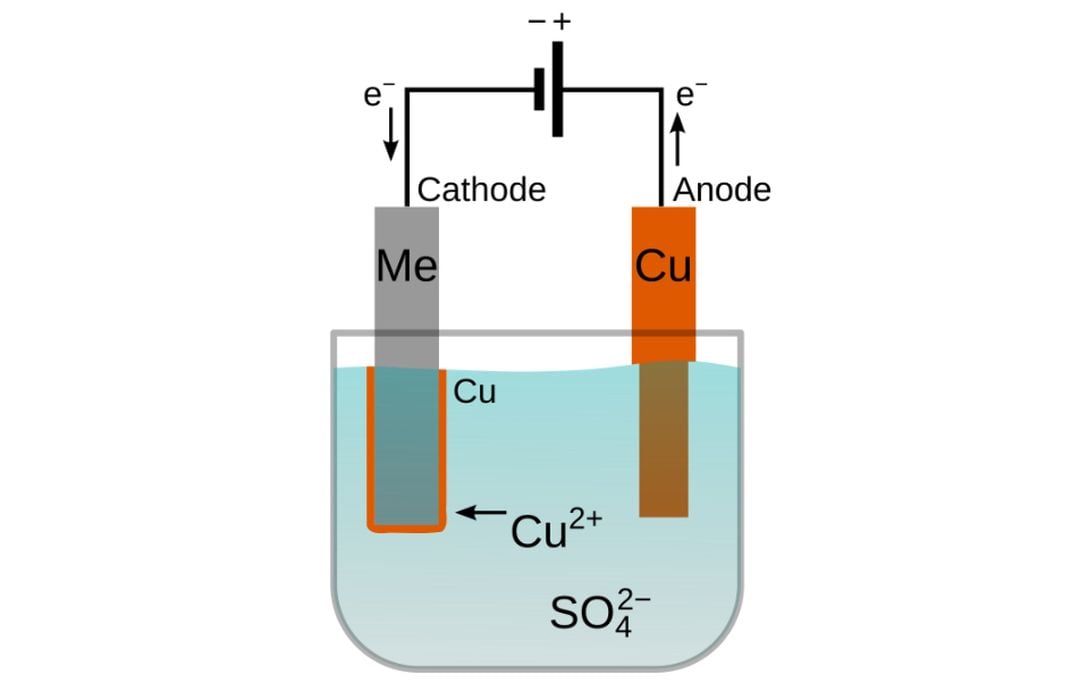
Phase 4: The Physics of Plating (The Power)
This is where the magic happens. You need a Constant Current DC Power Supply.
4.1 Calculating Current Density
You don’t just “turn it on.” You must calculate the surface area of your model.
- The Golden Rule: Use 0.1 Amps per 10 cm^2 of surface area.
- The “Slow Start”: Start the first 30 minutes at half the calculated amperage. This ensures a delicate “strike” layer covers the conductive paint before you “crank it up” to grow thickness.
4.2 Handling “The Shadow Effect”
Electricity takes the path of least resistance. The side of the model facing the anode will get thicker copper.
- Solution: Use multiple anodes (one on each side) or use a slow-turning motor (3-5 RPM) to rotate the model inside the tank.
Phase 5: Post-Plating & Finishing
Once you have reached a thickness of 0.2mm – 0.5mm (usually 4-8 hours), pull the part out.
5.1 Neutralization
The part is covered in acid. Rinse it in distilled water, then a baking soda bath to neutralize the acid, then distilled water again.
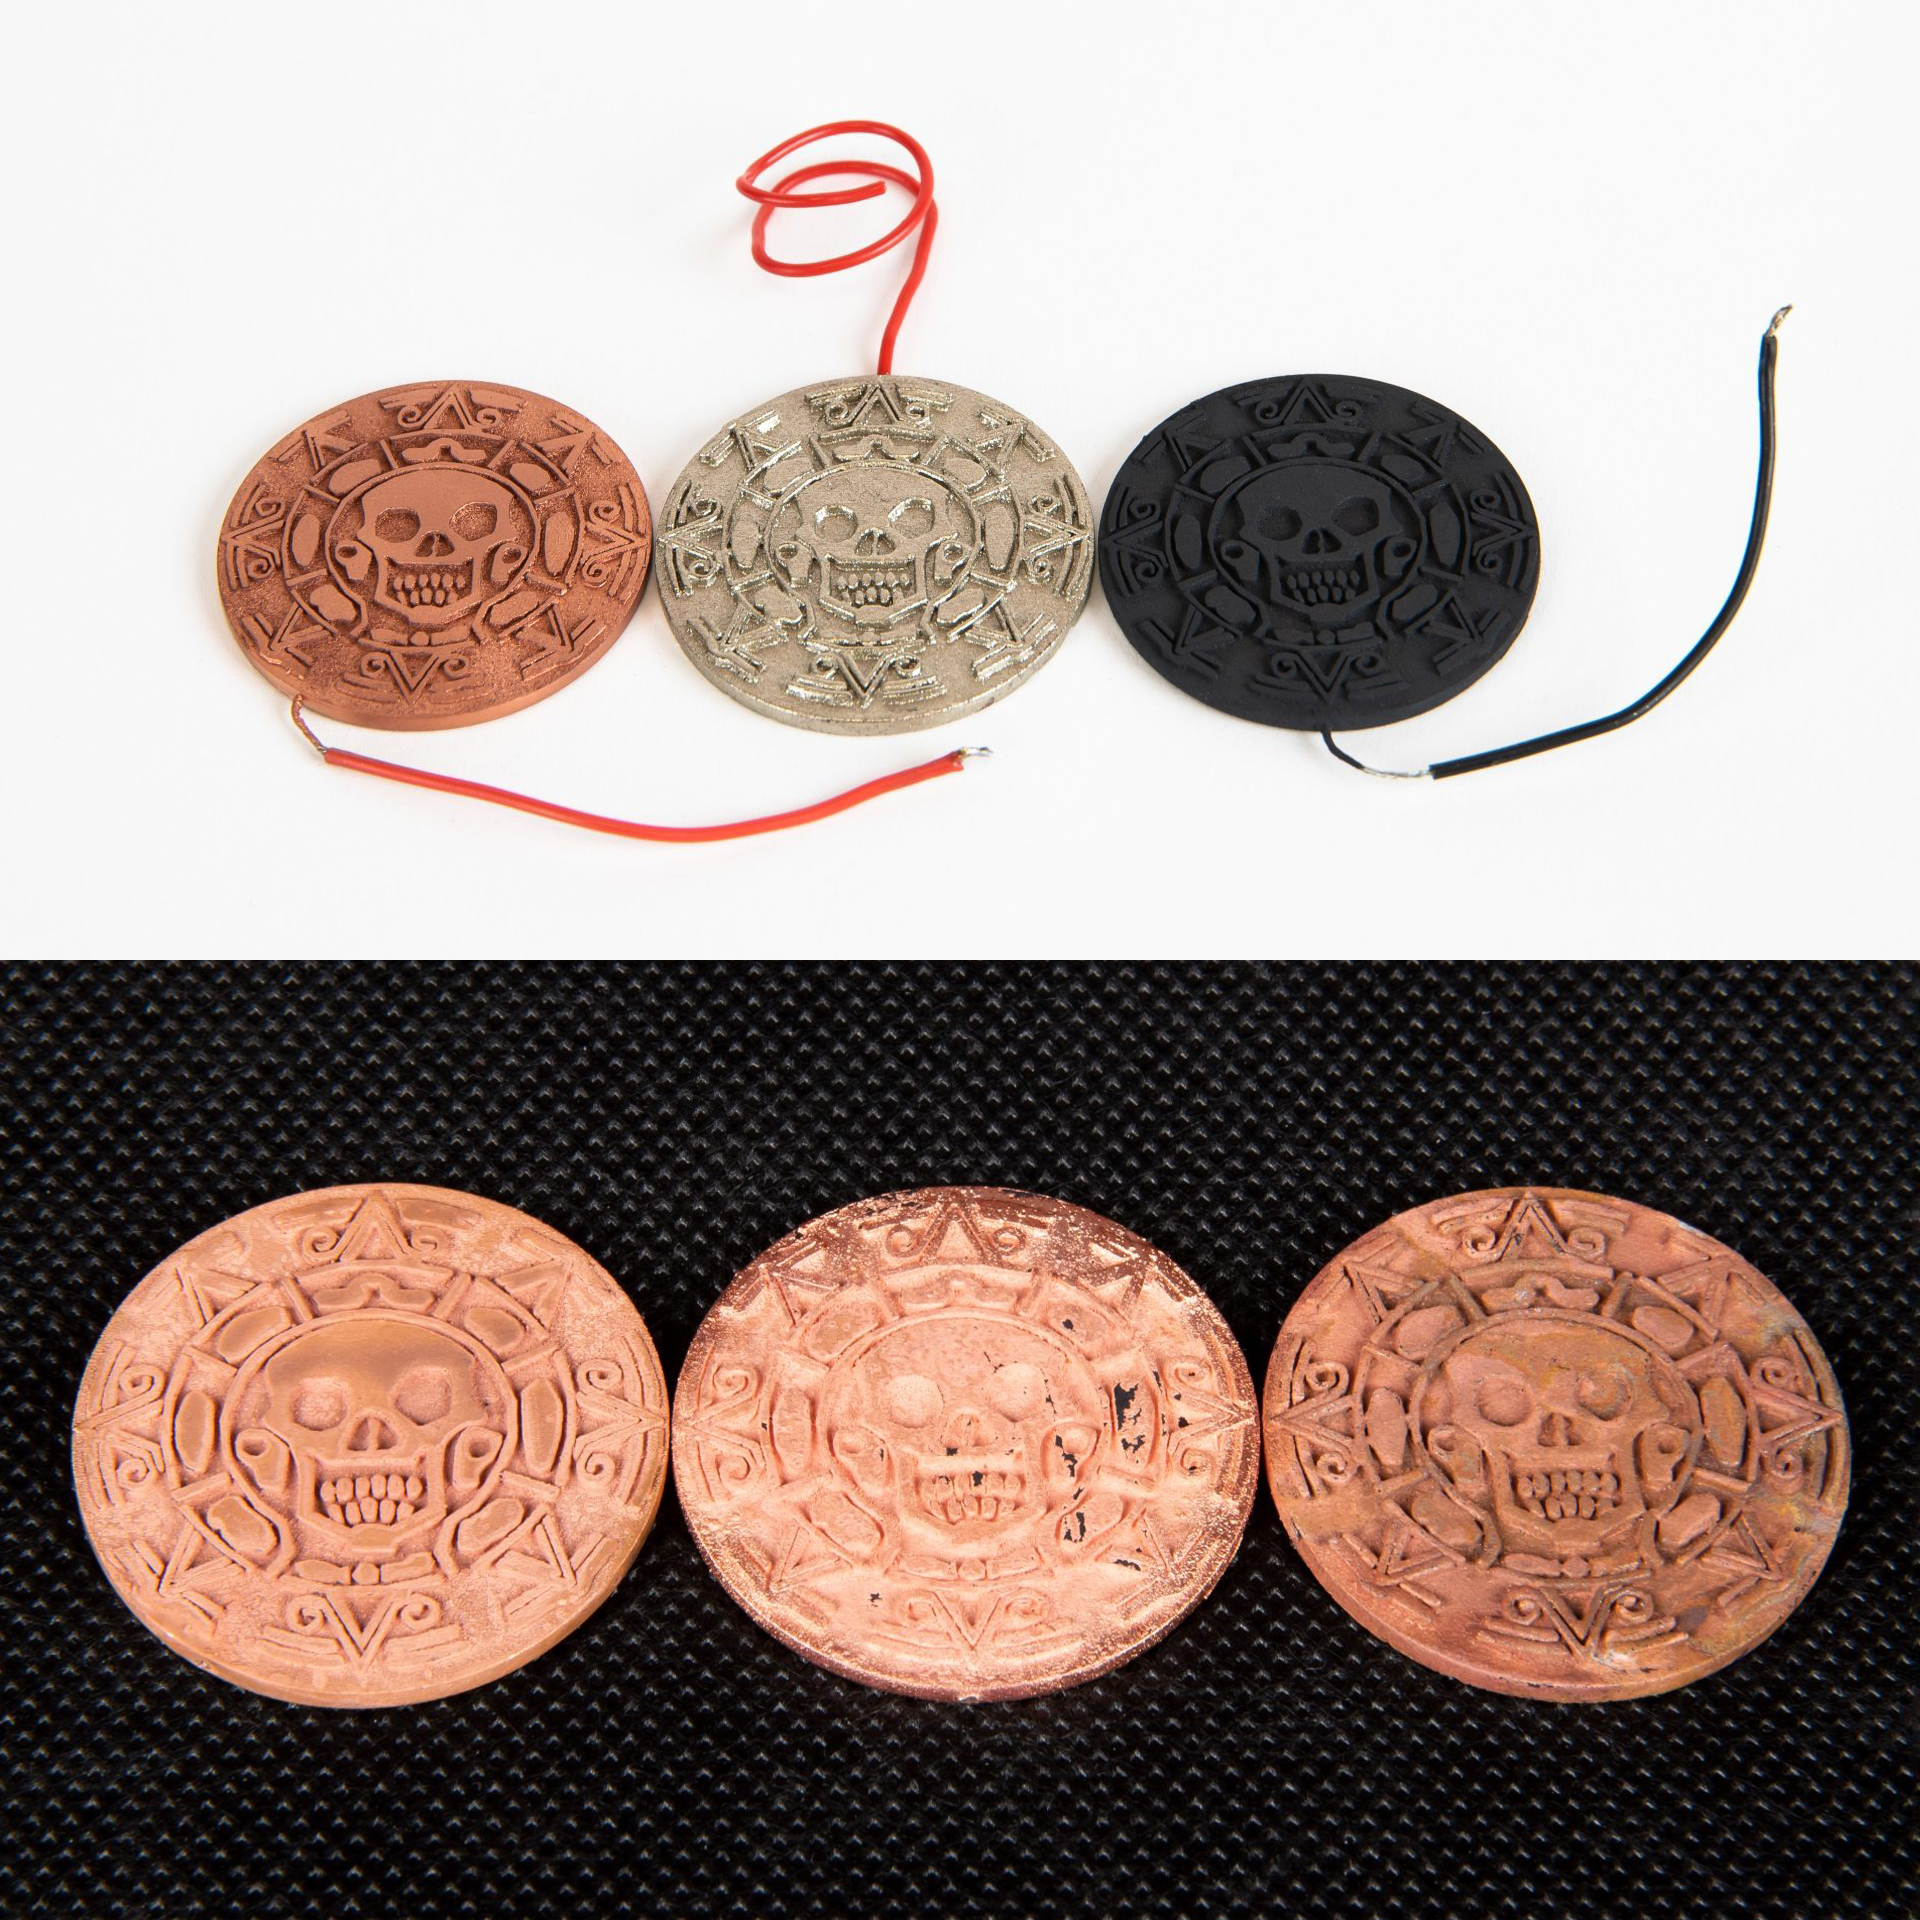
5.2 Polishing & Patina
- Sanding: The copper will be “salmon pink.” Use 1000-grit wet/dry paper to smooth it.
- Polishing: Use a rouge compound and a buffing wheel.
- Chemical Aging: If you want an antique look, use Liver of Sulfur. It reacts with the copper to turn it black/dark brown instantly. Buff away the high spots to reveal the bright copper underneath.
Troubleshooting Master Table
| Symptom | Diagnosis | Cure |
| Dull, pink “muddy” copper | Amperage is too high. | Lower the Amps; check your brightener levels. |
| Copper “peels” off in sheets | Poor surface prep. | Improve sanding/degreasing; ensure paint is dry. |
| Pitting or small holes | Air bubbles or anode sludge. | Use an air bubbler; wrap anodes in filter bags. |
| Copper only grows near the wire | Conductive paint is too resistive. | Add another layer of paint or use Nickel spray. |
Final Pro-Tip: The “Nickel Strike”
If you find that your copper bath is “eating” your conductive paint before it can plate (common with some graphite mixes), perform a Nickel Strike first. Nickel plates much faster and creates a “shield” that the copper can then build upon without damaging the base.
While DIY electroforming is a rewarding journey, achieving consistent, industrial-grade results on complex geometries can be a daunting challenge. If your project demands perfection without the chemical trial-and-error, FacFox is your ultimate partner.
As a leader in digital manufacturing, FacFox offers professional metal 3D printing (DMLS/SLM) for parts that are solid metal from the inside out, alongside premium electroplating and PVD services for resin prints. Whether you need the structural integrity of sintered copper or a flawless, mirror-polished decorative finish, our expert post-processing team ensures your designs transcend the “3D printed look.”
Skip the acid baths and power supplies—let us handle the chemistry while you focus on the design. Ready to turn your vision into metal? Would you like me to help you compare the costs between DMLS copper printing and resin electroplating for your specific model?