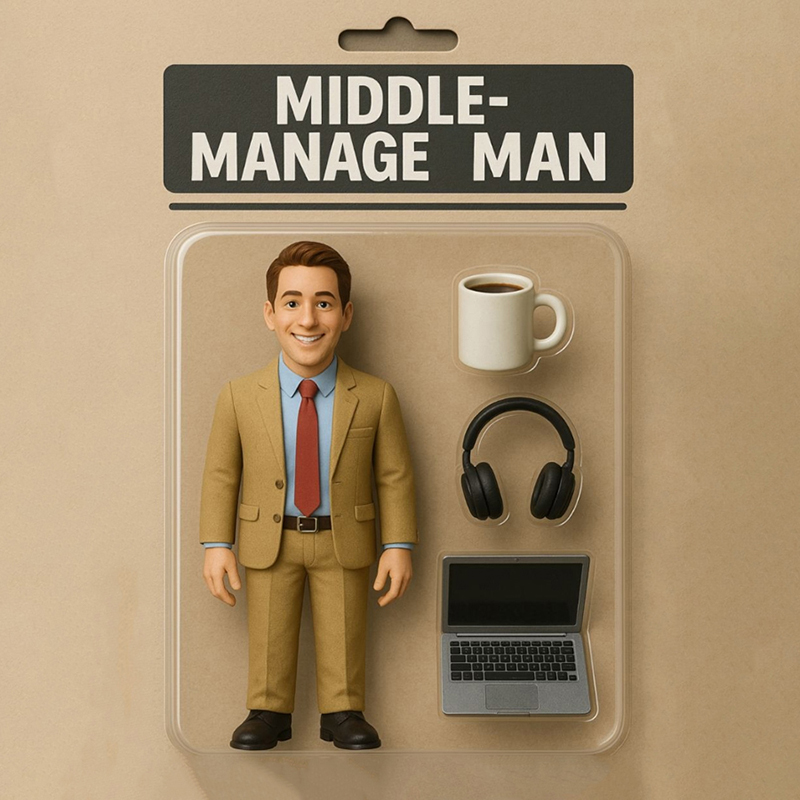
As AI tools become increasingly integrated into creative workflows, artists and designers now have more accessible ways to bring original characters to life in three dimensions. Whether you’re an illustrator, IP developer, or hobbyist, generating a cartoon figurine that is ready for 3D printing no longer requires a full studio pipeline. In this guide, we focus on the modeling process-from ideation to a print-ready digital model-using AI-powered generation and traditional sculpting tools.
Generating a Concept with AI: From Prompt to Visual
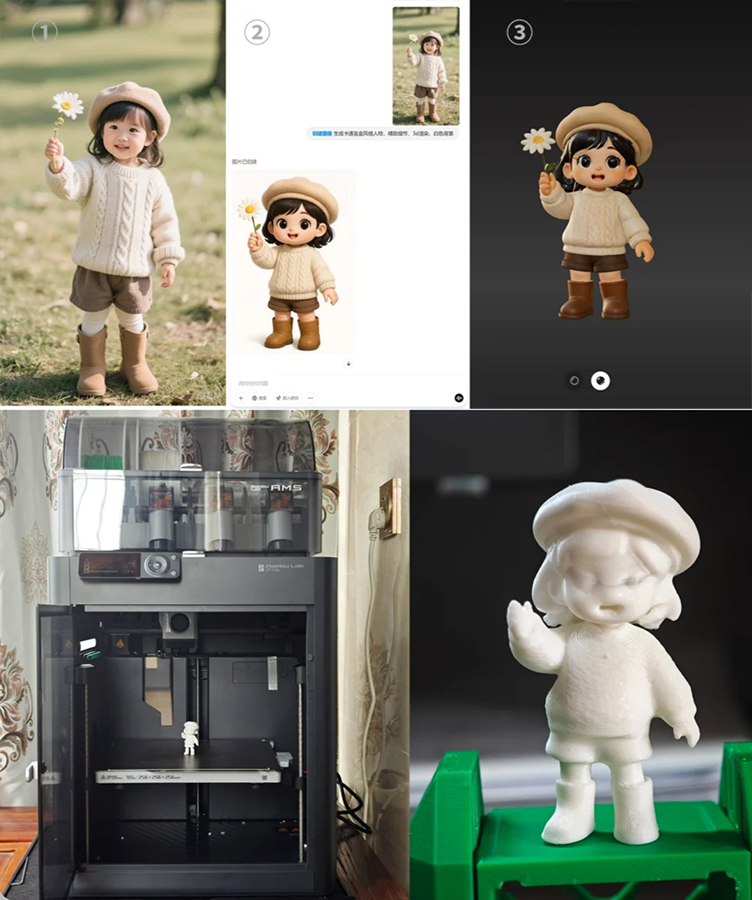
The first step in modeling a cartoon figurine is developing a clear character concept. Thanks to generative AI, this can be accomplished using several input types:
Text-to-Image
Tools like DALL·E 3, Midjourney, and Stable Diffusion can generate stylized 2D concept art from simple text descriptions.
Example Prompt: “A chubby robot cat with oversized eyes and a jetpack, 3D cartoon style, front and side view.”
This output can serve as your character sheet or modeling reference.
Sketch-to-Image
If you prefer drawing your concept manually, AI tools can enhance or stylize your sketch. Upload a rough drawing to platforms like ControlNet, Scribble Diffusion, or Paint with Stable Diffusion to generate refined visuals.
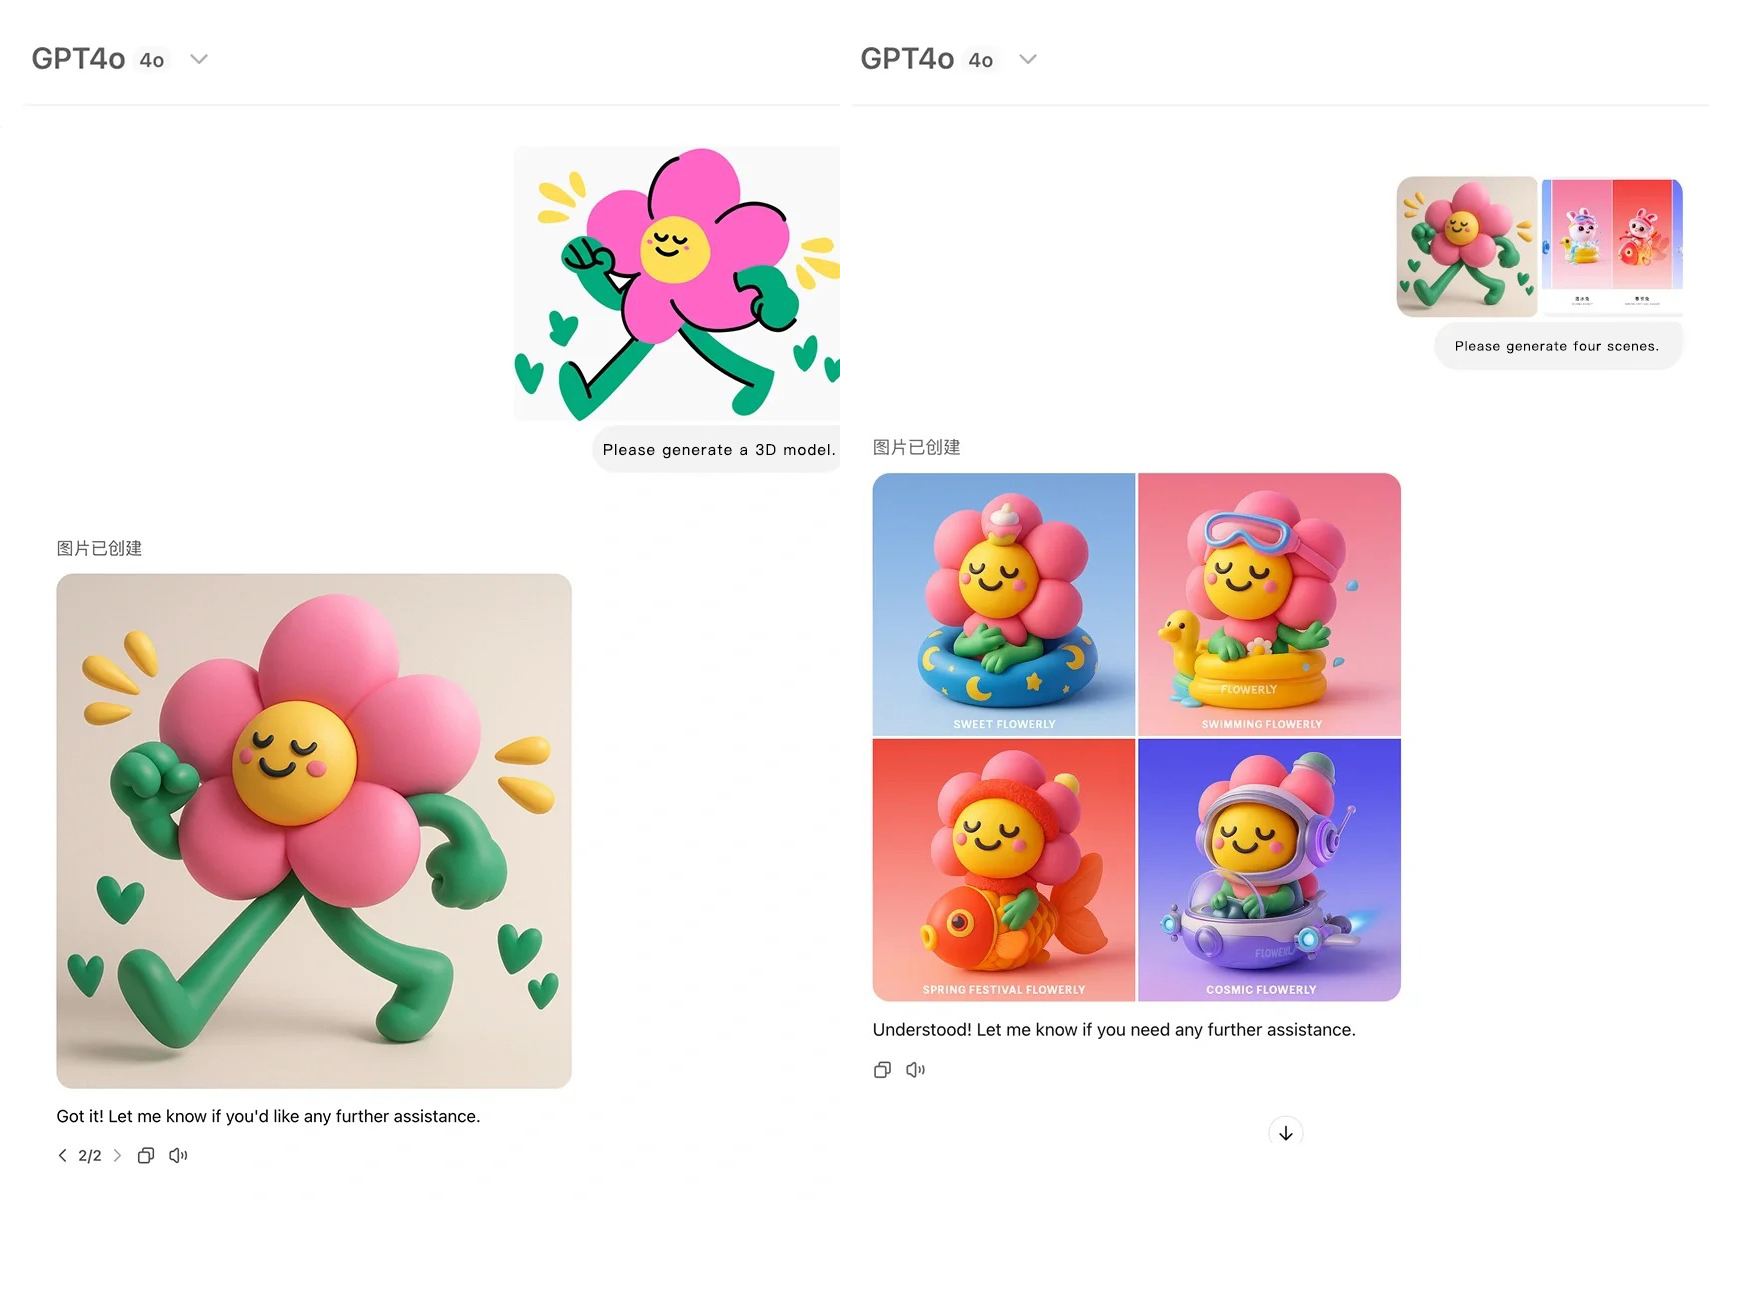
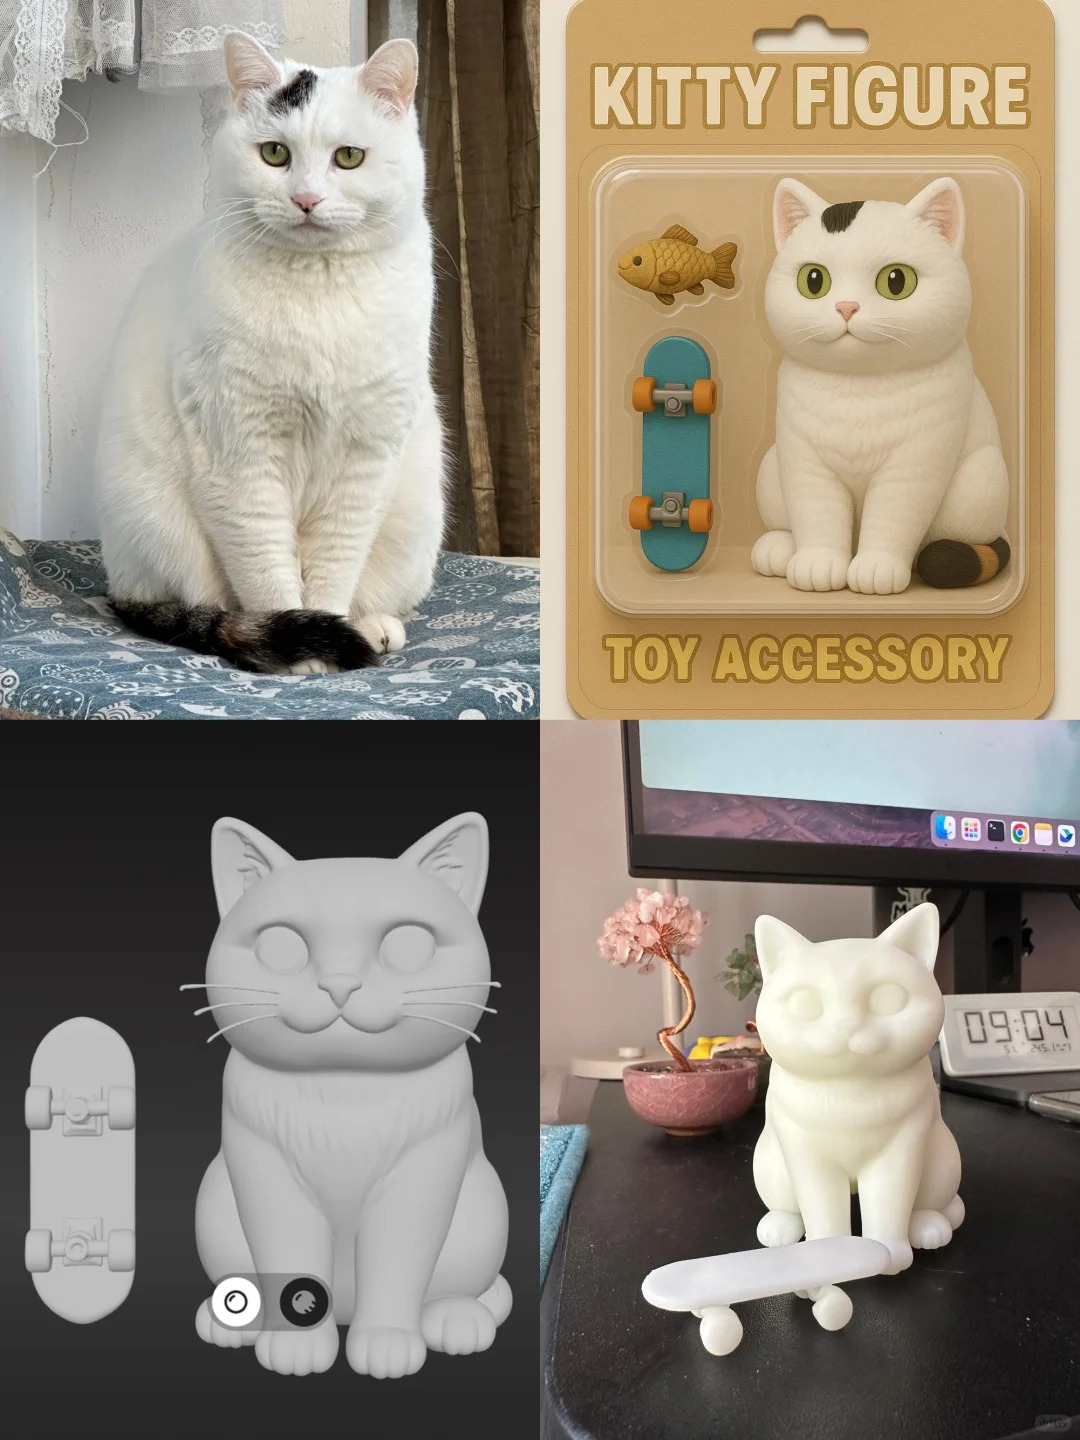
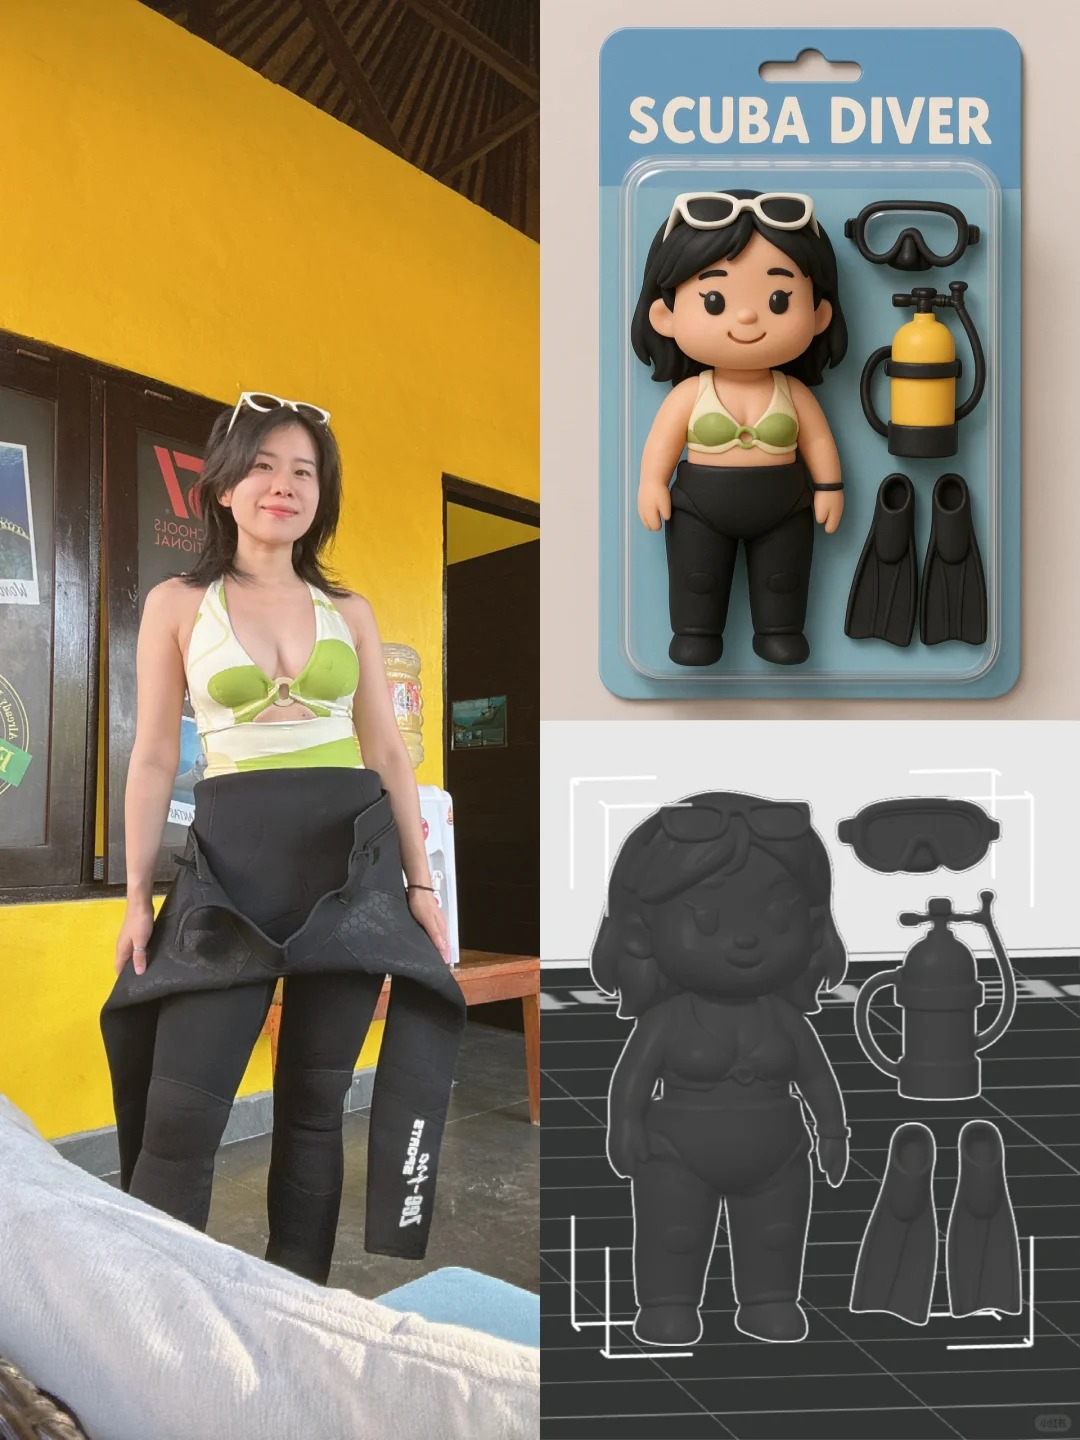
Photo-to-Model
For those working with toys, pets, or cosplay characters, some platforms can convert photographs into 3D approximations. This includes Luma AI, Kiri Engine, and other image-based reconstruction apps. While these won’t give you final meshes for stylized figurines, they offer a useful geometric base to work from.
AI-Assisted 3D Model Generation: Text, Image, and Hybrid Input
In addition to generating 2D concepts, a growing number of AI tools now offer direct 3D model generation using text prompts, image inputs, or hybrid workflows. These platforms significantly streamline the early modeling phase and can produce printable base meshes for further refinement.
Leading AI-to-3D Platforms
| Tool | Input Type | Output Format | Strengths |
|---|---|---|---|
| Hunyuan 3D (by Tencent) | Text Prompt | .obj, .glb | Stylized cartoon-like 3D meshes; good for figurine shapes |
| Tripo AI | Text or Image | .obj, .glb | Quick, sculptable character meshes; intuitive web interface |
| Meshy.ai | Text-to-3D, Image-to-3D | .obj, .stl | Full pipeline including auto-texturing |
| Luma AI | Photos/Video | NeRF / mesh export | Best for realistic scans, less ideal for stylized models |
Best Practices When Using AI-to-3D:
- Check geometry quality: Most outputs will require cleanup before printing.
- Watch for non-manifold issues: Especially if the mesh includes overlapping surfaces or thin artifacts.
- Use as a starting point: These models are ideal bases but typically benefit from sculpting passes in Blender or ZBrush to enhance character and clean topology.
When to Use AI Generation:
- You lack 3D modeling experience but can describe your concept clearly.
- You want to quickly prototype multiple character variations.
- You plan to sculpt on top of a basic shape rather than starting from scratch.
Building the Model: Manual Sculpting in 3D Software
Regardless of whether you use AI to start your model, finalizing a figurine that’s clean, stylized, and printable requires hands-on sculpting.
Recommended Software:
- Blender (Free and open-source; full sculpting and retopology tools)
- Nomad Sculpt (iOS/Android tablet app with intuitive controls)
- ZBrush or ZBrushCore (Industry standard for character sculpting)
Modeling Workflow:
Set up Reference Views
Import the AI-generated or hand-drawn front/side/back views into the 3D workspace. These will guide your proportions and features.
Block Out Basic Forms
Use primitive shapes (spheres, cubes, cylinders) to construct the head, body, limbs, and accessories. Apply a mirror modifier for symmetry.
Sculpt Stylized Features
Switch to sculpting mode to exaggerate proportions, shape facial expressions, and add stylized details like fur, armor, or clothing folds. Use brushes like:
- Grab – to stretch or reshape areas
- Inflate – to add volume
- Crease – to define hard lines
- Smooth – to refine transitions
Merge and Clean the Mesh
Boolean operations can be used to join different body parts. For 3D printing, ensure the model is watertight and free of intersecting geometry. Tools like Blender’s 3D Print Toolbox or Meshmixer can be used to detect and fix issues.
Exporting a Print-Ready Model
Once your character is complete, the final step is preparing it for printing:
- Apply all transforms (scale, rotation, location)
- Export as .STL or .OBJ
- Ensure closed geometry-no holes or non-manifold edges
- Minimum wall thickness of at least 1mm is advised for durability
If you’re separating the figure into parts (head, arms, base), ensure connector tolerances are appropriate-usually 0.2-0.5 mm depending on the material.
Bring Your Figurine to Life with FacFox
Creating a 3D model is only the beginning. At FacFox, we specialize in transforming your digital creations into physical reality with our professional 3D printing services. Whether you’re designing collectibles, IP-based merchandise, or stylized mascots, we support:
- High-resolution resin printing for fine detail
- SLS and SLA printing for strength and precision
- Five full-color 3D printing without need for post-processing
- Custom finishing options including painting and coating
- Consultation on model optimization and batch production
Visit www.facfox.com to upload your model and get an instant quote. Let us help you bring your characters off the screen and into the world.
