In this tutorial, you will receive an overview on laser processing stone as well as learn some tips and tricks for achieving the best results.
What stone types can be laser engraved?
Laser engraving stone slabs or rocks with a polished texture or very smooth surface will provide the best results. To achieve the most desirable engraving result possible, place the stone on a flat surface to ensure that the finished product is not distorted by curves.
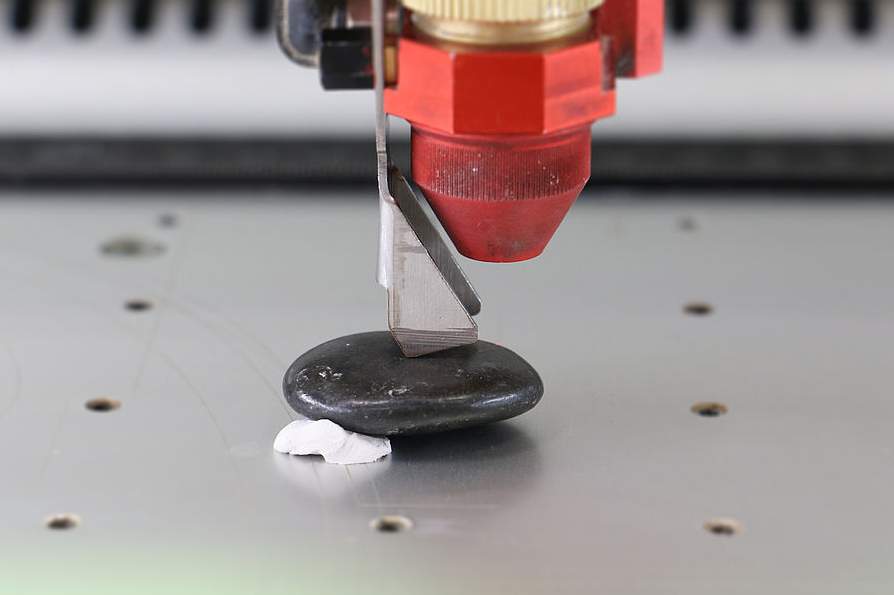
Natural stones with a round surface can still be laser engraved, just simply place the object on a horizontal plane. We also recommend using a support to assist with this process, such as modeling clay. When focusing the laser beam, you will want the engraving to be as uniform as possible, so input an average value of the engraving area for the best results.
Suggestions for selecting smaller stones:
Stones can be purchased from a variety of resellers and we have found that the tile departments of hardware stores typically have an excellent selection of stones for jewelry, worry stones and more. You can usually find all kinds of unique stones to choose from, including mosaic tiles composed of leveled river pebbles and even marble stones in a variety of colors. We recommend soaking the mat in warm soapy water to dissolve the glued backing that holds the stones together, and in doing so, you then have lots of smaller stones ready for laser processing at a fraction of the cost!
Tips for laser engraving stones
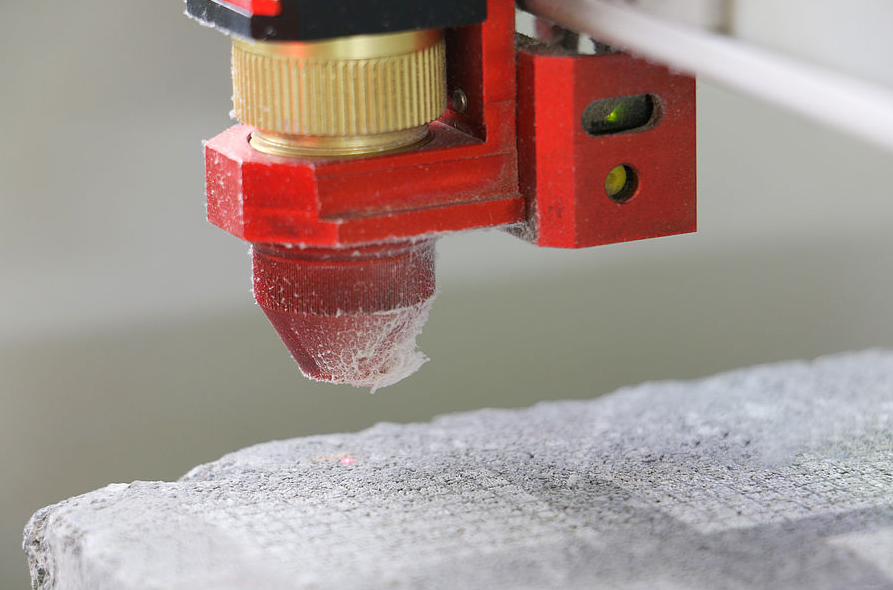
Depending on the type of stone being laser engraved, most will produce dust that will typically stick and cause stringing. Therefore, before each engraving job (and even during longer engraving jobs) make sure to check the nozzle opening, as it can become clogged from stone dust and obstruct the laser beam path. System performance can be restored on your Trotec laser by simply wiping the nozzle with a cloth or rinsing it with water, as well as by verifying lens and mirror functionality at intervals during the stone engraving process.
We also recommend cleaning the stone prior to laser engraving it, if you want to remove any natural dirt and debris that the stone may carry. Rinsing the material post-laser engraving will wash away any resulting stone dust, but cleaning the stone before and after laser processing will provide you with the best possible contrast.
Selecting the proper engraving parameters
Stone is a natural material that differs greatly in geological composition depending on its origin. Therefore, we have come up with a few processing techniques to ensure that the best possible engraving results can be achieved quickly and easily.
Variant 1: The grayscale matrix
We recommend using the grayscale matrix for any stone applications where you have at least 3×3 cm of flat surface available as well sufficient testing areas. Unlike the full power at low engraving speed that is required for wood or paper processing, we recommend different settings for hard stone surfaces. As a starting value, use 100% power (p) with around 30% speed (v) for a laser engraver with 60 watts, and then 100% power and around 15% speed for any machines with less than 60 watts. If this does not produce the desired engraving results then reduce the speed and run the matrix again. The benefit of this technique is that it allows you to control and designate the exact power settings to each field being engraved.
Variant 2: The grayscale gradient
The grayscale gradient is an efficient processing method if you are working with a limited amount of testing area. Draw a rectangle with a gradient from 100% black to white, and note, the same parameter and printer driver configuration can be utilized as for the grayscale matrix method. With this method, the ideal power setting can only be estimated and the determined power value is 50%, if it is in the middle of the engraved area. Therefore, when closer to the black area, you will have more power as a result of your settings.
An advantage of the grayscale gradient is that you can apply it to even the smallest areas.
Downloadable laser parameters
Each stone listed below is a type that is very well suited for laser engraving, and provides the best processing results from our own experience. The accompanying values were determined using a Speedy 360, 100W, and ultimately, your specific laser system, available laser power, and unique stone and graphics will cause variations in results.
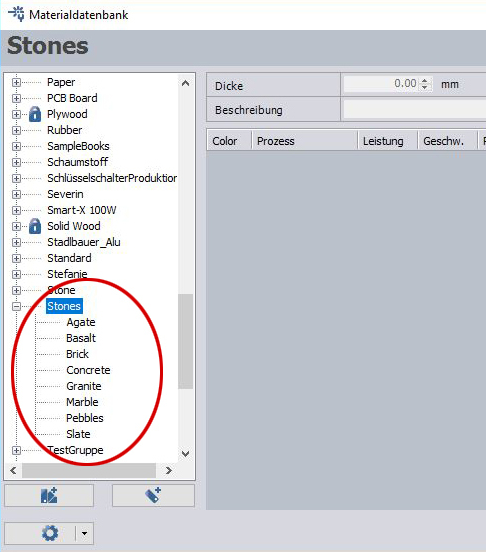
- Marble: p50%, v20%, 1000dpi, Z = -0.5mm
- Slate: p20%, v100%, 500dpi
- Concrete blocks: p100%, v20%, 500dpi
- Pebble stones: p80%, v30%, 500dpi, Z = +2
- Basalt: p12%, v50%, 500dpi, Z = -1
- Agate: p50%, v30%, 1000dpi, Z = +1.5
- Bricks: p100%, v30%, 500dpi, Z = +1.5
Certain stones, such as bright granite, will not always engrave well and will be more limited when it comes to laser processing. Because of the lighter color of the stone, you will have to inlay the engraving with color post-processing to achieve a higher contrast.
Tricks for improving your laser engraving results
Some stone types will offer little to no laser engraving results at all, due to their natural composition. Because of this, we have created a few additional processing tricks, so that you can still obtain useful results from your stones.
Adjust the Z-offset value
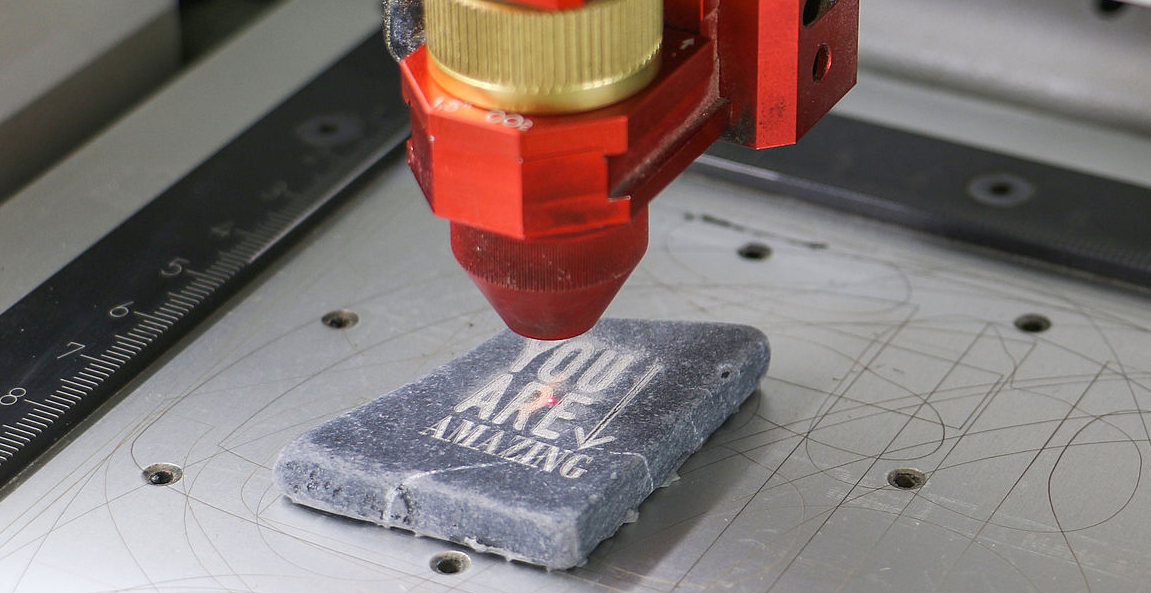
A slight change in the Z-offset value can greatly improve your engraving results in many cases. One technique that you can try is to use the offset values of +1 mm and -1 mm, and then compare the results. For stones that are extremely hard, try using a negative offset value, as this allows for more power to enter the engraving area.
Inlaying the engraving with color
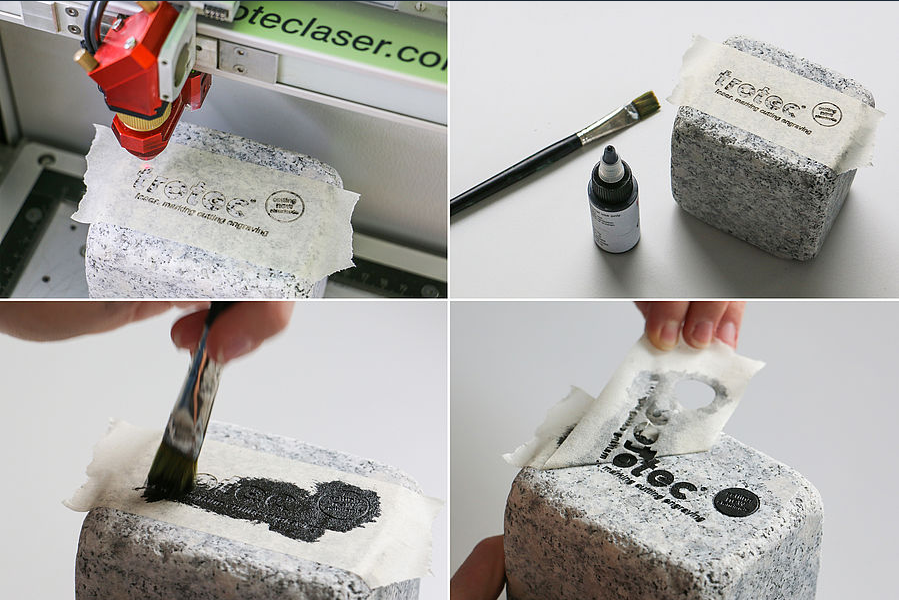
Again, in some instances with certain types of brighter stones, it is harder to obtain an engraving with good contrast. Using acrylic paint (or similar type) allows you to achieve that desired high-contrast result by filling in the engravings. To complete this step, start with apply an application tape or similar masking to the surface area and then engrave your desired motif. Then apply the acrylic paint using a bristle brush by dabbing the laser engraved sections with the paint. After allowing the pain to thoroughly dry, simply peel off the masking layer as well as clean off any dust and tape residue with water. Stones that are naturally smoother and more finely polished will typically offer better results once filled with paint. Rough or porous surfaces may cause parts of your artwork to lack sharpness as well as appear frayed.
