One of the best things about 3D printing is the opportunity to create your own designs and art projects. In this guide, I am going to share some simple techniques I use to create silhouette art and some ideas on how we can use these techniques for more complex projects.
Silhouette and Silhouette Art – What is it?
A silhouette is a shape (usually dark) depicting the outline of a person, object or scene. Silhouette art is created by layering silhouetted shapes and scenes to create a 3D art effect. It can be very complicated with multiple layers of silhouettes or simple with only a single silhouette displayed against a contrasting background.
How to Design – Software Used
Designing simple 3d printed silhouette art is not too difficult to do and is a good way to become familiar with some of the design software available. Tinkercad is probably the most accessible software for new designers and is free, and this is what I use to make my silhouette art.
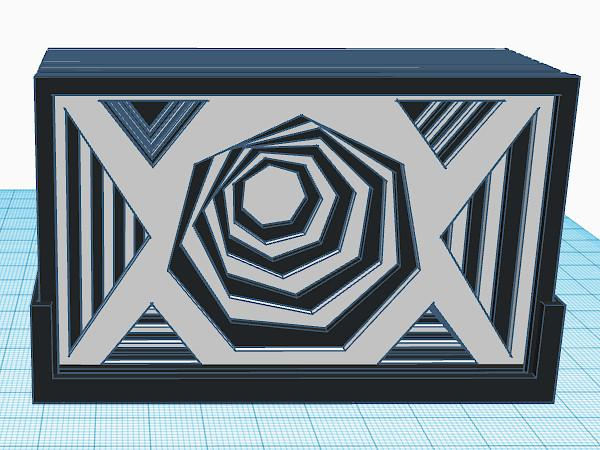
To design some basic silhouette art we need to create two parts, the frame, which includes the silhouette itself with a slot behind for the backplate, and the backplate itself, a thin plain rectangle slightly smaller than the frame.

You will need to download or create the picture you want to use and convert it into a file that can be uploaded into design software, I use an online converter to create an SVG file which I can then download into Tinkercad. The image you use needs to be either one solid piece or more than one piece where all pieces can be attached to the frame edge.
The frame is designed to be printed upside-down, so that it can be printed without supports, so when you upload your picture svg file, flip it over otherwise your picture will appear backwards. You can create a frame of size and shape to suit your picture and remember to include a slot for the backplate, I angle my slot along one edge to eliminate the need for supports.

Backgrounds – What Colours to Use
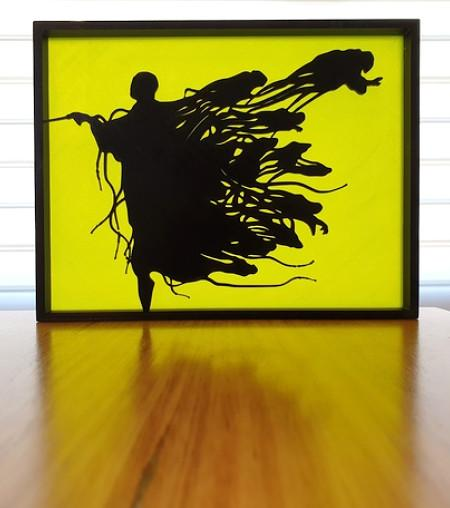
Traditionally printed silhouette art uses a dark colour for the silhouette, most often black, and a lighter more transparent backplate colour such as yellow or orange. These silhouettes look most dramatic when viewed with a window or other light source behind them.
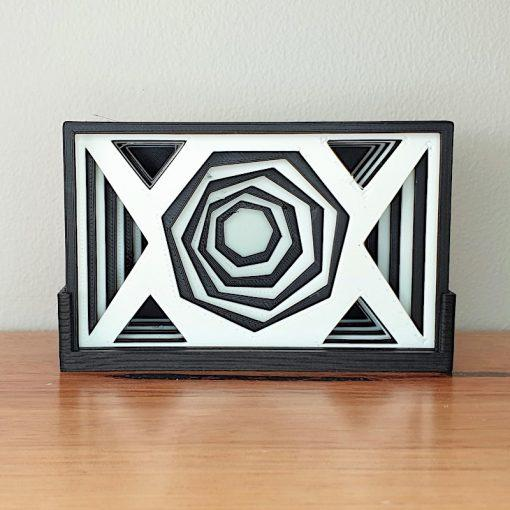
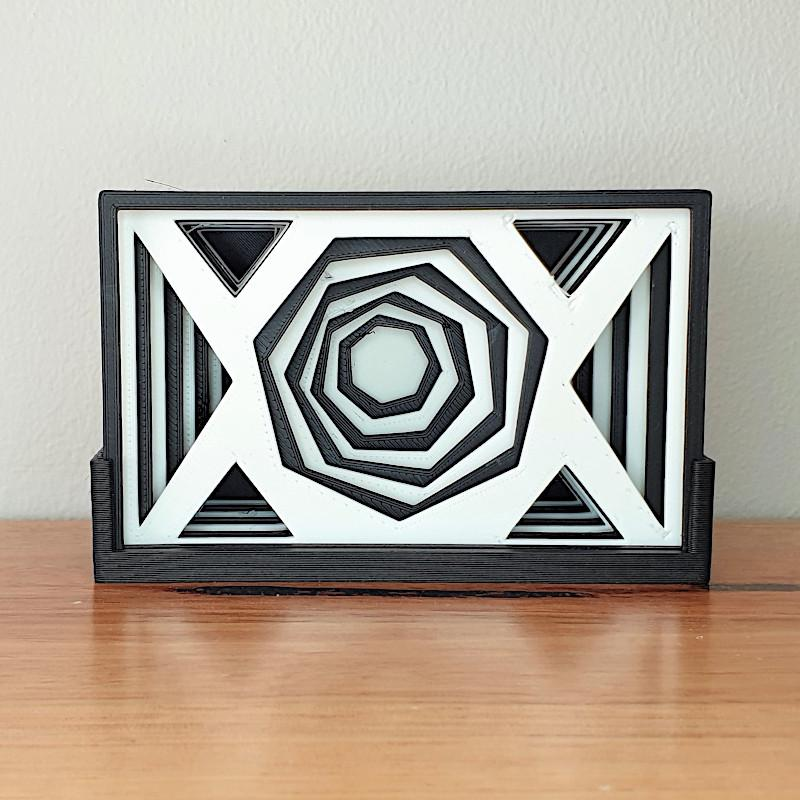
Of course, we can mix these colours up and silhouettes with a dark backplate can look very striking, such as the Halloween ornaments pictured. We can also choose to cut out the image from the frame so that it shines through in the backplate colour. You can see an example of this in the Portal silhouette.

Slicer Software Settings
When you slice your silhouette art frame be sure to place it on the print bed with the flat image facing downward. Slow the print speed down for the first layer and avoid using adhesive such as glue-stick that will leave an impression on the print. The first layer will become the front of your art piece and therefore the print is particularly unforgiving of any first layer discrepancies.
Certain silhouettes can be enhanced by using a different bottom layer infill pattern so experiment with this. Geometric patterns can be accentuated by using the concentric pattern or you may choose to use a pattern such as Hibert curve to break up a silhouette with large surface area.
Other Examples of Silhouette Art
Example 1 – Layered Silhouette art
If you want to make your silhouette more detailed or colourful or you want to add depth, you can increase the number of silhouette layers in your artwork. Create your layers working from the one with largest coverage at the back to the one with the least at the front. Remember to focus your detail in the area seen through the viewing hole of the silhouette in front. I find lining them up in Tinkercad very helpful in imagining the finished result.
Example 2 – Cityscapes
One way to enhance your silhouette art is to add detail to the backplate, and one effect that works well using this technique is the addition of the reflection of the original image. I created a series of artworks using this technique that showed silhouetted cities from around the world. I placed the silhouetted city image about a third of the way up the frame and printed the reflected image onto the white backplate. To make it look more realistic I squashed the reflected image down to half the height. Tinkercad has a reflect tool which enables you to easily create the reflection.

Example 3 – Lithophane
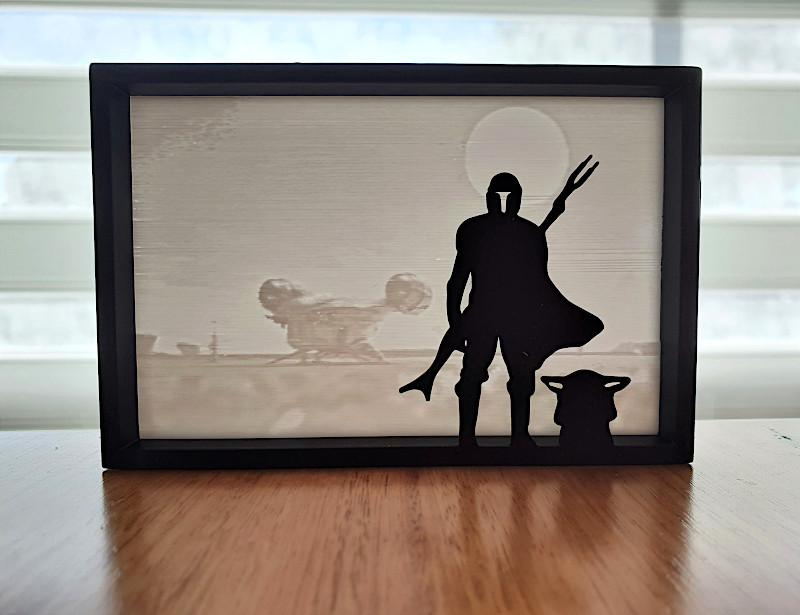
Another way of enhancing your silhouette art is to use a lithophane as the backplate. In the pictured Mandalorian silhouette you can see the lithophane is used to provide the background to Din Djarin and Grogu’s silhouetted figures. Many online lithophane creators give you the option to choose the size of the lithophane and to create a thin edge around the outside of the picture and this works well when creating a lithophane as a backplate for your silhouette art.
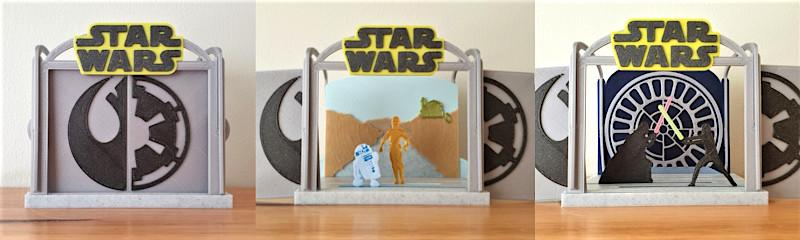
A bigger project – Mini theatre
Once you feel comfortable designing silhouette art there are many ways you can use it in more complex projects. I wanted to make a miniature theatre with movable curtains, backdrops and characters. I used the silhouette art technique to portray simple characters and to create layered scenery.
Conclusion & Links
Creating your own 3D printed silhouette art is a fun, easy way to grow your 3d print design skills and the technique can be used in many elements of more complex design projects. Why not have a go at creating today?
Author: Natalie Cheesmond