The majority of plastic products in the world today are manufactured by injection molding. However, fabricating molds can be prohibitively expensive and time-consuming. Fortunately, molds don’t always need to be machined out of metal—they can be 3D printed.
Stereolithography (SLA) 3D printing provides a cost-effective alternative to machining aluminum molds. SLA 3D printed parts are fully solid and isotropic, and materials are available with a heat deflection temperature of up to 238°C @ 0.45 MPa, meaning that they can withstand the heat and pressure of the injection molding process.
Fast Fabrication of Short-Run 3D Printed Injection Molds
With affordable desktop 3D printers, temperature-resistant 3D printing materials, and injection molding machines, it is possible to create 3D printed injection molds in-house to produce functional prototypes and small, functional parts in production plastics. For low-volume production (approximately 10-1000 parts), 3D printed injection molds save time and money compared to expensive metal molds. They also enable a more agile manufacturing approach, allowing engineers and designers to prototype injection molds and test mold configurations or to easily modify molds and continue to iterate on their designs with low lead times and cost.
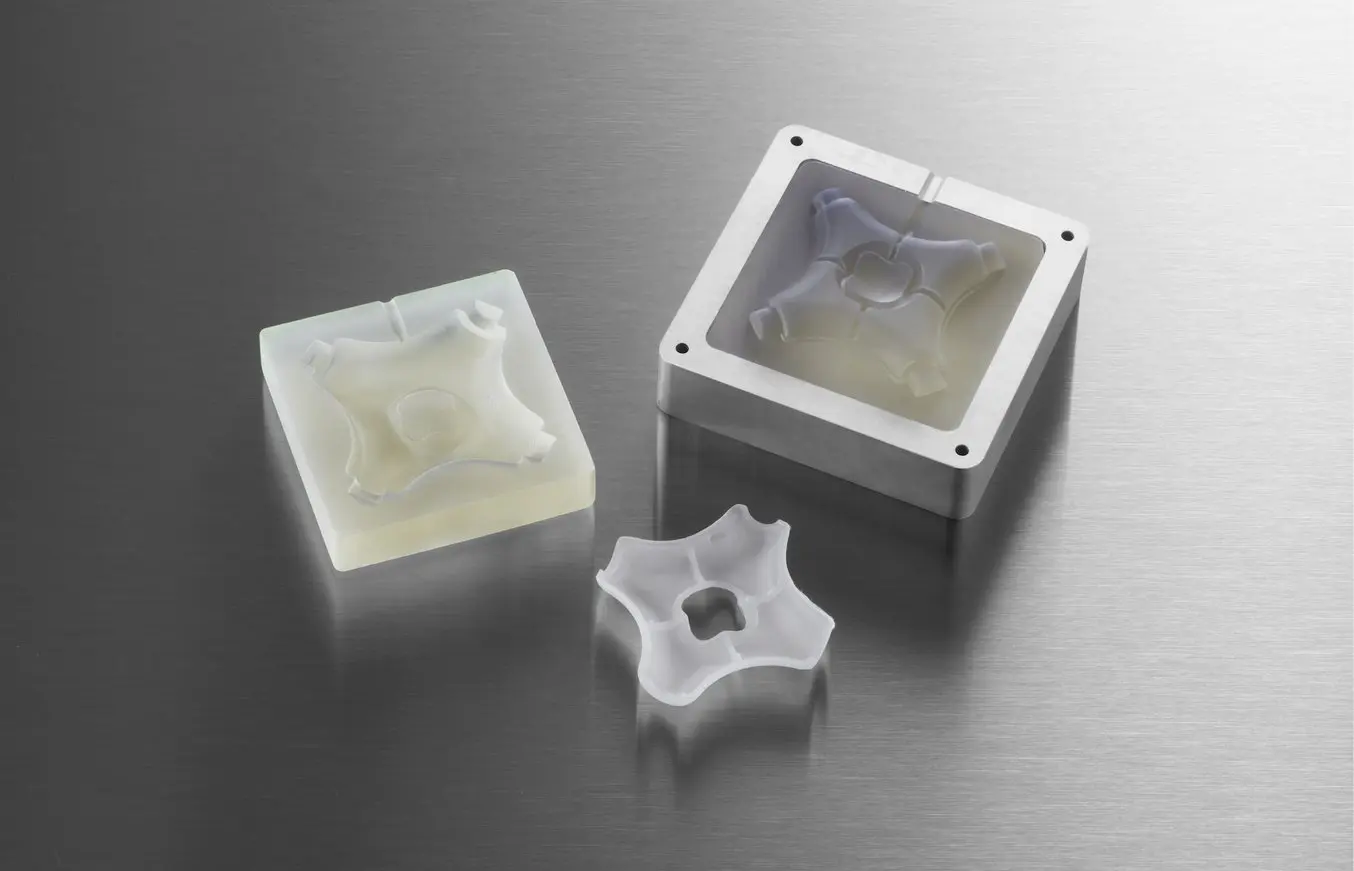
SLA printing technology is a great choice for injection molding. It is characterized by a smooth surface finish and high precision that the mold will transfer to the final part and that also facilitates demolding. 3D prints produced by SLA are chemically bonded such that they are fully dense and isotropic, producing functional molds at a quality not possible with fused deposition modeling (FDM). Desktop SLA printers, like those offered by Formlabs, simplify workflow as they are easy to implement, operate, and maintain.
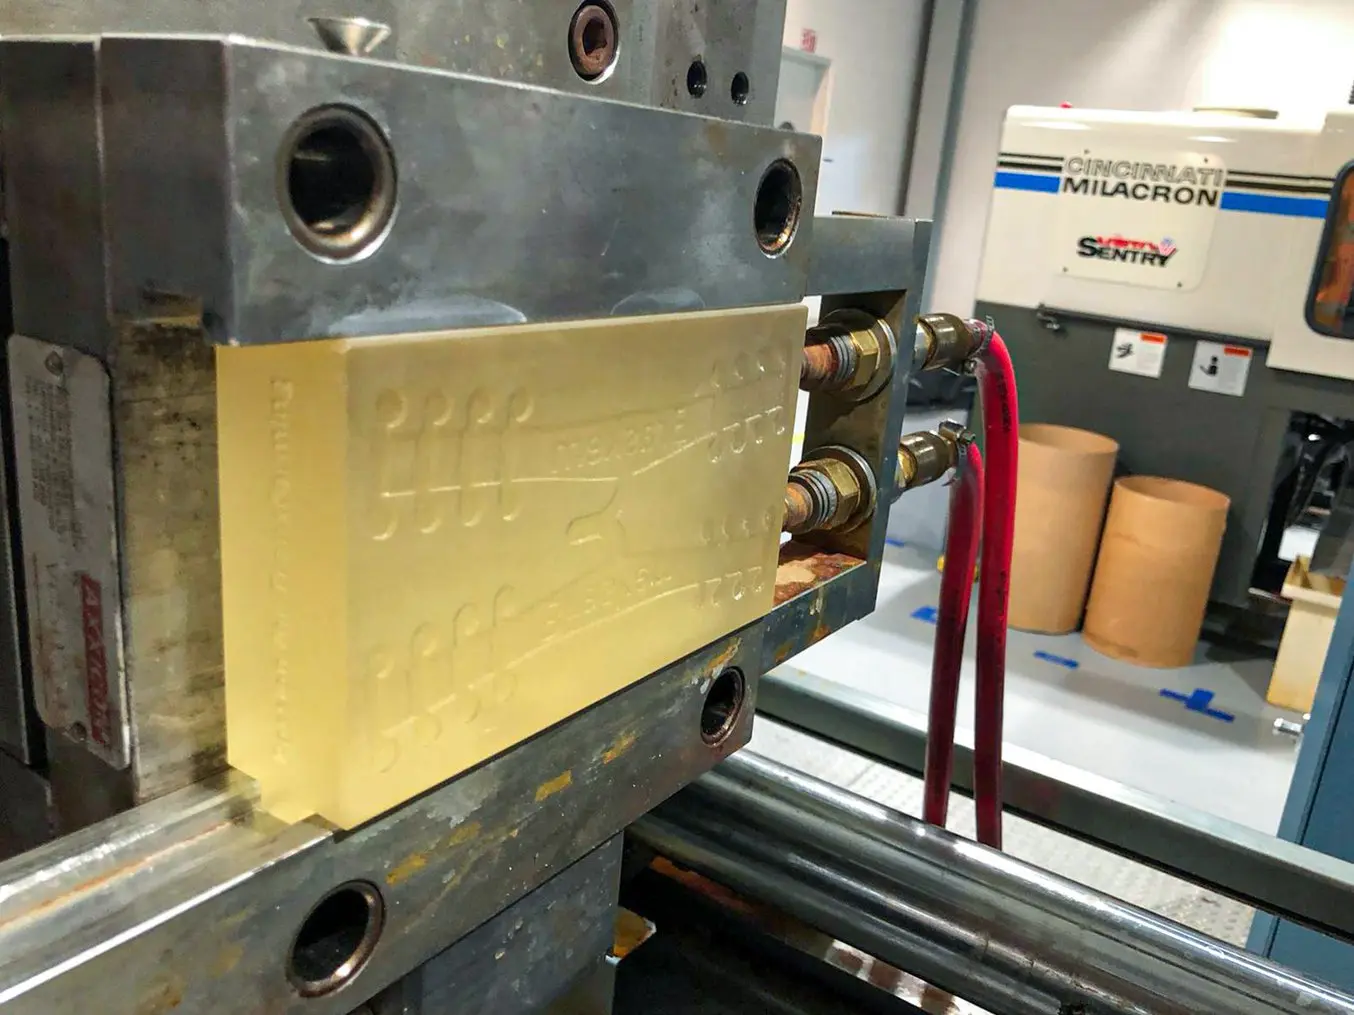
To support short-run injection molding, Formlabs developed High Temp Resin, which has a heat deflection temperature (HDT) of 238°C @ 0.45 MPa, the highest among Formlabs resin and one of the highest among resins on the market. High Temp Resin can withstand high molding temperatures and minimize cooling time. Our white paper goes through a case study with Braskem, a company that ran 1,500 injection cycles with one mold insert 3D printed with High Temp Resin to produce mask straps. The company printed the insert and placed it inside a generic metallic mold integrated in the injection system. This is a powerful solution to produce medium series quickly. The printed insert can be replaced as the design evolves and in case of failure. It allows for creating molds on-demand with elaborate geometries that would be difficult to manufacture traditionally while still running multiple shots.
High Temp Resin, however, is quite brittle. In the case of more intricate shapes, it warps or cracks easily. For some models, reaching more than a dozen cycles can be challenging. To solve this challenge, French startup Holimaker turned to Grey Pro Resin. It has a lower thermal conductivity than High Temp Resin, which leads to a longer cooling time, but it is softer and can wear hundreds of cycles.
Formlabs recently released Rigid 10K Resin, an industrial-grade, highly glass-filled material, which provides a solution that can cope with a wider variety of geometries and injection molding processes. Rigid 10K has an HDT of 218°C @ 0.45 MPa and a tensile modulus of 10,000 MPa, making it strong, extremely stiff, and thermally stable. Novus Applications has injected hundreds of intricately threaded caps with a single Rigid 10K Resin mold. As more companies get their hands on Rigid 10K Resin we expect it to be an excellent asset to 3D print sophisticated molds for injection molding.
Download our free white paper for the detailed case studies and to learn how to create 3D printed molds in-house for injection molding.
Choosing the Right Resin for 3D Printing Injection Molds
Based on internal testing and case studies with our customers, we suggest to choose the 3D printing resin based on the criteria from the table below. Three stars means the resin is highly effective, one star is less effective.
| CRITERIA | HIGH TEMP RESIN | GREY PRO RESIN | RIGID 10K RESIN | |
|---|---|---|---|---|
| High molding temperature | ★★★ | ★ | ★★ | |
| Shorter cooling time | ★★★ | ★ | ★★ | |
| High pressure | ★ | ★★ | ★★★ | |
| Increase cycle number for complex geometries | ★ | ★★ | ★★★ |
How to Injection Mold Parts With 3D Printed Molds
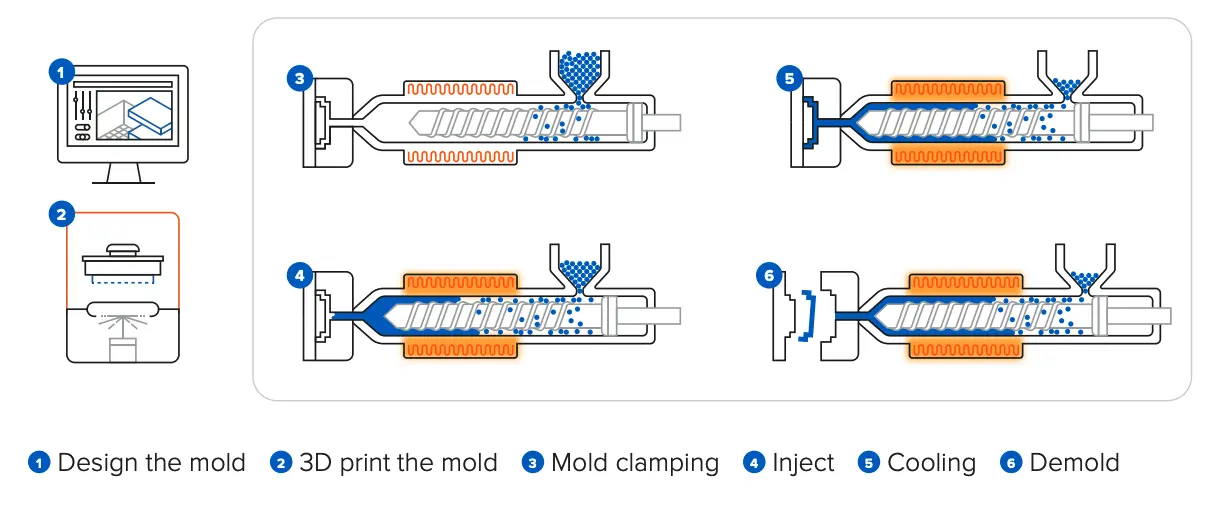
The complexity of the injection molding process is mostly driven by the complexity of the part and the mold structure. A broad range of thermoplastics can be injected with 3D printed molds such as PP, PE, TPE, TPU, POM, or PA. A low viscosity material will help reduce the pressure and extend the lifetime of the mold. Polypropylene and TPEs plastics are easy to process at a high amount of cycles. In contrast, more technical plastics like PA will allow a lower number of runs. The handling of a release agent helps to separate the part from the mold, in particular for flexible materials such as TPUs or TPEs.
The type of injection press does not have a significant influence on the process. If you are new to injection molding and are looking into testing it with limited investment, using a benchtop injection molding machine such as the Holipress or the Galomb Model-B100 could be a good option.
Design Guidelines for 3D Printed Molds
We recommend respecting the rules of design for additive manufacturing as well as the general rules for injection mold design, such as including two or three degrees of draft angles, maintaining a uniform wall thickness across the part or rounding up the edges. Here are a few helpful advice from users and experts, specific to polymer printed molds:
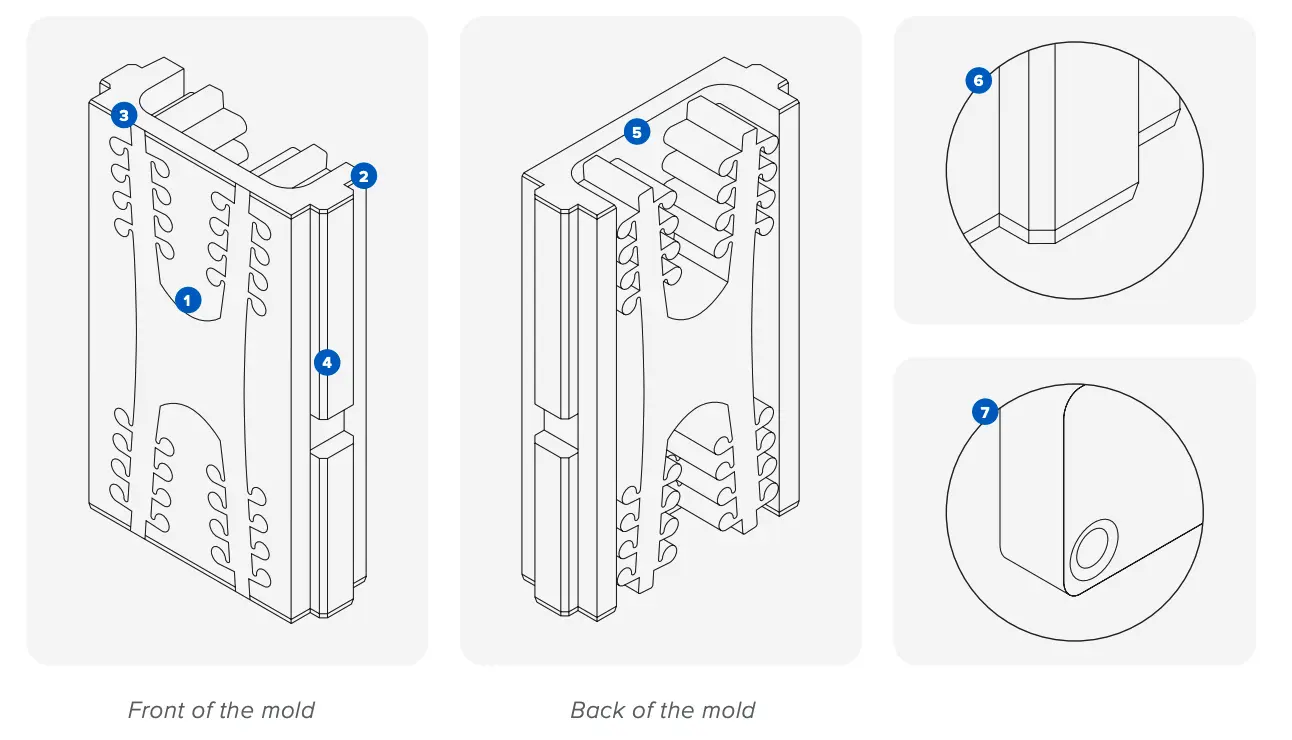
To optimize dimensional accuracy:
- Plan stock allowance on the mold to post-process and adjust sizes.
- Print one set of mold to understand dimensional deviations and account for this in the CAD model of the mold.
To extend the lifetime of the mold:
- Open up the gate to reduce the pressure inside the cavity.
- When possible, design one side of the stack flat while the other side carries the design. This will lessen chances of blocks misalignment and risk of flashing.
- Include large air vents from the edge of the cavity to the edge of the mold to allow the air to escape. This yields a better flow into the mold, minimizes pressure and alleviates flashing in the gate area to decrease cycle time.
- Avoid thin cross-sections: surface thickness less than 1-2 mm may deform with heat.
To optimize the print:
- Adjust the back of the mold to minimize material: reduce the cross section in areas that are not supporting the cavity. It will save costs in resin and diminish risks of print failure or warpage.
- Add chamfer to help to remove the piece from the build platform.
- Add centering pins at the corners to align both prints.
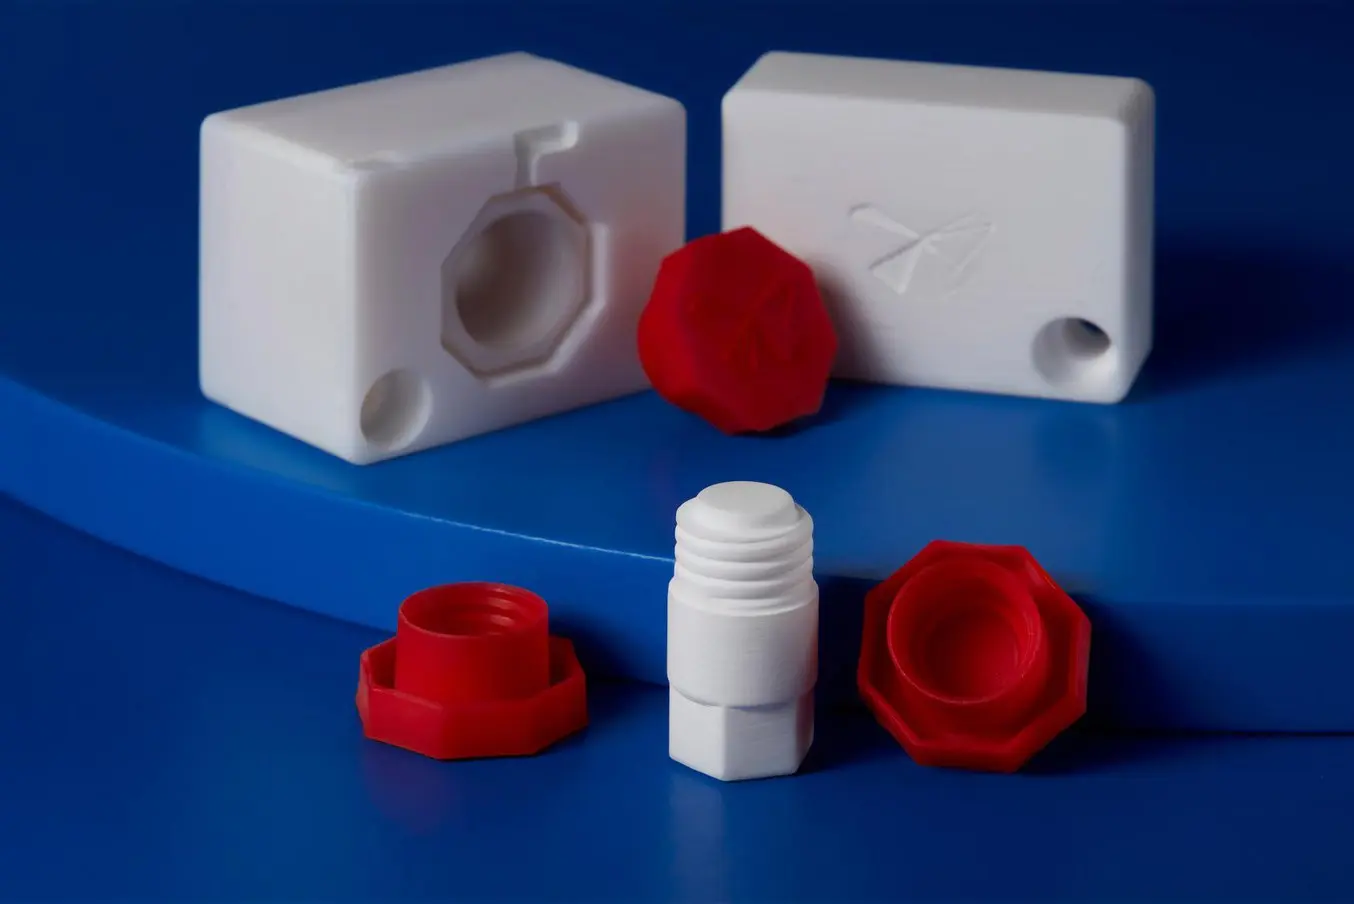
3D Printed Molds: Techniques for Prototyping and Production
Combining moldmaking with desktop 3D printing allows engineers and designers to expand the realm of materials they’re using and bring the capabilities of their 3D printer beyond rapid rototyping and into the realm of production.
Using 3D printed molds, dies, and patterns to supplement molding and casting processes tends to be both faster and less expensive than CNC milling, and easier than working with silicone molds.
Beyond injection molding, 3D printed molds can be used for the following molding and casting processes:
- Thermoforming and vacuum forming
- Silicone molding (also overmolding, insert molding)
- Vulcanized rubber molding
- Jewelry casting
- Metal casting