3D printer enclosures protect your printer, improve printing quality, and reduce noise and odors. Check out the best DIY, low-cost options!
3D printer enclosure isn’t necessarily a must-have in your 3D printing workshop, but having one can improve your printing results. There are many advantages that come along with having a 3D printing enclosure, such as allowing to better control the temperature in the printing environment, thus reducing warping.
Additionally, having an enclosure protects both the users and the printers. For users, it reduces noise and can control exposure to gases that cause odors, and for the printer, it limits its contact with exterior elements like dust, which can deteriorate both the machine and models.
In this article, we’ll look at our top picks for DIY 3D printer enclosures, so that you can find the one that best fits your needs to help you create perfect prints.
Considerations
3D printer enclosures aren’t always accessible, so we’ve selected the best DIY enclosures or items that you can repurpose for that goal. To do so, we’ve taken into account the following:
- Accessibility: Whether it’s a DIY enclosure or a repurposed one, the design should be such that it doesn’t obstruct access to the printer. With this in mind, enclosures that have to be completely removed to access the printer weren’t included.
- Safety: All enclosures selected use materials or are designed to take into account that the printer will be reaching high temperatures and as such shouldn’t represent a fire hazard (although special care should be taken when noted).
- Price: As the purpose of the article is to provide affordable alternatives for enclosures, the sets provided have to be cheap or the materials for the DIY options have to be less costly than commercial enclosures.
- Optional considerations: Additionally, some enclosures may have attractive features like lighting for better visibility, temperature sensing, a camera, or other factors that might make them preferable.
With these aspects in mind, let’s look at our top picks for DIY 3D printer enclosures!
READYMADE
To begin with, let’s look at a couple of affordable 3D printer enclosure options to buy. They still require assembly, but they’re definitely down the low-effort end of “DIY”. Choose wisely, taking into account budget, what 3D printer you own, space availability, and preference on looks!
Photography Tent
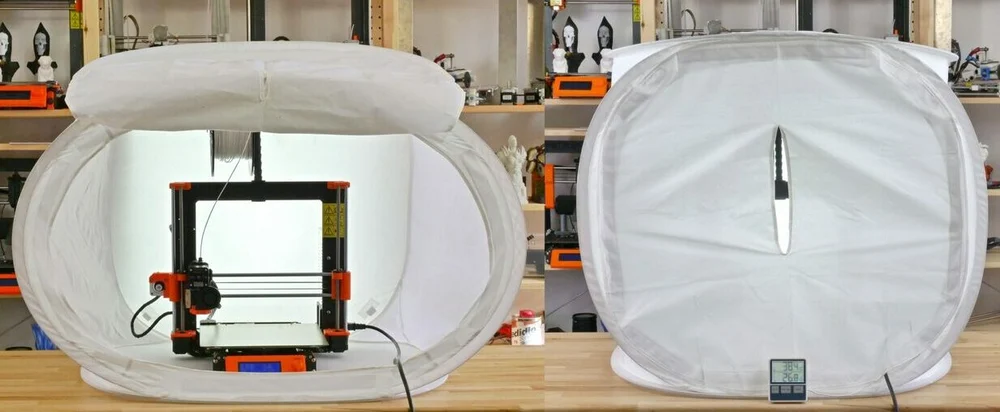
The point of an enclosure is to keep your 3D printer isolated, protecting it from dust, while also keeping the temperature inside constant. A photography tent is an inexpensive and effective way to do both.
They’re typically white and made of flexible synthetic material, which in the context of photography acts as a light diffuser so that objects inside can be more evenly illuminated. One added bonus is that you’ll be able to get amazing shots of your printer at work!
Be aware, however, that the material typically used to make these tents is highly flammable, so to be safe, don’t choose sizes that make it a tight fit. A little “breathing room” is helpful for accessing your printer, anyway.
- Cost: ~$40
- Complexity: Easy
Creality Enclosure
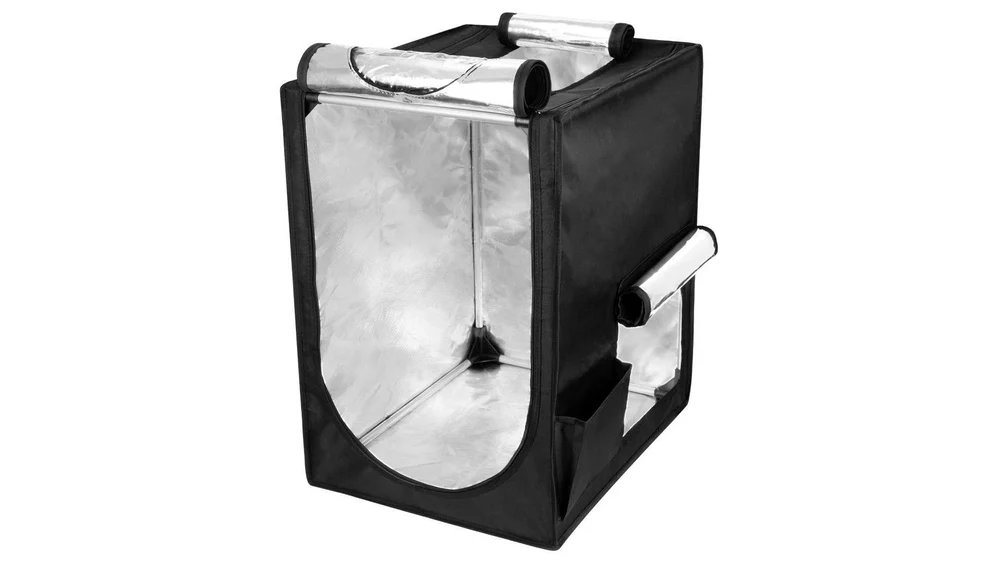
3D printer enclosures, especially those designed to fit a specific printer, can get really pricey, but we can always count on Creality to provide accessible options. True to form, they sell an affordable enclosure that’s easily portable and safe thanks to its flame-retardant material. It opens from all sides for easy access and can fit a Creality CR-10, Ender 3, or Ender 5.
This is an ideal option if your printer fits inside and you want a quick, afforable solution that doesn’t require hours of work.
- Cost: ~$65
- Complexity: Easy
REPURPOSED
Sometimes you don’t need a lot of work, only a good price and a bit of repurposing! In this category, we’ve selected projects that take household items and upcycle them into 3D printed enclosures.
Ikea Lack
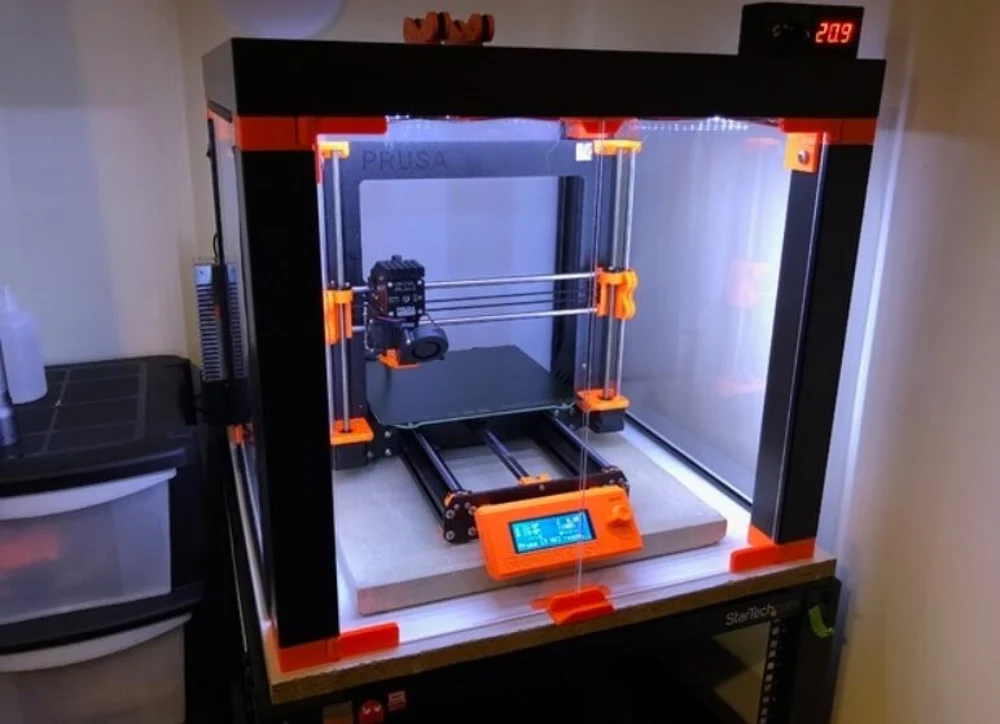
The Ikea Lack table is one of the most popular DIY enclosure options, probably because it’s accessible, looks neat, and goes in tandem with the design of the printer. It’s often used to fit a Prusa i3 MK3S but will fit many different printers – you just might need to increase the height if your printer is quite tall.
The concept is straightforward: You buy two (or even three) Ikea Lack tables and stack them on top of each other to make a 3D printer stand. You can add plexiglass doors to seal the enclosure while maintaining easy access, and it’s easy to add filament guides and other accessories.
People have made 3D printed parts to avoid drilling into the tables themselves and to easily assemble and disassemble the system. An important aspect to consider is that putting the filament on top requires some way for it to get inside, so make sure that the design you choose accounts for the filament’s easy movement.
- Cost: ~$70
- Complexity: Intermediate
- Core components: Ikea Lack tables, plexiglass, 3D printed parts
- Who designed it? cisardom, florentiusbohn, and many others
- Where to find it? Thingiverse
Storage Boxes
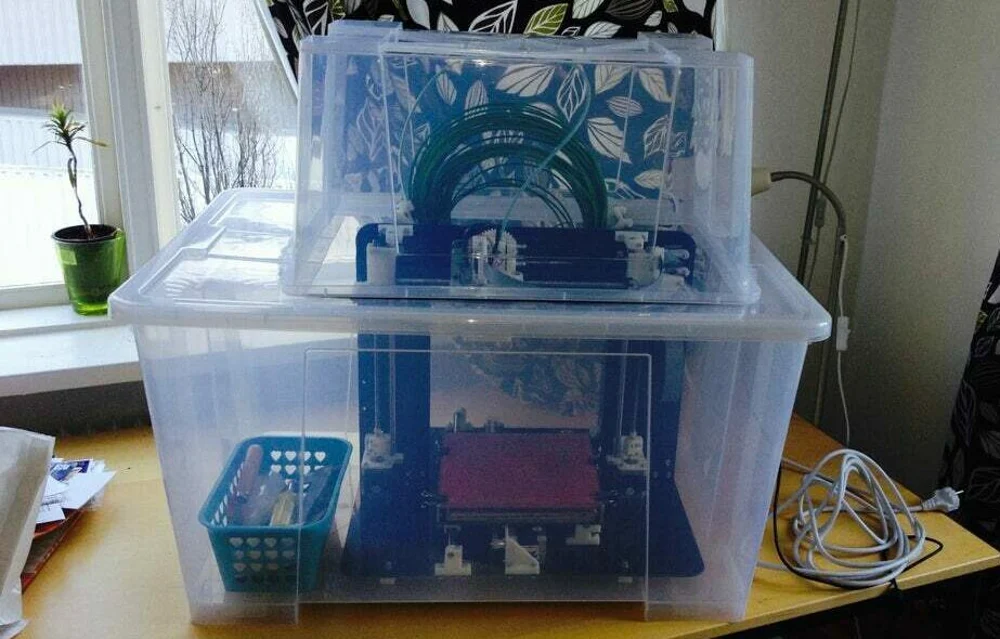
This is an option that’s easy to make and that’s adaptable to many sizes. It requires a bit of DIYing, but not that much: You only need some plastic boxes stacked together and you’re all set. Since they’re transparent, they won’t get in the way of checking the state of the print, and you can organize them and stack them in the way that’s most comfortable to you, so you can access your printer.
There are many ways you could go about this, but for starters, we recommend following this Instructables tutorial using Ikea plastic boxes. According to the creator, the boxes will cost you about $30 to $40. You’ll just need to cut a few holes and slits to accommodate the printer and its cables.
Due to the high temperatures that may be reached and because not all plastic boxes may have flame-retardant properties, it’s best if the enclosure isn’t a tight fit.
- Cost: ~$40
- Complexity: Easy
- Core components: Tupperware boxes, cutting tools
- Who designed it? rjacobsson
- Where to find it? Instructables
DIY PROJECTS
We’ve seen quick and easy solutions that just require a bit of smart purchasing, but what if you’re up to more of a challenge or want a more refined look?
The following selections are DIY projects that will take some time buying, building, gluing, and putting together, but the final result will give you protection, aesthetics, and in some cases additional advantages like remote monitoring of the state of the print, better lighting, or temperature sensing.
PVC Foam
This enclosure option is designed to fit a Creality Ender 3, but you could fit similar-sized printers or easily adapt it to fit bigger machines. The structure itself is pretty easy to build as it consists mainly of PVC foam walls, but the project also includes some electronics to take it to the next level. Such additions include aesthetic elements, like LED lights, and safety elements, like a heatsink tube and fans to extract the hot air and gasses from the printing process.
Be warned, though: To assemble the parts you’ll need to solder, work with hot glue, and drill, among other activities. You may also need an extra set of hands to help you during construction.
- Cost: ~$150
- Complexity: Advanced
- Core components: PVC foam, plexiglass, hinges, LEDs, a fan
- Who designed it? Just Barran
- Where to find it? YouTube
Soundproof
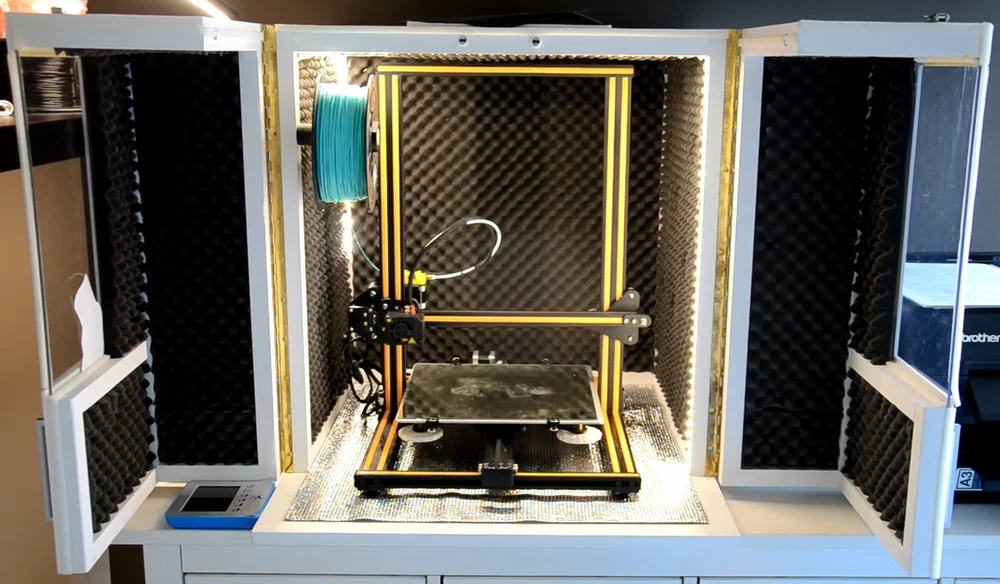
A fashionable option aimed mainly at noise reduction, this 3D printer enclosure was designed for a Creality CR-10, which is a rather large 3D printer, so if you have anything smaller than that, it should fit just fine.
The materials are very accessible, as it’s mainly MDF, isolation foam, and reflective foil. As you may gather from these materials, it isolates noise and evens temperature. The result is a professional-looking enclosure with doors designed for easy access. The only downside may be the amount of space required to fit the enclosure, especially taking into account the size when the doors are open.
- Cost: ~$200
- Complexity: Intermediate
- Core components: MDF, isolation foam, reflective foil, hinges
- Who designed it? Spare Time Shop
- Where to find it? YouTube, Instructables
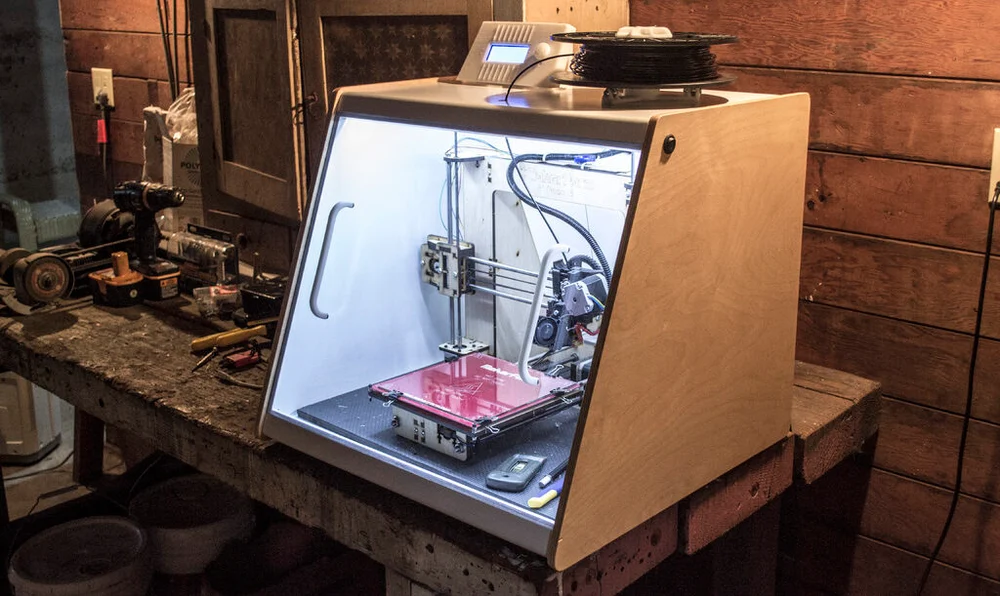
Full Visibility
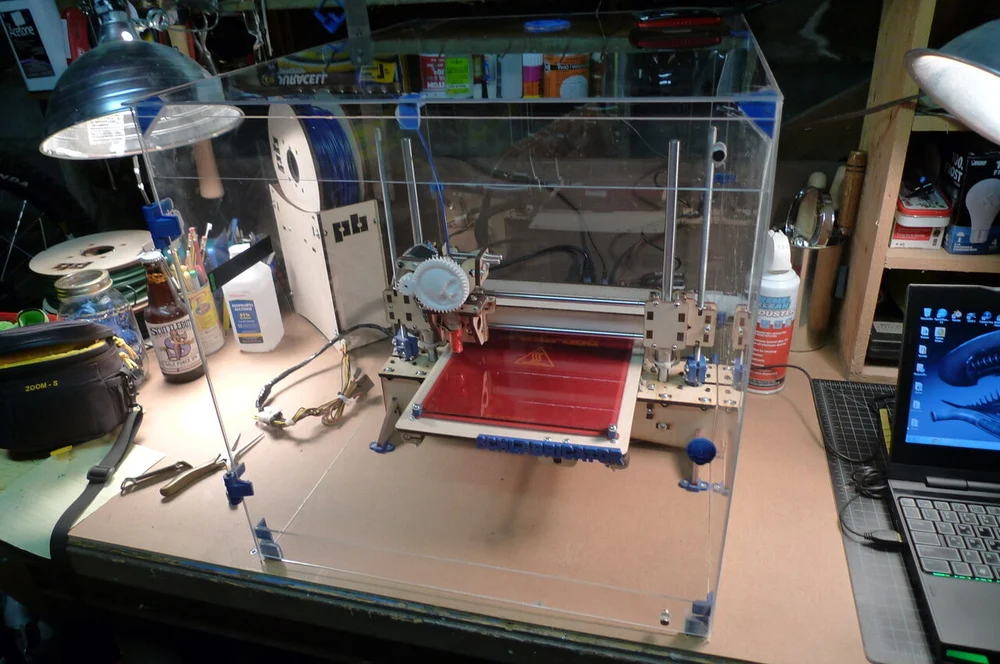
With this enclosure, your machine is protected from outside particles while ensuring maximum visibility. It’s easily customizable for any printer size as it only needs plexiglass, some 3D printed hinges, and some screws. Additionally, you may need some workshop tools like a saw or a CNC machine.
This design mostly provides protection from dust. It doesn’t include a ventilation or temperature tracking system, so it’s important to take that into account as, for example, working with ABS would require an additional hole with a fan to eliminate the toxins from the printing process. However, if your main aim is to keep the printer away from the hands of your kid or your cat, this enclosure will get the job done.
- Cost: ~$120
- Complexity: Intermediate
- Core components: Plexiglass, 3D printed parts
- Who designed it? schlem
- Where to find it? Instructables
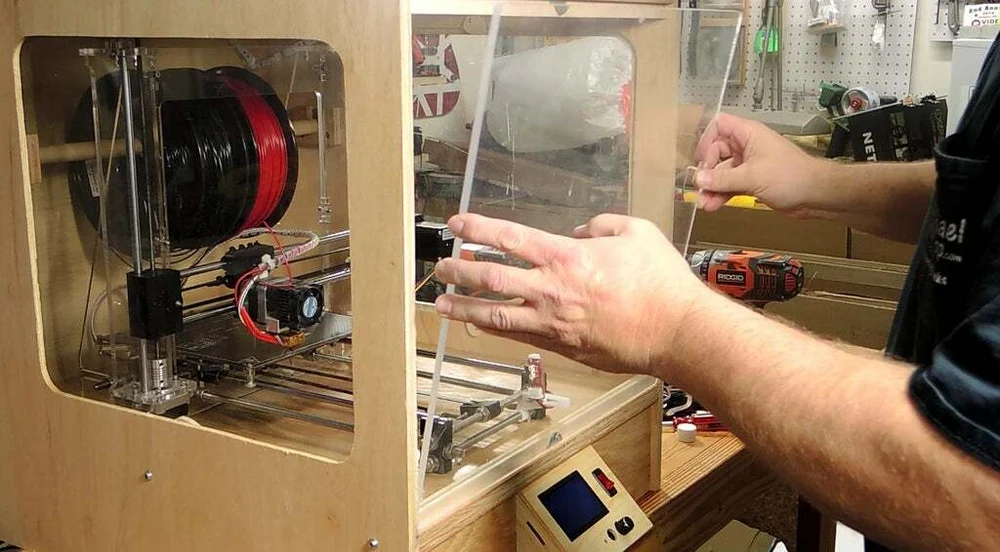
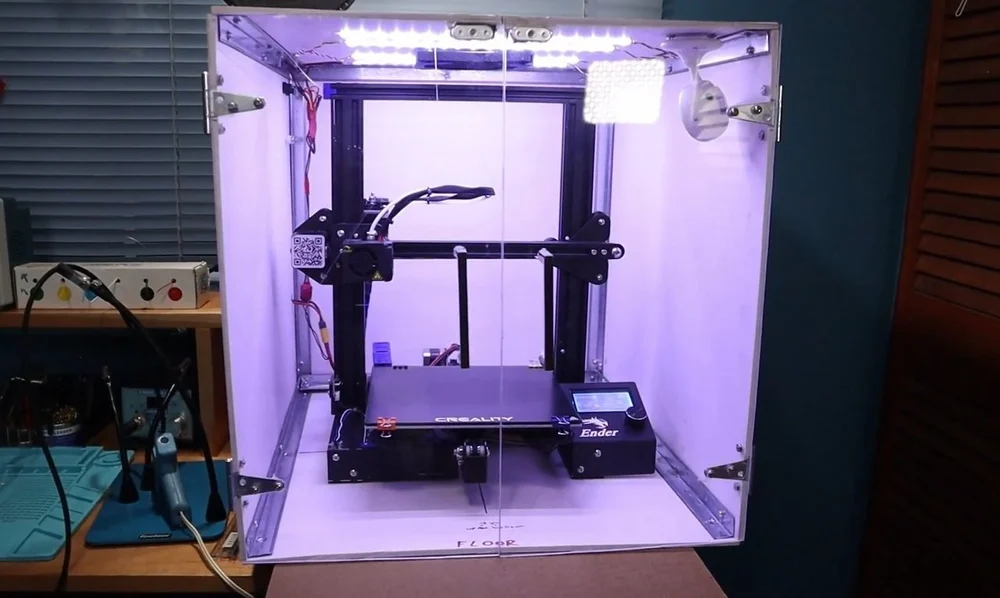
LED Lighting
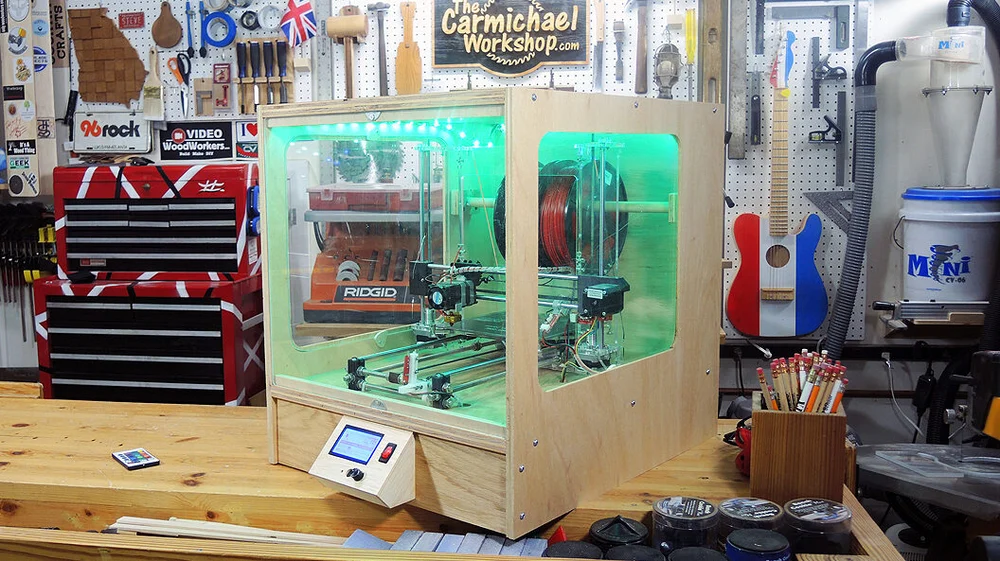
This is an inexpensive option that makes your printer look like a gaming PC. The option includes a slot for the display, so you can disassemble it from the actual machine and place it on the exterior, making it possible to interact with the machine without needing to open the enclosure.
LEDs are useful for lighting to get good time-lapses or pictures, and they make the machine look cool regardless of practicality.
- Cost: ~$100
- Complexity: Advanced
- Core components: Plywood, LEDs, plexiglass
- Who made it? TheCarmichaelWorkshop
- Where to get it? Instructables
MDF
The main purpose of this boxy option is to keep the temperature regular inside the enclosure space and to avoid odors. The design is very easy to make as it requires only MDF, a door panel, and some 3D printing, and it costs less than $50, including screws and nuts.
The model has seven successful Makes in Thingiverse. The only file provided is an STL, which, even though it doesn’t provide much information, is enough to export each view as DXF and cut it with a CNC machine.
- Cost: ~$50
- Complexity: Intermediate
- Core components: 3/4″ MDF board, door panel, 3D printed parts
- Who designed it? moczys
- Where to find it? Thingiverse
DIY HotBox
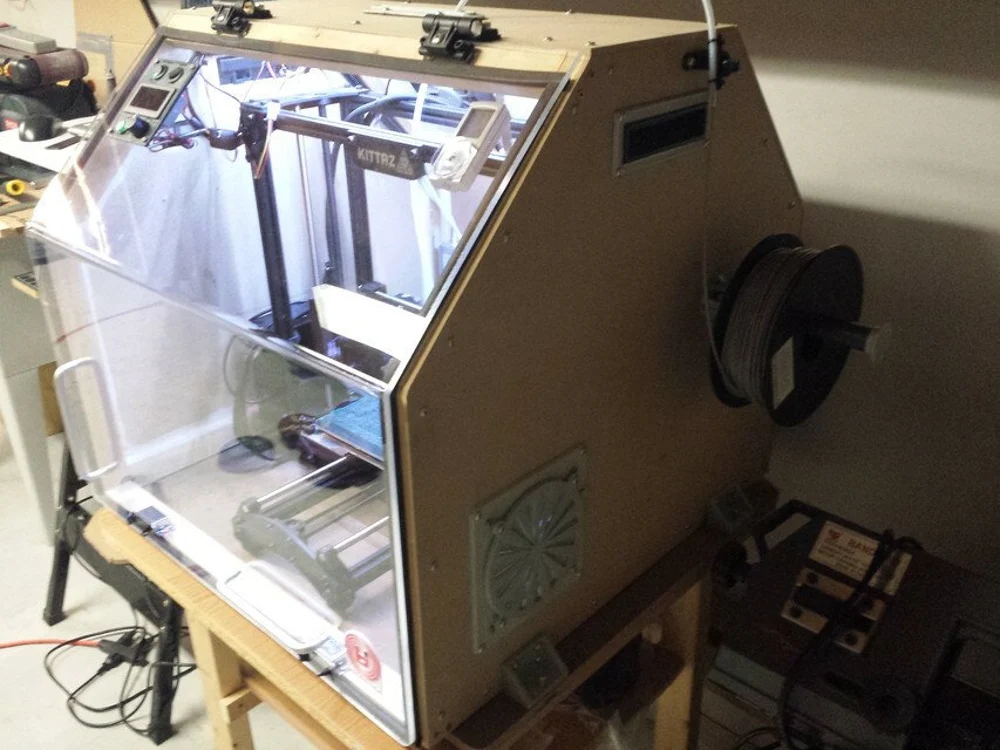
Although the design may look a little complex, the results are worth it, and the creator has included a full and detailed construction manual for a road to success. The main materials needed are, as in most cases, MDF boards, plexiglass, and a few electronic components. It includes a door to easily open and interact with the 3D printer, and it’s suitable to print many materials like ABS or nylon.
Beyond protecting the machine with an enclosure, the design includes a ventilation system and temperature tracking sensors and display, all of which are also fully explained in the instructions. If you’re up for a more sophisticated and challenging system, this one could be a great choice.
- Cost: ~$200
- Complexity: Advanced
- Core components: MDF, plexiglass, fan, electronic components
- Who designed it? Jonathan Brazeau
- Where to find it? GrabCAD