3D print layer separation is one of the most frustrating 3D printing issues. Learn how to get rid of layer delamination in just 5 easy steps!

What is Layer Delamination?
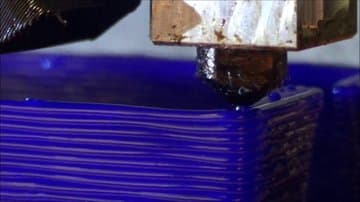
Layer delamination occurs when the layers of a 3D print separate or don’t completely stick together. This results in ugly cracks that may seem like a pain to get rid of. Actually, it isn’t that difficult. With a few tweaks in your slicer and maybe a few on your actual printer, you will be bidding farewell to ugly prints.
Let’s dive into some easy tips and tricks to eliminate 3D print layer separation.
Increase Hot-End Temperature

The first (and perhaps most obvious) solution to layer separation is to increase your printer’s hot-end temperature. Layers stick together by being fused with heat. If the heat of the extruding material is too cool, it will not be able to adhere to the previous layer. Rather, the cooling fan causes the material to set too fast, resulting in delamination between layers.
Start with your normal print temperature and increase it in 5-°C increments until you see some improvement. Read The Best Printer Temperature for Different Filaments to find the best temperature for your printer.
Note: If you start to see some blobbing or over-extrusion in your prints, bring the temperature back down and move on to the next fix.
Adjust Print Cooling

Having read the previous section, you probably anticipated this one. If you’re experiencing layer separation and adjusting the print temperature isn’t making much of a difference, the problem might be with your print cooling fan.
First, check that the print cooling fan is aimed at the printing model. If so, try decreasing your fan speed in 10% increments. You will probably see a significant decrease in cracks in your prints.
Increase Flow Rate
This fix is a sort of piggyback off of the first. When you increase your printer’s flow rate (or extrusion multiplier), more molten filament will come out of the nozzle. This will result in a stronger bond between layers.
Start with your normal extrusion rate, and increase it in 5% increments.
If you start to see print issues caused by over extrusion, bring the flow rate back down a bit. You don’t want to cause a problem by fixing another. Check out Extruder Calibration – Easy Steps to fine-tune your extruder settings.
Slow Print Speed
3D print layer separation can be caused by high print speeds. If the print head is moving too fast, the extruding plastic will not have time to successfully bond to the previous layer. If the previous fixes did not improve your prints, try slowing your print speed in 10mm/sec increments.
Printing speed can affect various printing issues, maybe you can kill two birds with one stone!
Use a Wider Nozzle
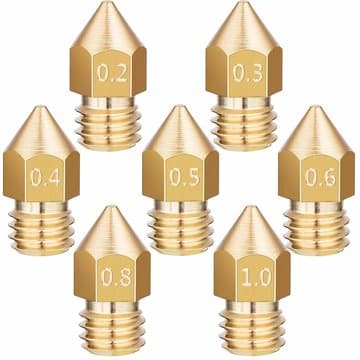
If all else fails, try using a wider nozzle. This will allow you to print with a thicker line width, which should result in better layer adhesion. If you normally print with a 0.4-mm nozzle, try using a 0.5-mm one and see if it makes a difference.
Keep in mind though, if you are using a wider nozzle, you will also have to increase print temperature and flow rate. With a bit of tweaking, you will be on your way to 3D printing beautiful models.
Read 3D Printer Nozzle Size & Material – What to Know & Which to Buy for a comprehensive guide on how to get the right nozzle for your needs.