Modeling for 3D printing can seem like a skill that only a few can accomplish, but it’s a lot simpler than you think. It’s not too difficult to learn the basics of 3D modeling so you can design your 3D prints from scratch and create them.
So, strap in, and let’s get you started on your creative journey.
How Do You Design Something For 3D Printing?
The first and most important part of 3D printing is the design phase. Any good 3D printed model starts from a sound design plan.
To design something for 3D printing, choose your ideal design application such as Fusion 360 or TinkerCAD, create your initial model sketch, or import shapes to modify and edit into a model.
Nowadays, many online repositories are offering ready-made 3D models for you to download and print. That might seem like a godsend for beginners to save them time, but sometimes, this will not be enough.
For example, let’s say you need 3D printed replacement parts for custom objects like mouth guards, you cannot find the 3D model in an online repository.
You have to design the 3D model yourself and print it. Luckily, the design process is fairly easy. You can learn how to make a model for DIY 3D printed parts in a short time with the right tutorial, and with some practice.
Let’s go through how we can prepare a model for 3D printing using the design steps on a beginner-friendly application like TinkerCAD.
Step 1: Visualize your design
Before you start modeling make sure you have a sketch, drawing, or figure of what you want to do. You can even import your sketches or drawings into the 3D modeling application to serve as a starting point.
Step 2: Create the 3D model’s outline using blocking
Blocking involves building up the 3D models using basic shapes. You can use shapes like cubes, spheres, triangles to form the rough shape of the 3D model.
Step 3: Add the details of the 3D model
After you’ve created the basic outline using blocking, you can now add the details. These include things like holes, chamfers, threads, color, texture, etc.
Step 4: Get the Model ready for 3D printing
After you’ve finished modeling and you’ve saved the project, you have to get it ready for printing. Getting the model ready involves adding rafts, supports, dividing the model into separate parts, and slicing. All this can be done in slicing applications like Cura.
Creating 3D models is very easy now. Before, 3D modeling was primarily a profession for specialists using large amounts of computing power. Not anymore.
Now, a wide variety of applications are available on virtually almost every technological platform. There are even apps on common handheld platforms like androids and iPads capable of making printable 3D models.
Now, let me show you how to choose the 3D modeling application that is right for you.
What Modeling Software Should I Use for 3D Printing?
Now that you know what goes into making a 3D model, let’s talk about the main tool you need to bring it alive, the modeling software.
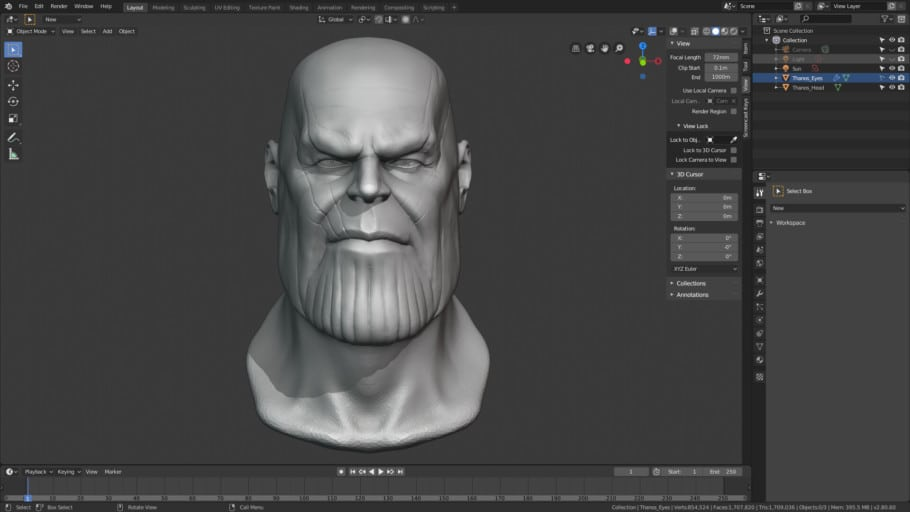
For people with a low skill level or for students, I would choose TinkerCAD. People that have more complex requirements should use Fusion 360 to model 3D prints. Modeling sculptures are best done in the Blender application since you have more control over the design and surfaces
The applications above are just a few out of many available on the market for creating beautiful 3D models. These applications range from low-end applications for teaching to more advanced applications for creating detailed 3D models.
To maximize your 3D modeling experience, it’s best to choose the one that works for you. Here’s how.
How to Select A 3D Modelling Software?
Before you choose a modeling application, to begin with, you first have to consider a few factors. Let me take you through some of them;
- Skill Level: Skill Level is an important thing to consider when choosing a modeling application. While modeling applications have gotten simpler, some of the high-end ones out there still require quite a bit of computer know-how to use.
So, be sure to choose one well-tailored to your skill set.
- Modeling Purpose: 3D modeling is quite popular in many fields such as education, engineering, and even art and design. All these fields have modeling applications available for them with specific built-in capabilities.
To get the best out of your work or modeling experience, it’s best to learn with a modeling application popular in your field.
Coming from the same publishers that built the industry mainstay, SolidWorks, this app places focus on the entire creative journey. It doesn’t just dwell on 3D modeling alone. Rather, it provides several apps that guide users from the idea conception stage to the final printing process.
For those wondering if this might be a lot to take in, don’t worry. Dassault provides a variety of videos and a learning curriculum to help maximize the app’s utility.
It is a cloud-based application, which means it is available on just about any PC with an internet connection. iPadOS users are also not left out as there is support for it on the iPad Pro.
SolidWorks apps are also free and provide a pretty comprehensive lesson plan which makes it ideal for kids and beginners.
SketchUp
Price: Free trial version available, Pro: Plans from $55 to $699 || Operating System: Windows, Apple OS, Chromium || Difficulty: Intermediate
All the applications we’ve looked at up till now are great for learning and beginners. However, they lack certain features required to create advanced 3D models. SketchUp provides these features in a simple, easy-to-use package.
SketchUp is one of the most popular 3D modeling software on the market. Its main selling point is its intuitive, easy-to-use interface. Users can easily visualize, create and upload 3D models easily using multiple tools and preset models.
As a result, professionals from plenty of fields use this software to create models ranging from buildings to car parts. It is also capable of creating 2D drawings for things like engineering plans.
Another great perk of SketchUp is its great online community. You can get started with the software, thanks to the tutorials available. If you get stuck, you can also ask questions on a variety of user forums.
To quickly get started with the software, you can go through this helpful video.
SketchUp comes with a cloud-based, web browser version for free. Users can create and upload their designs to the cloud repository called Sketchup Warehouse.
As a result, using Sculptura, users can create highly photorealistic models. It also provides a clean, intuitive interface for artists to create with. This can be refreshing compared to other modeling software that tends to be somewhat clunky and code-oriented.
Even better, with tools like Apple Pencil and Sculptura’s voxel engines, users can create models as easily as putting pen to paper.
In case you want to take your creations to a more powerful platform, it is also available on the Apple Mac for the same price.
Sculptura costs $9.99 on the Apple app store.
Tips for Designing 3D Printed Models & Parts
Okay, I’ve given you some tools to help you on your creative journey, now it’s time to end this article with some sage advice. Seriously though, 3D modeling for 3D printing is a different beast, and using some of these tips, you can conquer and master it.
So, here are the tips:
Invest in A Good Device: Although processing power requirements have decreased over the years, for the best results, you still need decent hardware for 3D modeling. For the best quality models, be sure to use a PC or iPad with a great graphics processor.
Buy Good Support Hardware: Support hardware like the Apple Pencil and a graphics tablet can make a world of difference. Getting them can help overcome the limitations posed by keyboards, mice, etc.
Divide Large Models into Multiple Parts: Most desktop 3D printers do not have the build space to handle large volume prints. It’s best to design and print them separately then assemble them. You can also design press-fit or snap-fit connections to make this easier.
Minimize the Use of Sharp Corners: Sharp corners can cause warping in the final print, especially if you use an FDM printer. So, it’s best to replace them with rounded corners to reduce the probability of warping occurring.
Avoid Overhangs and Thin Walls: If you are okay with using supports, overhangs aren’t a problem. Just make sure you keep the angle smaller than 45⁰. Also, depending on your printer, thin walls or features can cause problems, so be sure to keep wall thicknesses to above 0.8mm.
Know Your Printer and Material: There are many printing technologies and materials out there. They all have different advantages and disadvantages, so before designing any part for printing you should be aware of all this.
Well, that’s all I have to offer you for now. I hope I’ve inspired you to pick up a 3D modeling course and start creating your models.
As usual, good luck on your creative journey.